How to file your nails for guitar
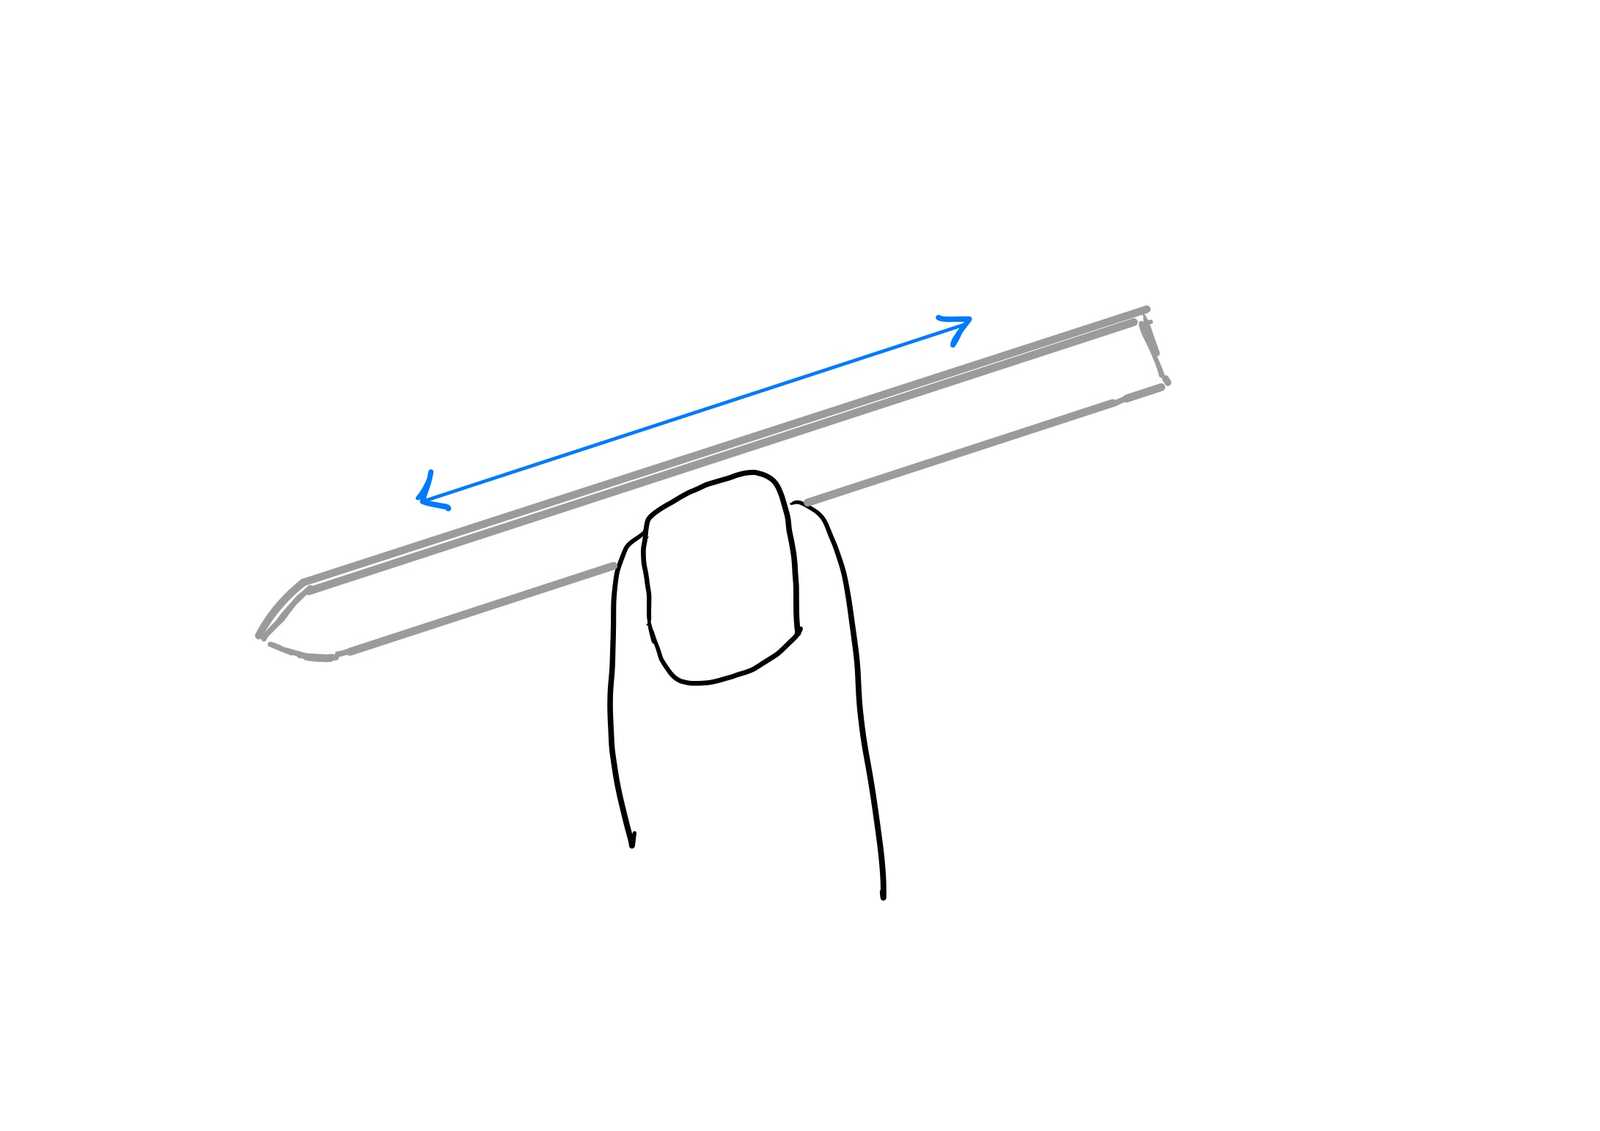
When students want to learn the classical or fingerstyle guitar, they need to know how to shape their nails. Many of my students ask me for resources on this topic that they can use at home after their guitar lessons, so I’ve created this guide.
But why create this guide when there are so many other resources on the internet?
Most other resources and books overlook the most fundamental characteristic of nail shape which is the playing surface and the angle it creates to the string. Instead they show you secondary characteristics, which is the shape of the nail if you were looking at it from the top. That’s not to say they don’t have the right idea, but it is more difficult to understand than it should be. Here, we’ll help you to get a better sound by getting you to look at what really matters when shaping your nails.
In this article, I’ll show you:
- How to file your nails in a way that works for all guitar players.
- How to look at your nail shape in a way that is simple to understand.
- How to produce a uniform sound across all of your fingers, including the thumb.
This is not the only method to file your nails
The filing method that I’ll show you is not the only way to do it, but if you have a good right hand position and technique, this method will always work. If you just want to know how to file your nails without the explanation, skip ahead to here.
Goals of Filing Your Nails
Why should you use nails when playing the classical or fingerstyle guitar? The simple answer is that using nails will enable you to get the best sound from your instrument.
The principle for producing a better sound with your nails on the guitar is simple: the nails should be shaped so that the guitar string vibrates in and out from the guitar face, not parallel along the face.
A guitar pick does the same thing when you hold it properly—see how here.
How the nail shape gets the best sound
For a string to produce the best sound, it needs to vibrate in and out of the guitar. In other words, the guitar strings should vibrate in a direction that is perpendicular to the guitar top, not parallel to it.
Try this experiment: Get your guitar. Pull a guitar string in a direction that is parallel to the face of the guitar. Let it go to produce a sound, and notice the sound quality and volume. Then, being careful to use the same amount of force, pull the guitar string out and away from the face of the guitar. Let it go and notice the sound quality and volume.
Did you hear a difference? Of course you did—everyone does! When you pull the string away from the face of the guitar, the sound is both louder and fuller. And when you pull the string parallel to the face of the guitar, the sound is softer and much thinner.
The reason for this difference in sound lies in the physics of how guitars actually produce sound. When a guitar string vibrates perpendicular to the guitar top, this in-and-out movement causes the guitar top to move in and out. This, in turn, causes the top and back to compress and decompress lots of air, making a fuller sound. But when the guitar string vibrates parallel to the top, the top then vibrates more in the same direction, which does not compress and decompress as much air, resulting in a thinner sound.
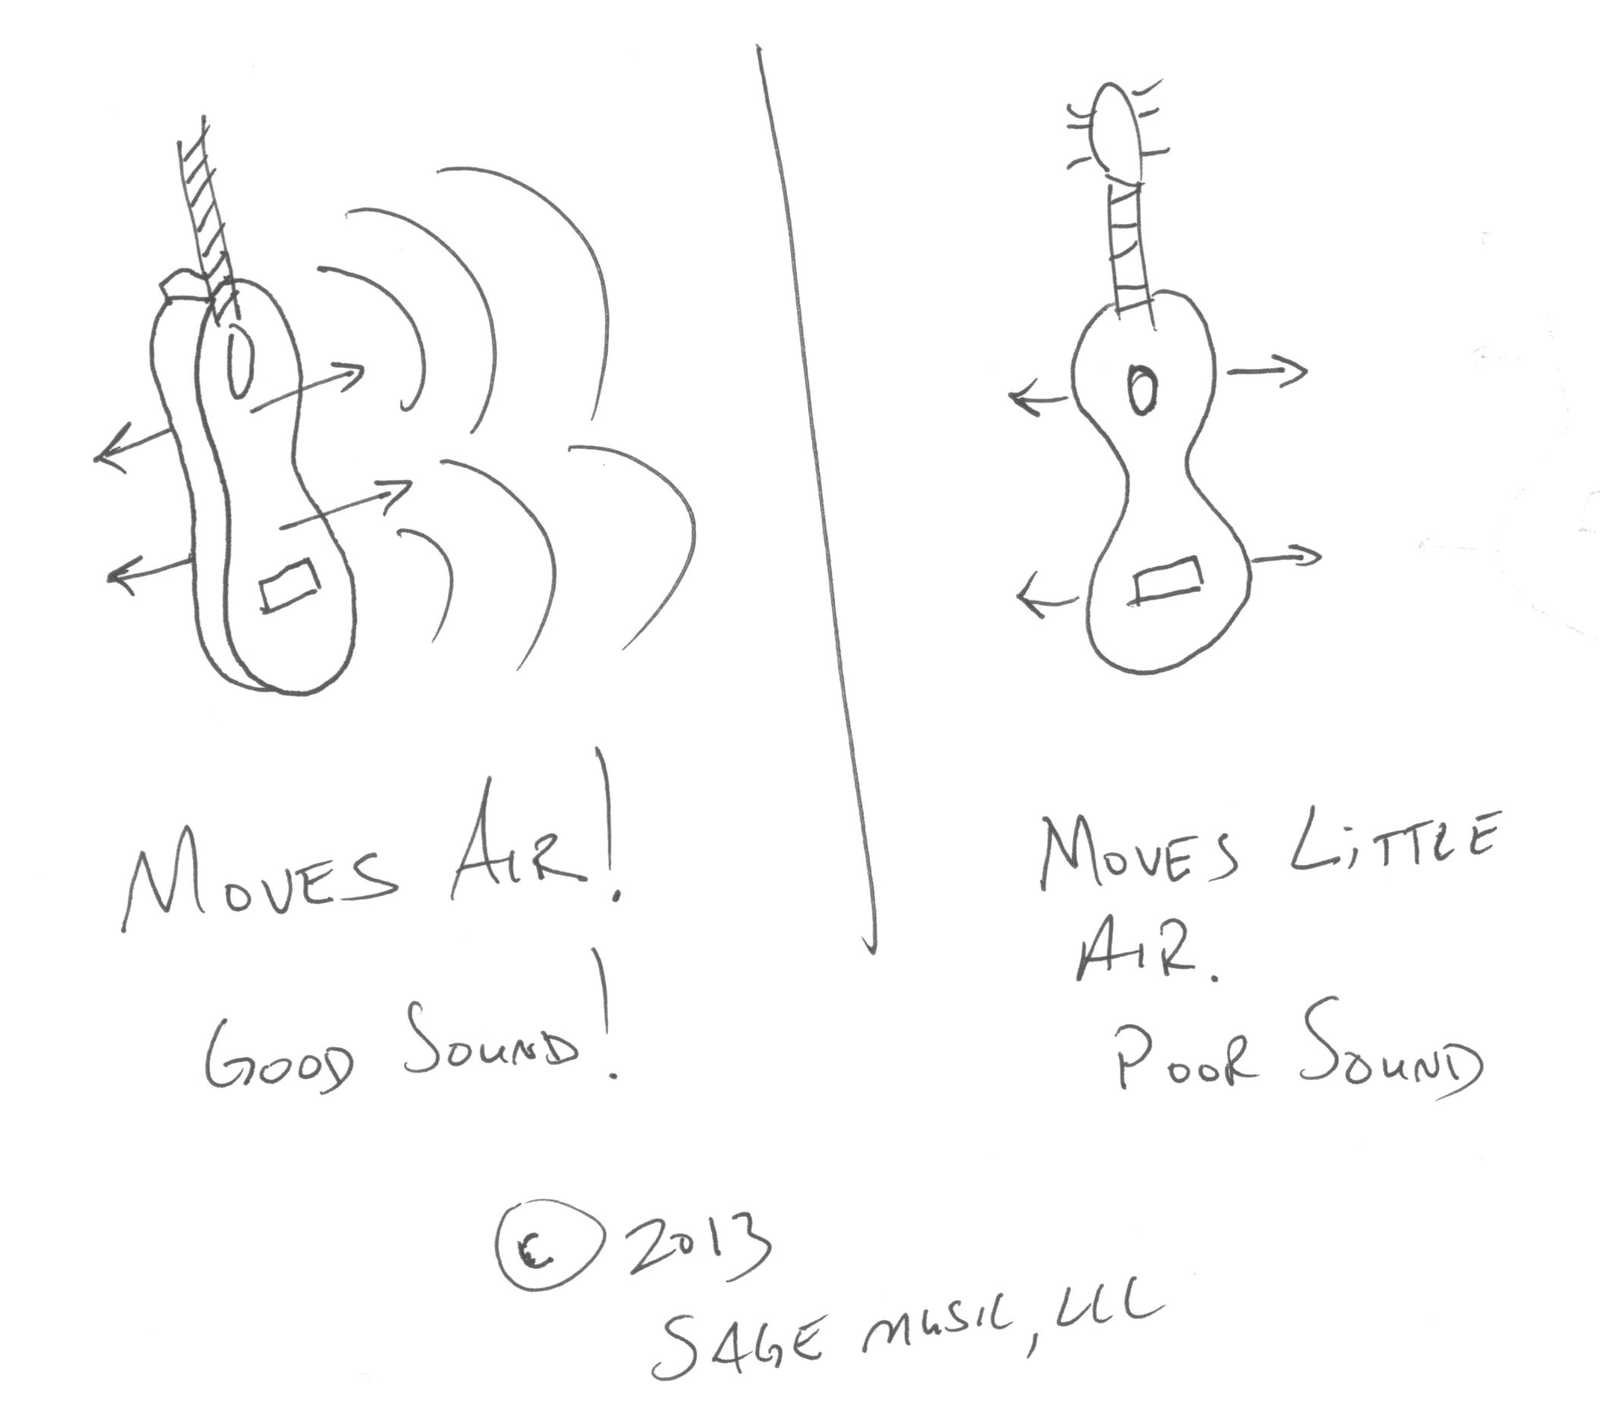
Incidentally, this is why rest strokes often sound better than free strokes. In a rest stroke, you push the string into the face of the guitar, which causes more of that in-and-out vibration, and thus a better, fuller sound.
However, by using the nail shape outlined in this blog post, you can get your free strokes to sound almost as loud and full as your rest strokes. I’ll prove that later.
Look at what counts, the side not the top
You’ve likely seen a lot of different drawings and images about how to shape the nail.
Most people look at the nail shape from the top, like this.
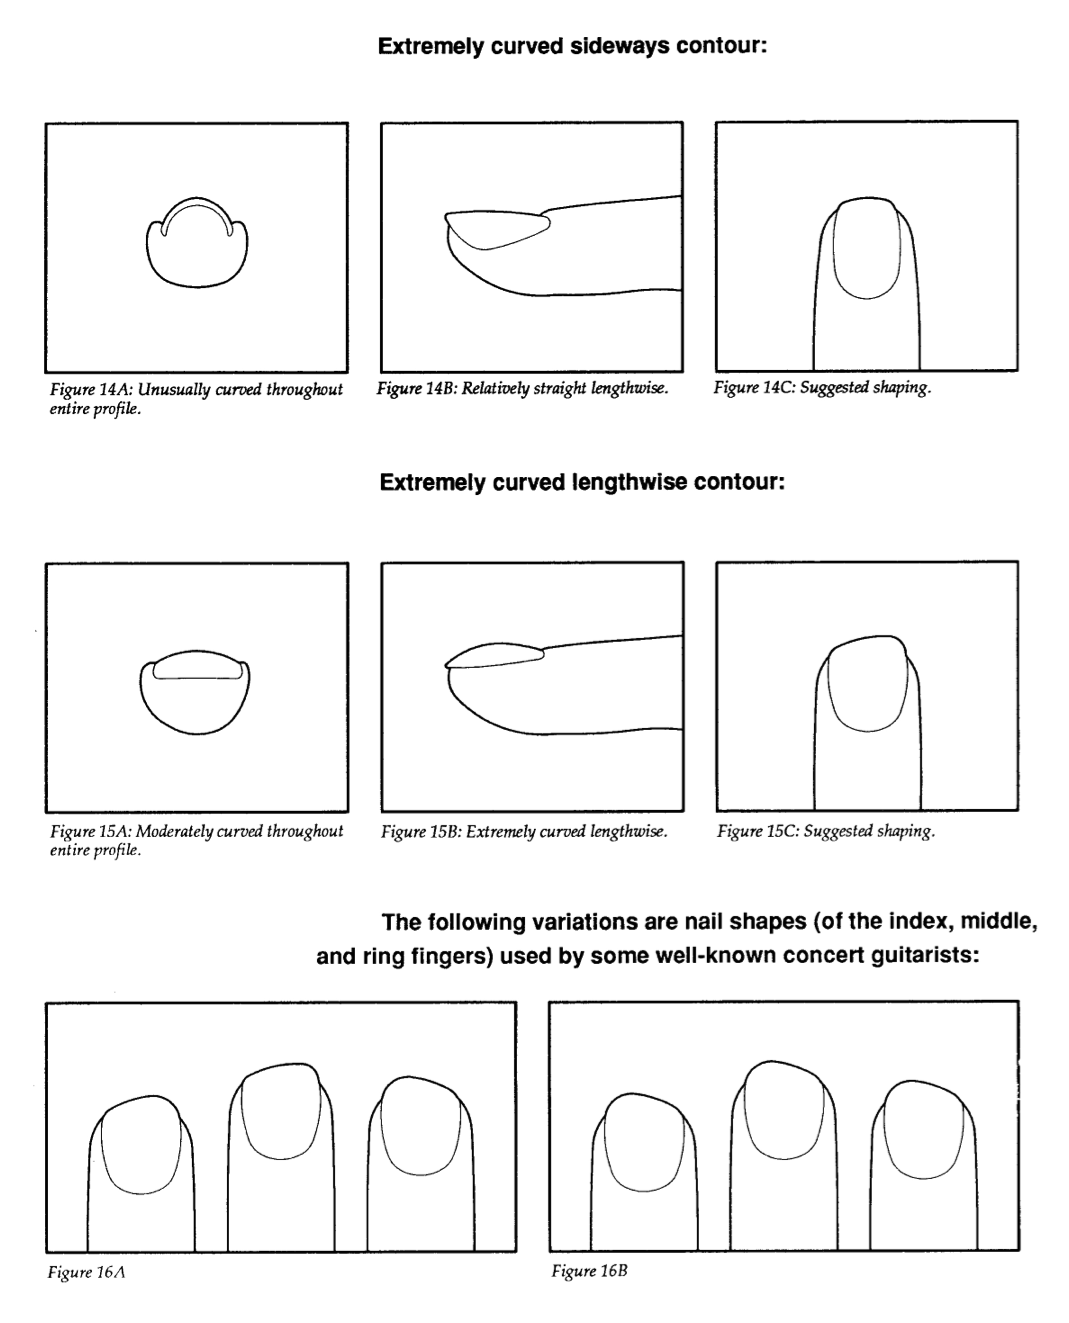
You’ll notice that Shearer writes the “suggested” shape from the top view. He’s asking you to consider your nail shape from the top view. And while these top view shapes may be good, it’s not the best way to view your nail shape.
Looking at the nail shape from the top is misleading, because the curvature of your nail will affect the shape from the top view. Because no two players' nails have the exactly the same curvature, the resulting top view will never be the same, even when the angle of attack to the string is the same.
Both Scott Tennant, in his well know "Pumping Nylon", and the great pedagogue Aaron Shearer, in his "Learning the Classic Guitar", observe this.
However, the topside images they use are only secondary to what you should be looking for.
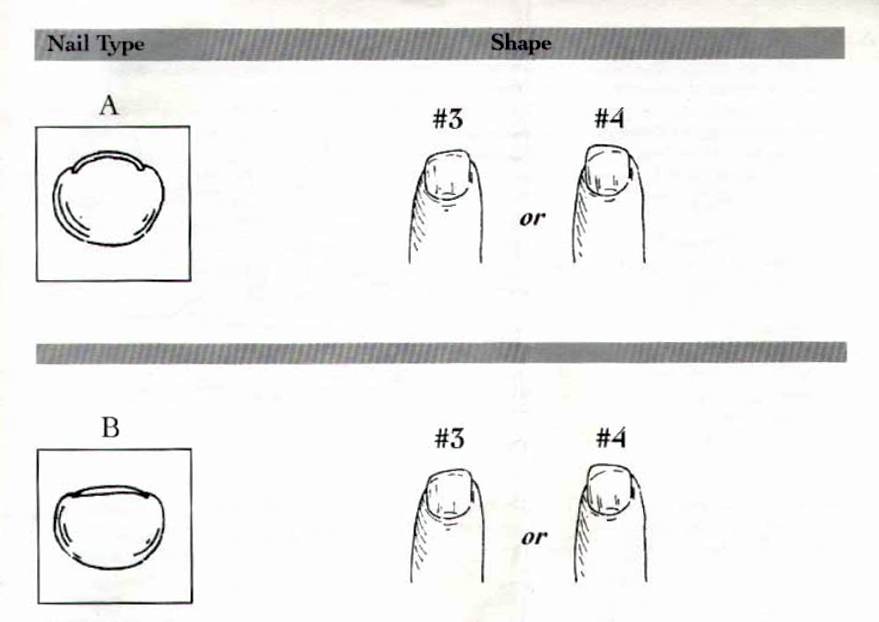
Tennant does a great job of showing that differently curved nails will produce different nail shapes. Although he is still showing you the secondary shape - the top view - not the one that counts, which is the primary playing surface as it moves across the string.
This is how you should look at your nails - Focus on the primary shape, the playing surface
Look at the fingers and thumb as if you are looking down the strings from the nut to the saddle.
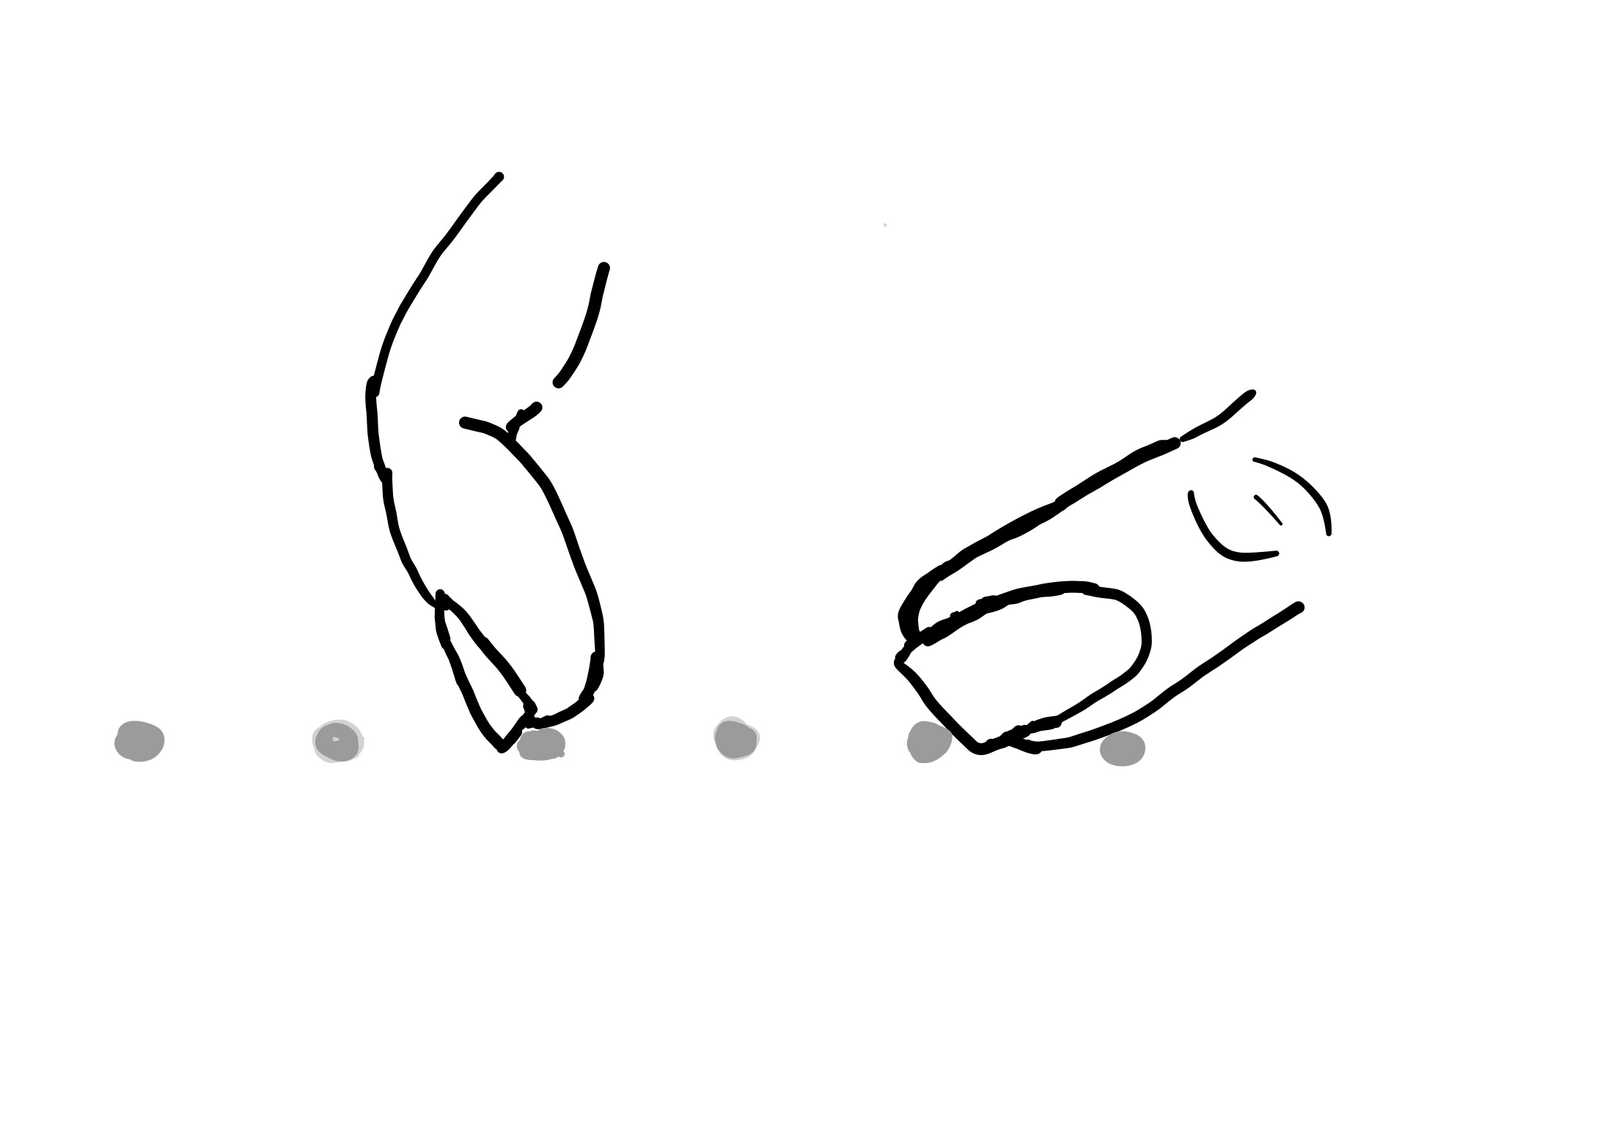
When the nail moves across the string, it creates a ramp which causes the string to move into the face of the guitar. The shape of the nail that you need to be concerned with is this ramp—simply the angle of the nail to the string.
As the finger crosses the string, the string is deflected into the face of the guitar by the “ramp” created from your filed nail shape. When the nail passes through the string, the string gets pushed into the face of the guitar and then releases away from the guitar face, so that the string primarily vibrates in and out of the guitar. This angle is the only angle that you need to be concerned with when filing your nails.
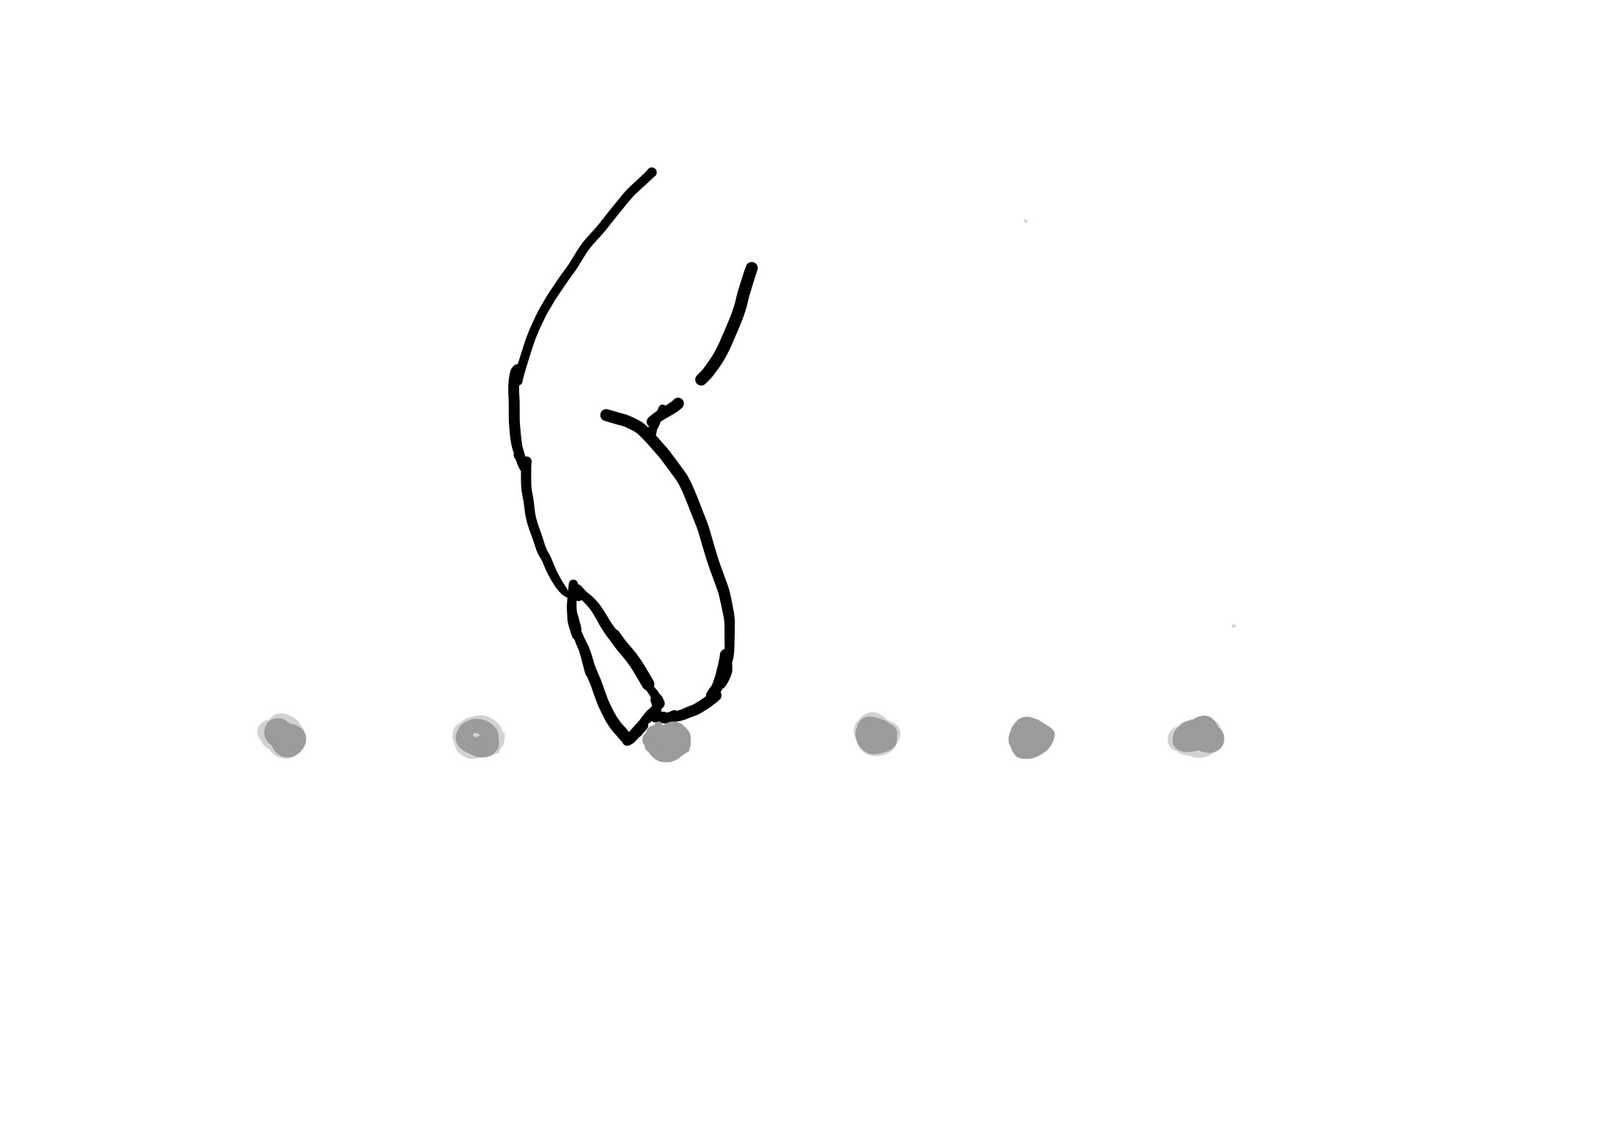
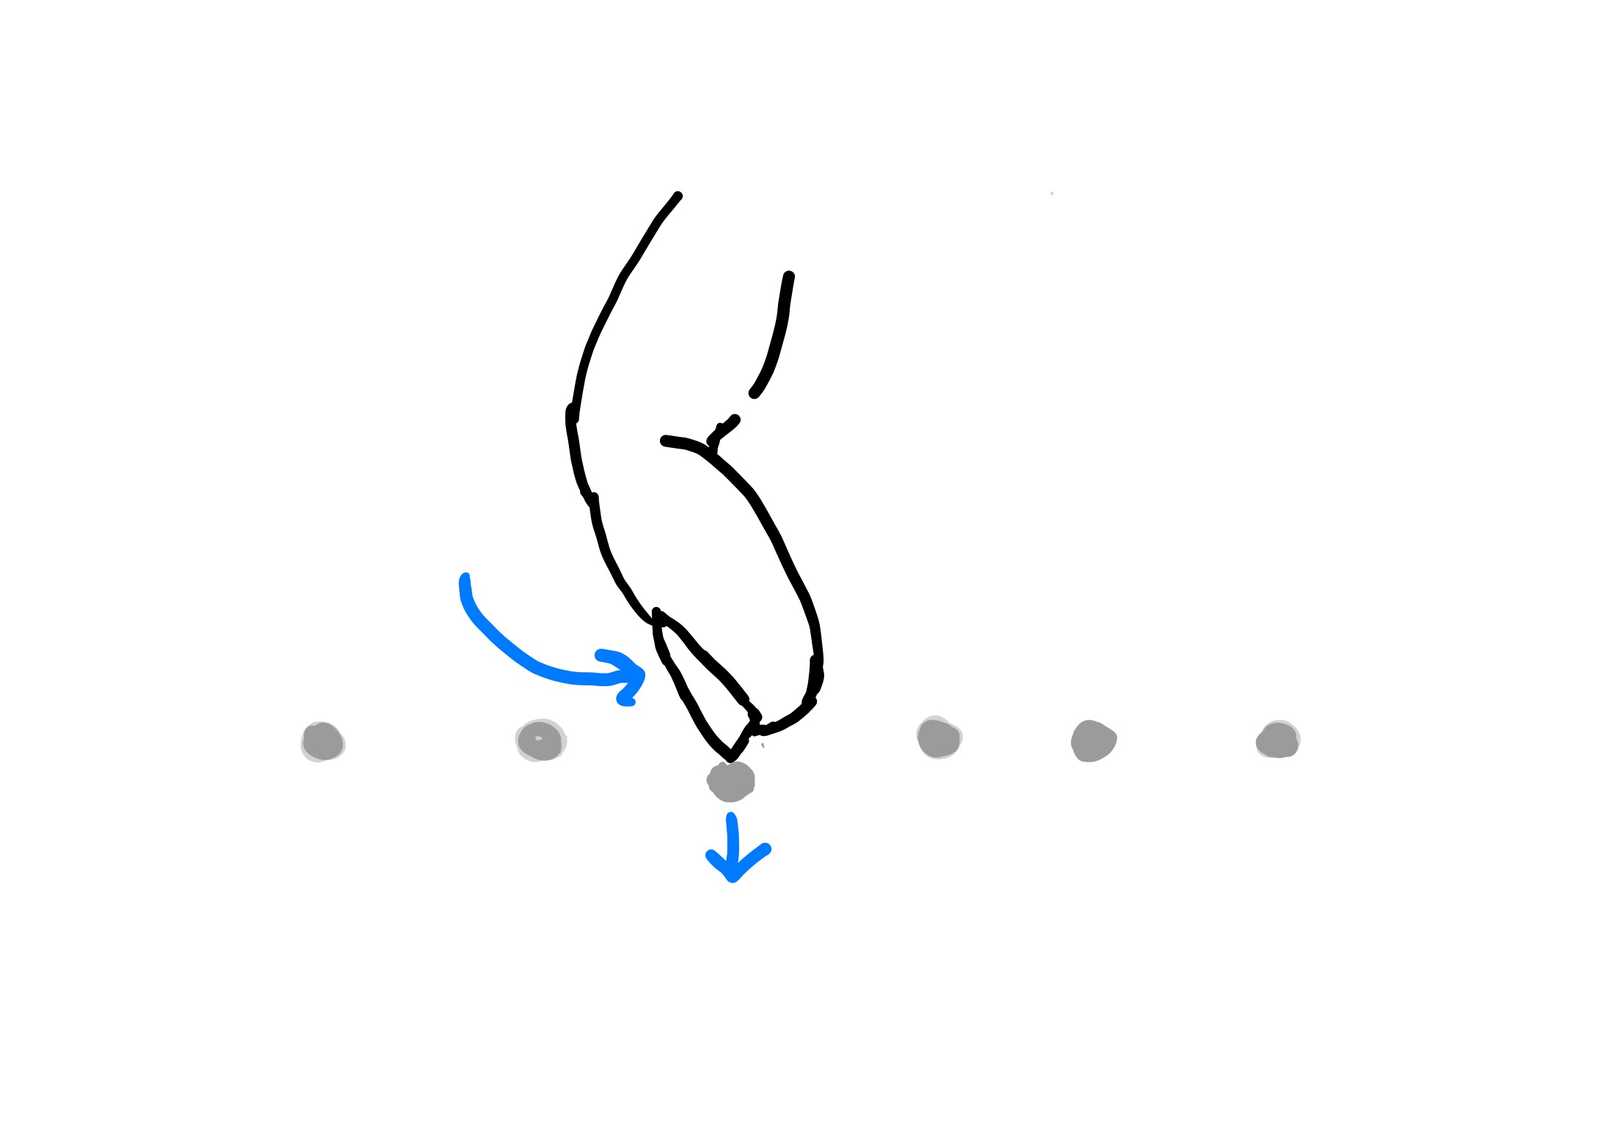
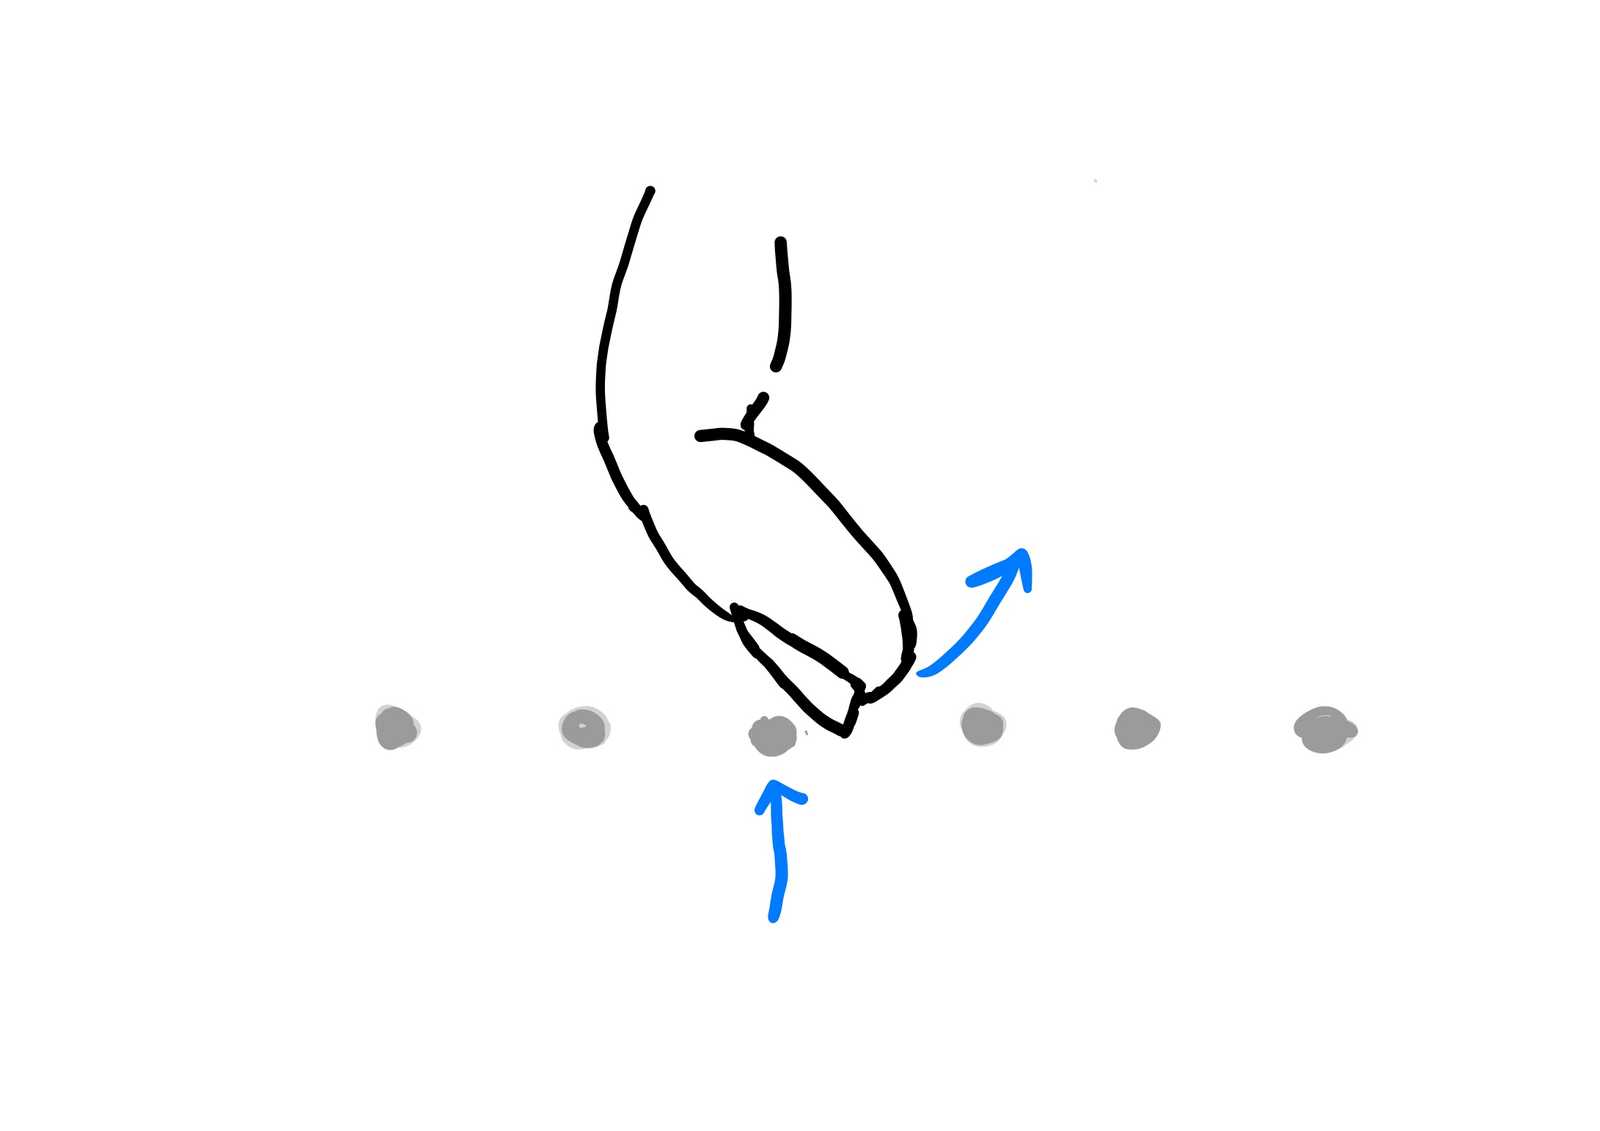
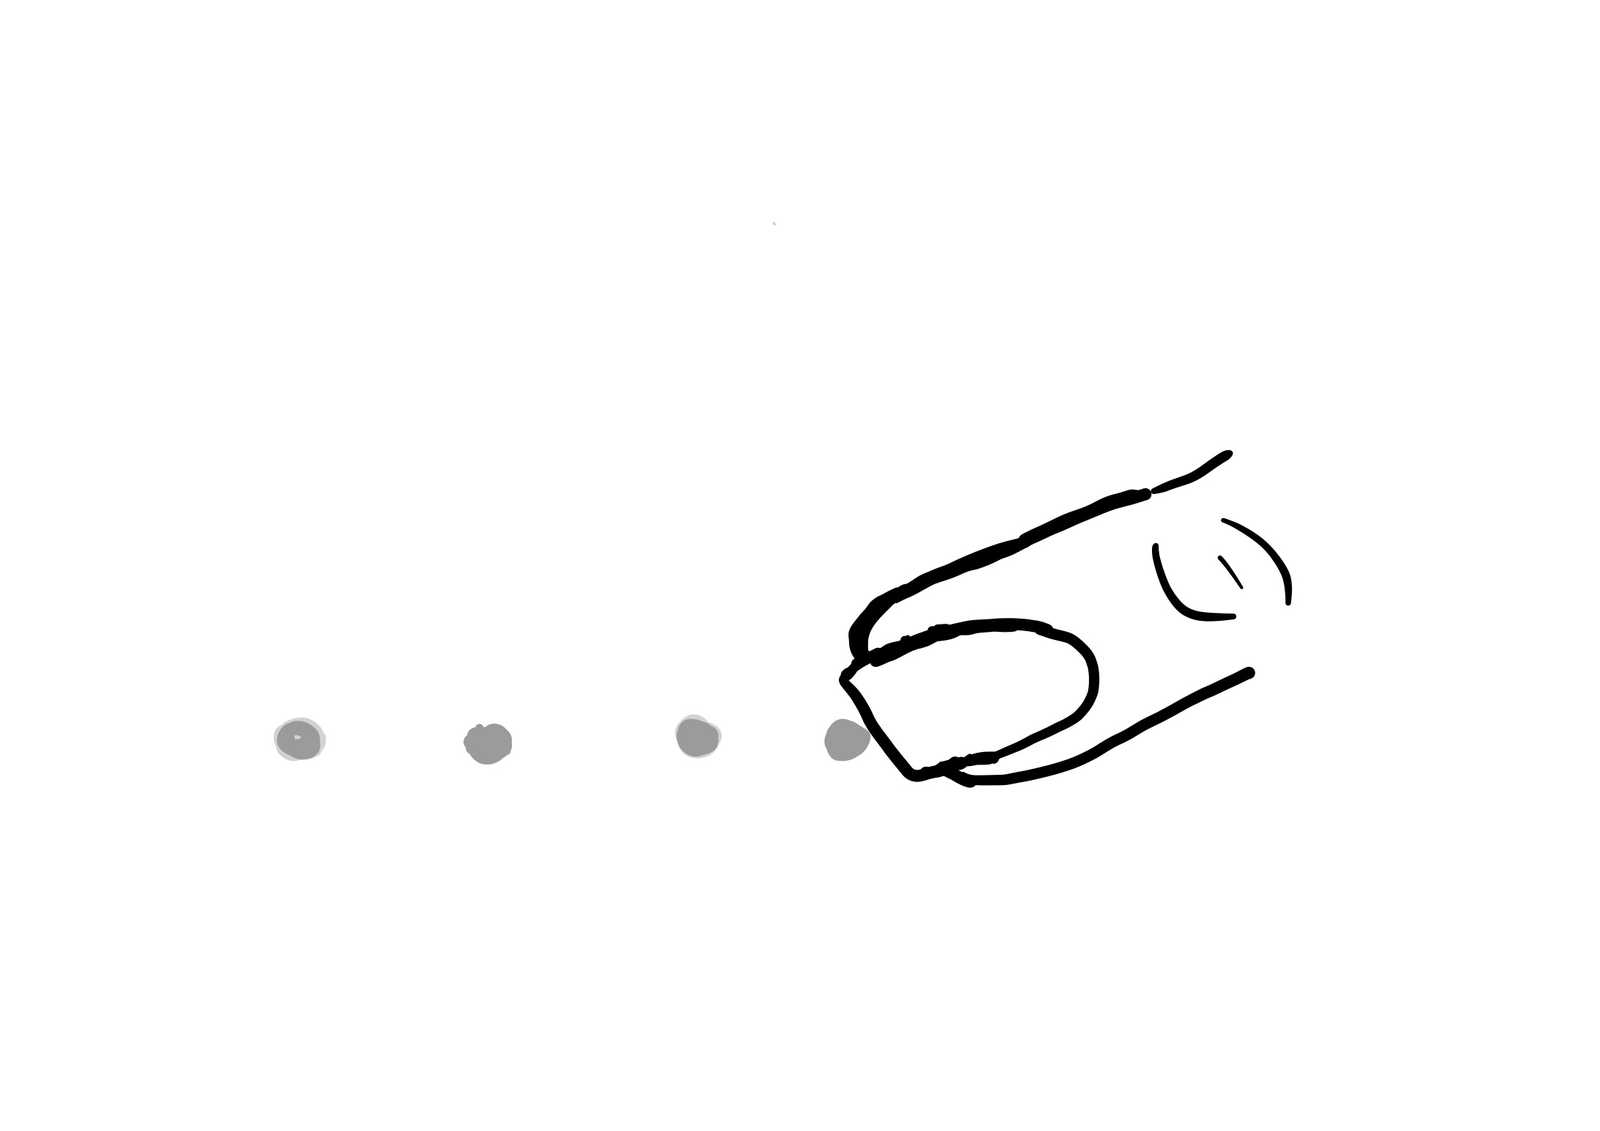
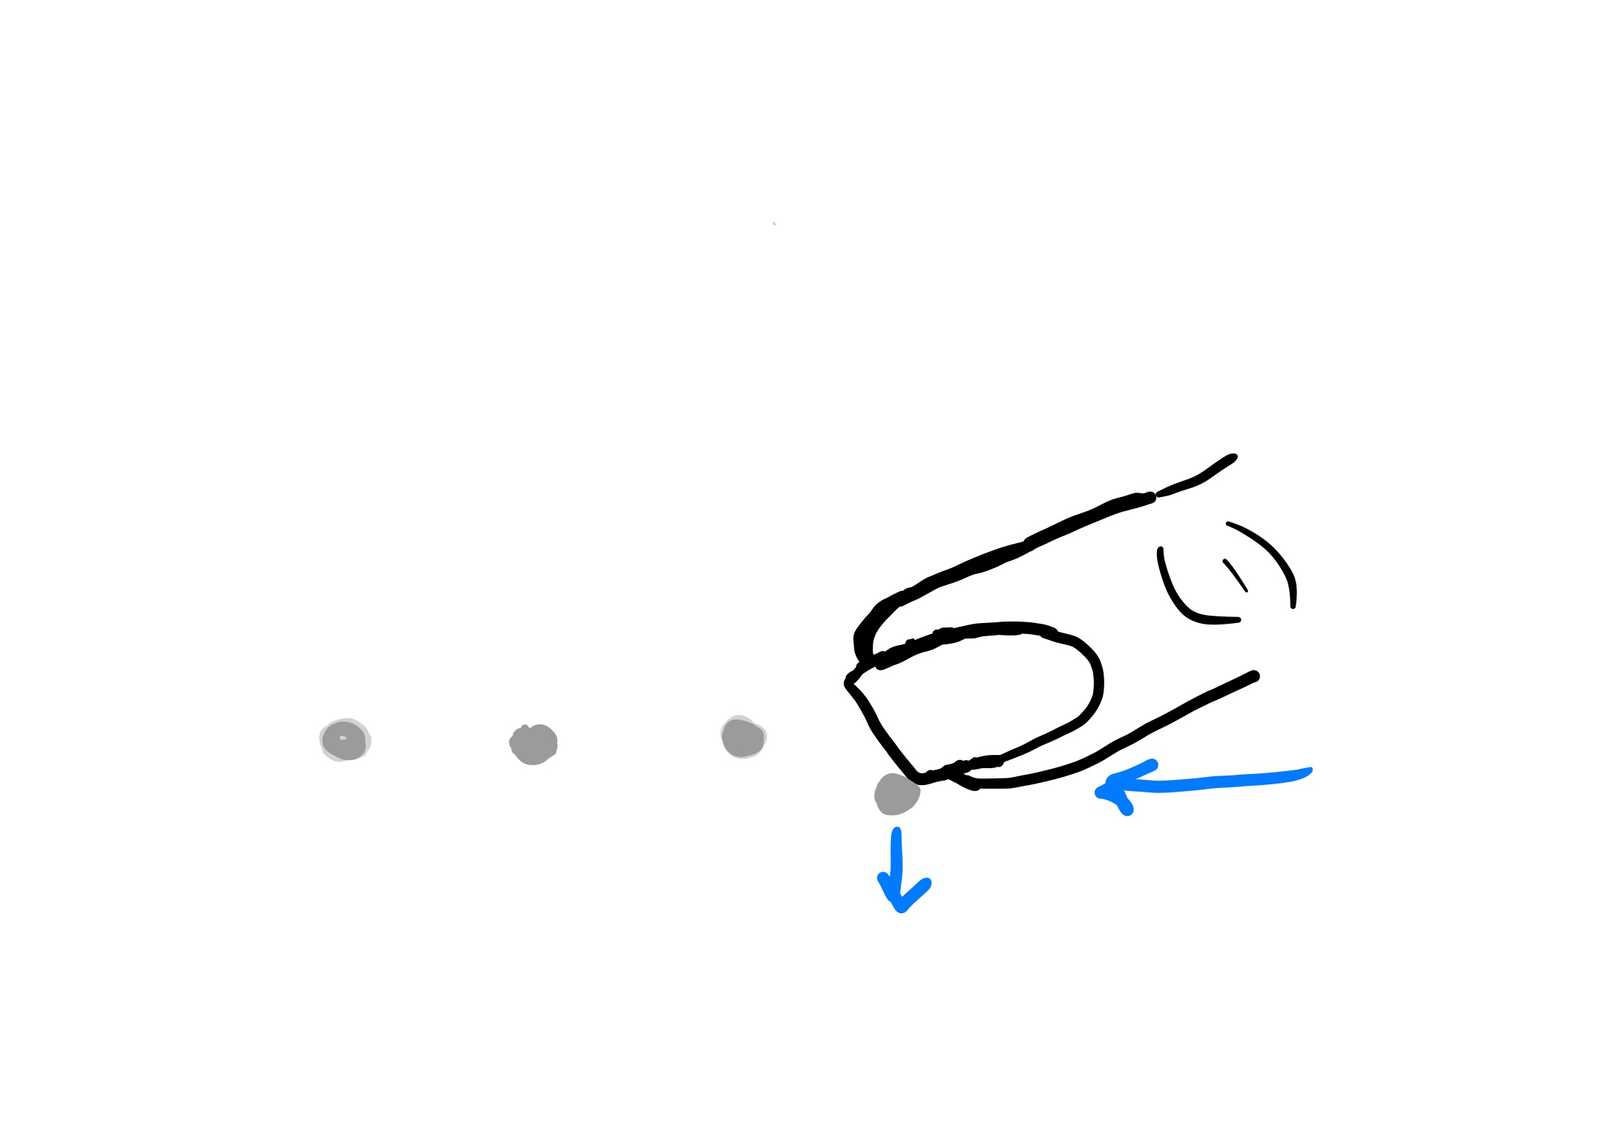
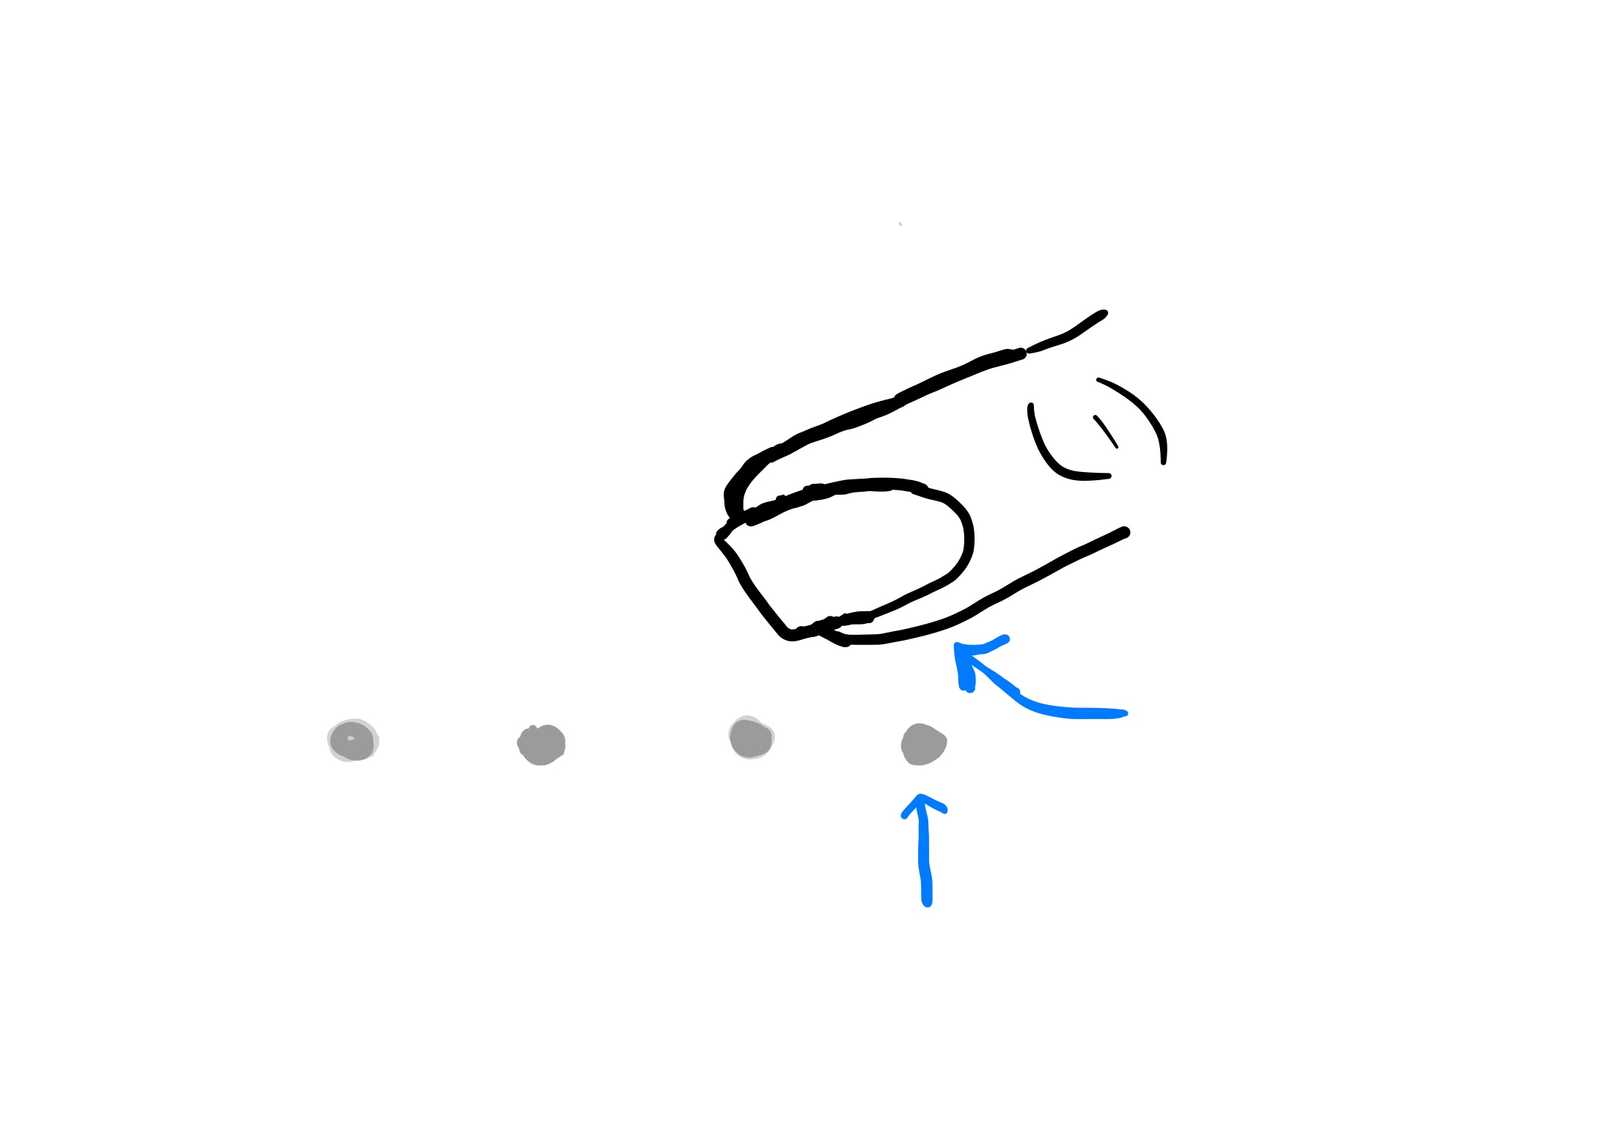
When you look at your fingernails from the side, as they are crossing the string, the angle on each finger should be the same.
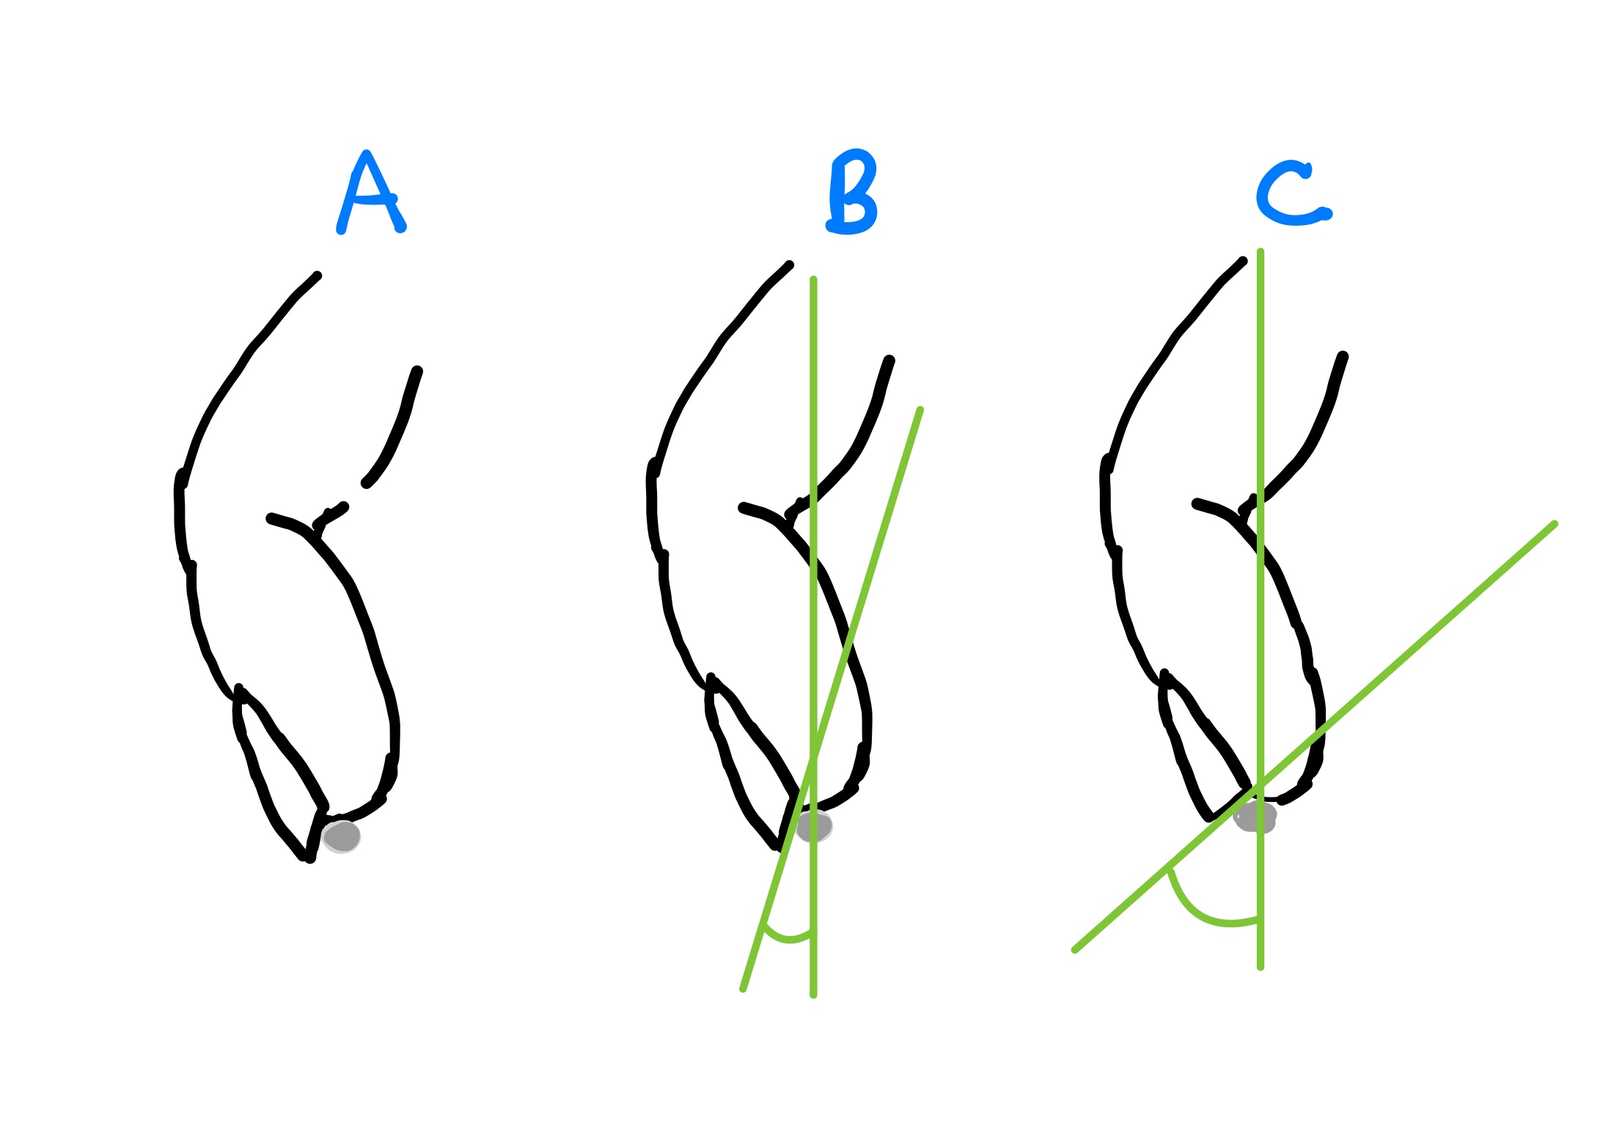
In the example above, fingers A and B have the same angle, and finger C has a flatter angle. As a result, A and B will sound the same, and have a slightly brighter sound, with more resistance. Finger C will have a warmer sound with less resistance.
If the angle is the same, then the sound will be the same. It’s just like playing pool. If you hit the object ball with the cue ball at the same angle, the object ball will consistently move in the same direction.
Below, I’ll show you a simple technique to file each finger with the same ramp angle.
Filing the thumb nail
For your thumb, you simply need the angle to be opposite the fingers, because the attack of the string is in the opposite direction.
Thomas Villoteau gets the closest to understanding this, with his technique of filing nails by using sandpaper on the string. He is essentially getting the nail shape to mimic the path caused by his strokes. Watch his video on filing nails on YouTube.
The goal of filing the thumb is to get the same angle of the nail to the string as the fingers. Except this time you will look at the thumb from the top, because that shows you how the string traverses across the nail. Keep in mind that the thumb joints are rotated roughly 90 degrees from the hand, compared to the fingers.
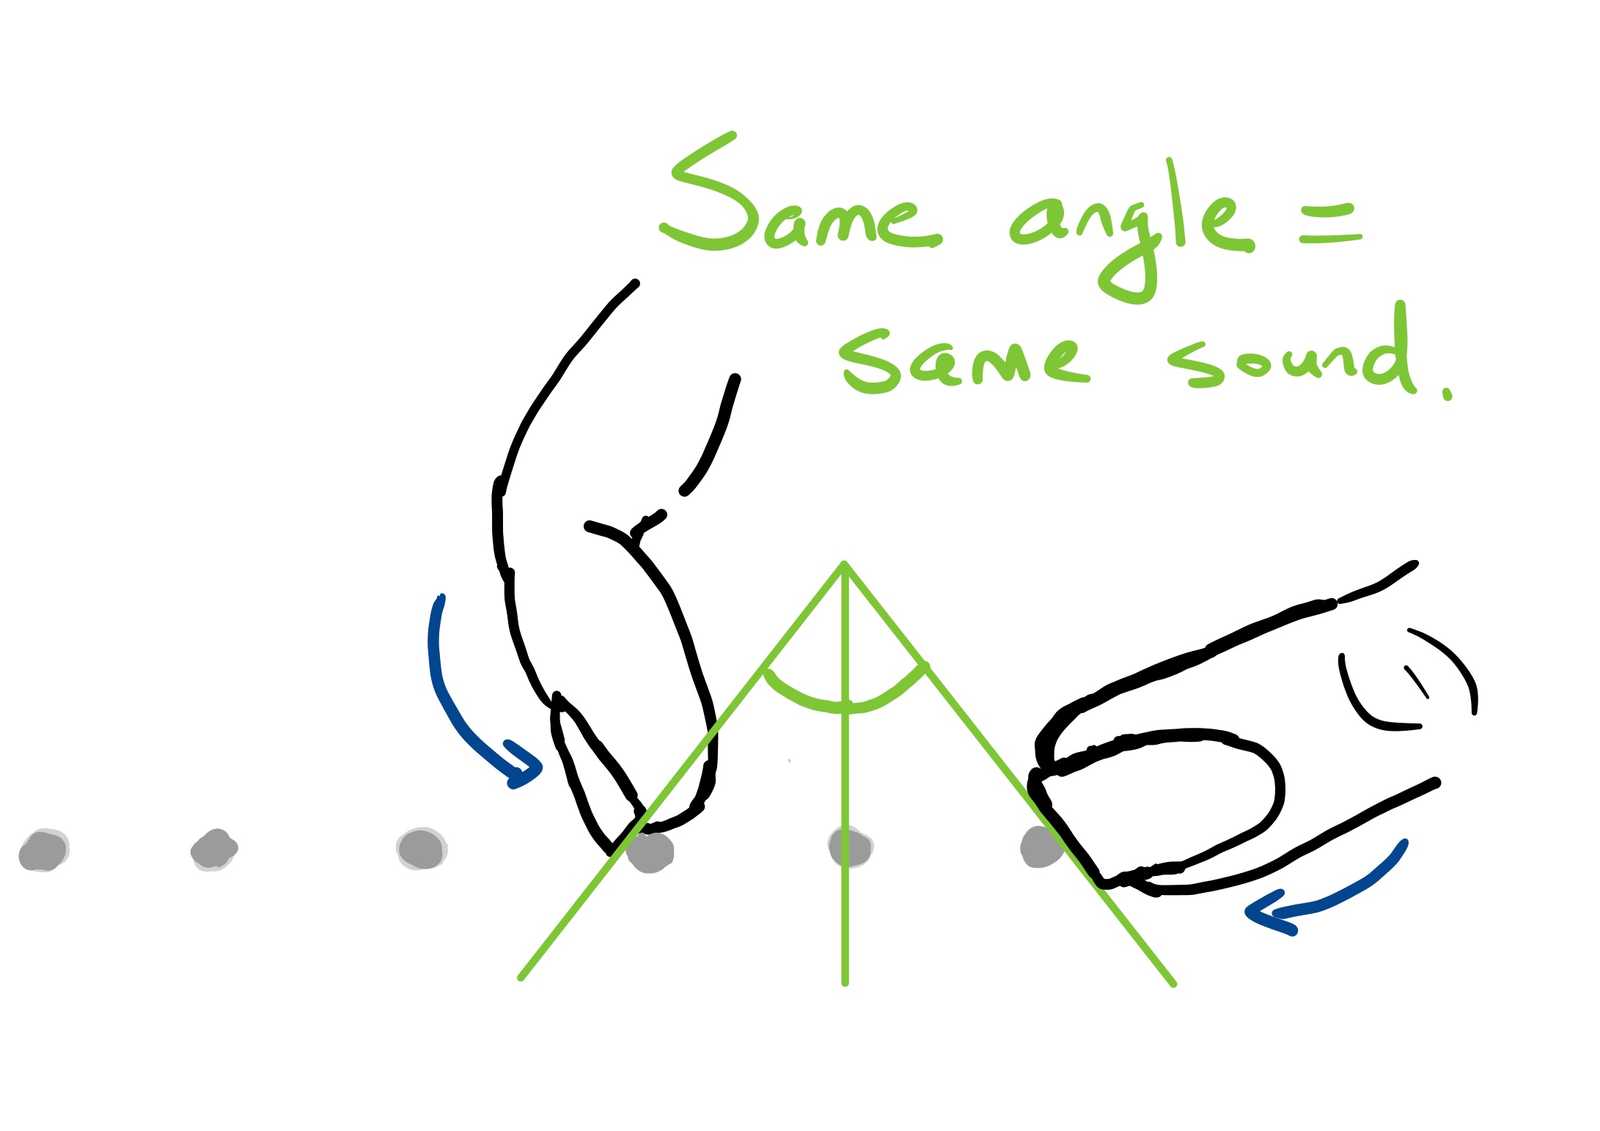
What about the "reverse ramp" or other nail shapes?
You may notice that this shape we are recommending is sometimes called the "ramp" shape.
The full answer to this question is outside the scope of this article. We'll write a full article on this later, but here is the short answer.
Often, players will allow gravity to pull the ring finger towards the floor. The ring finger is deviated away from the center line of the hand. You see this in the Shearer example above, in the ring finger on figure 19A. You’ll see how the angle goes up from left to right on the index and middle fingers, but right to left on the ring finger. In this case, the player is playing from the outside of the nail: the string starts on the outside of the ring finger, then it slides toward the thumb side.
This can be corrected by aligning the ring finger to the hand, or changing the angle of the arm to the guitar strings, and ensuring that the string is starting on the thumb side of the nail when preparing.
how to file your nails for guitar
Follow these simple steps to get an even, consistent sound across all of your fingers.
1. Place the nail file perpendicular to the index finger and nail
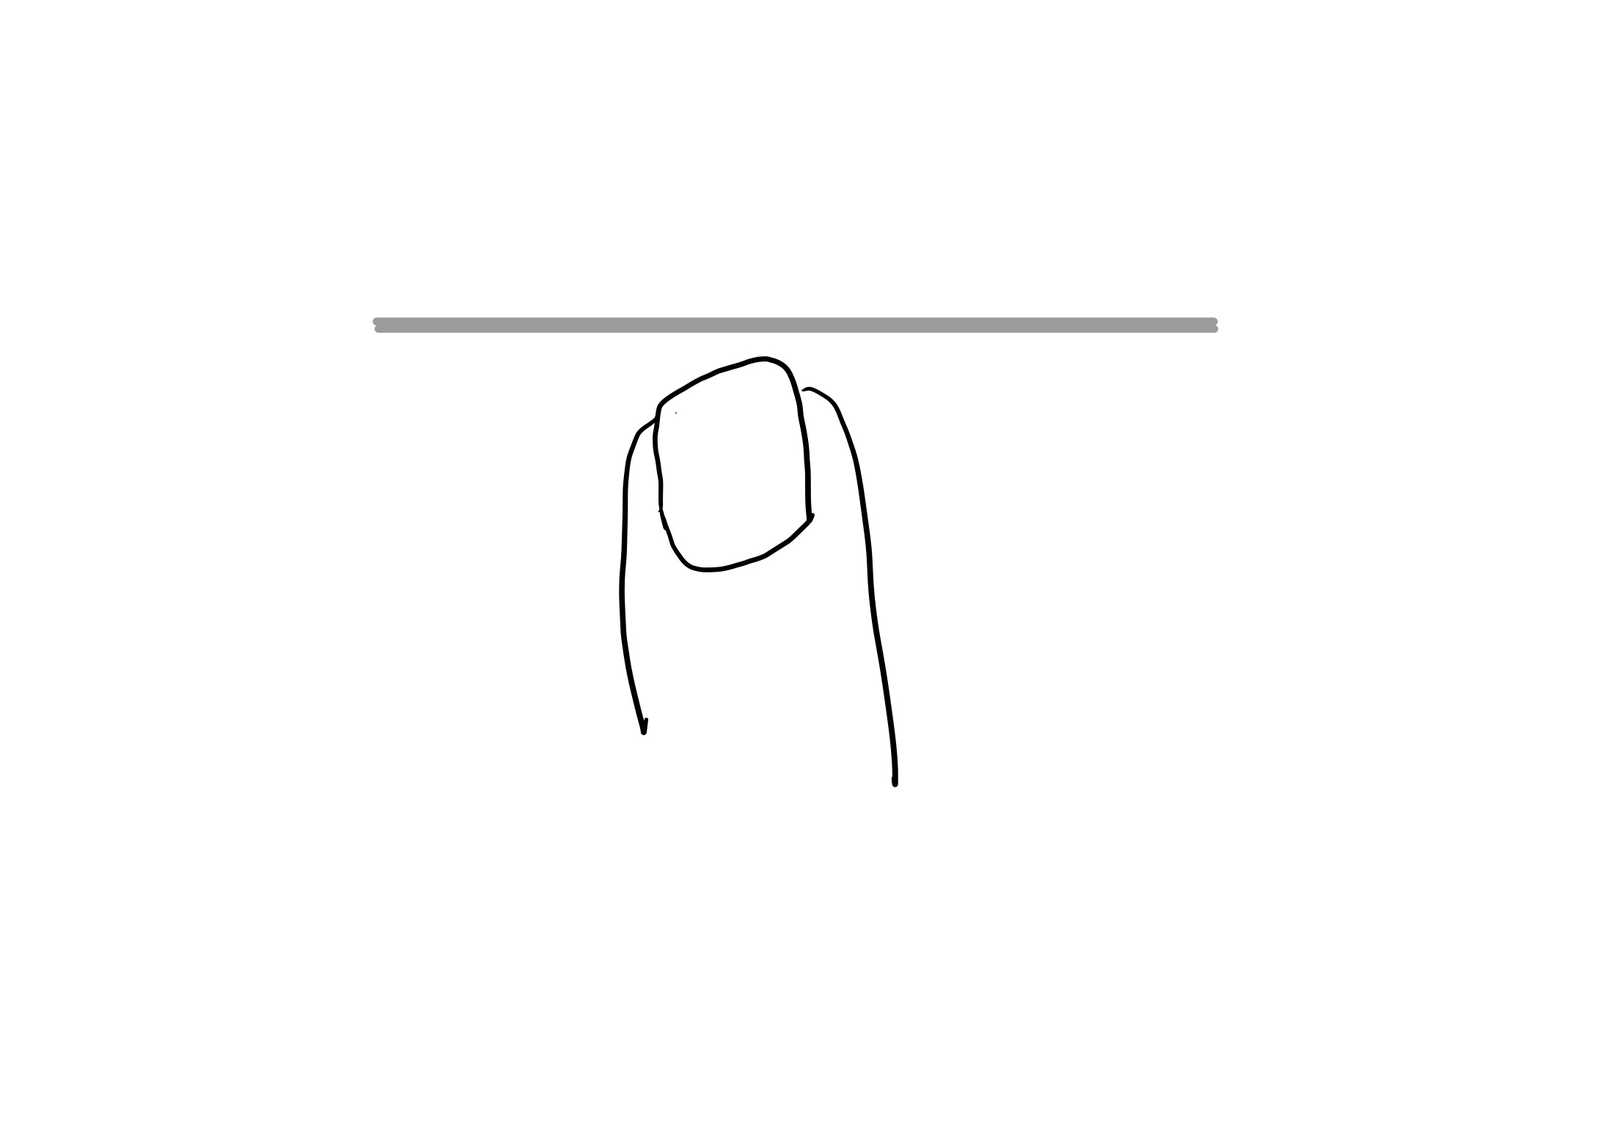
Start with the index finger. Place the nail file perpendicular to the nail.
2. Rotate the file about 10 to 15 degrees under the nail
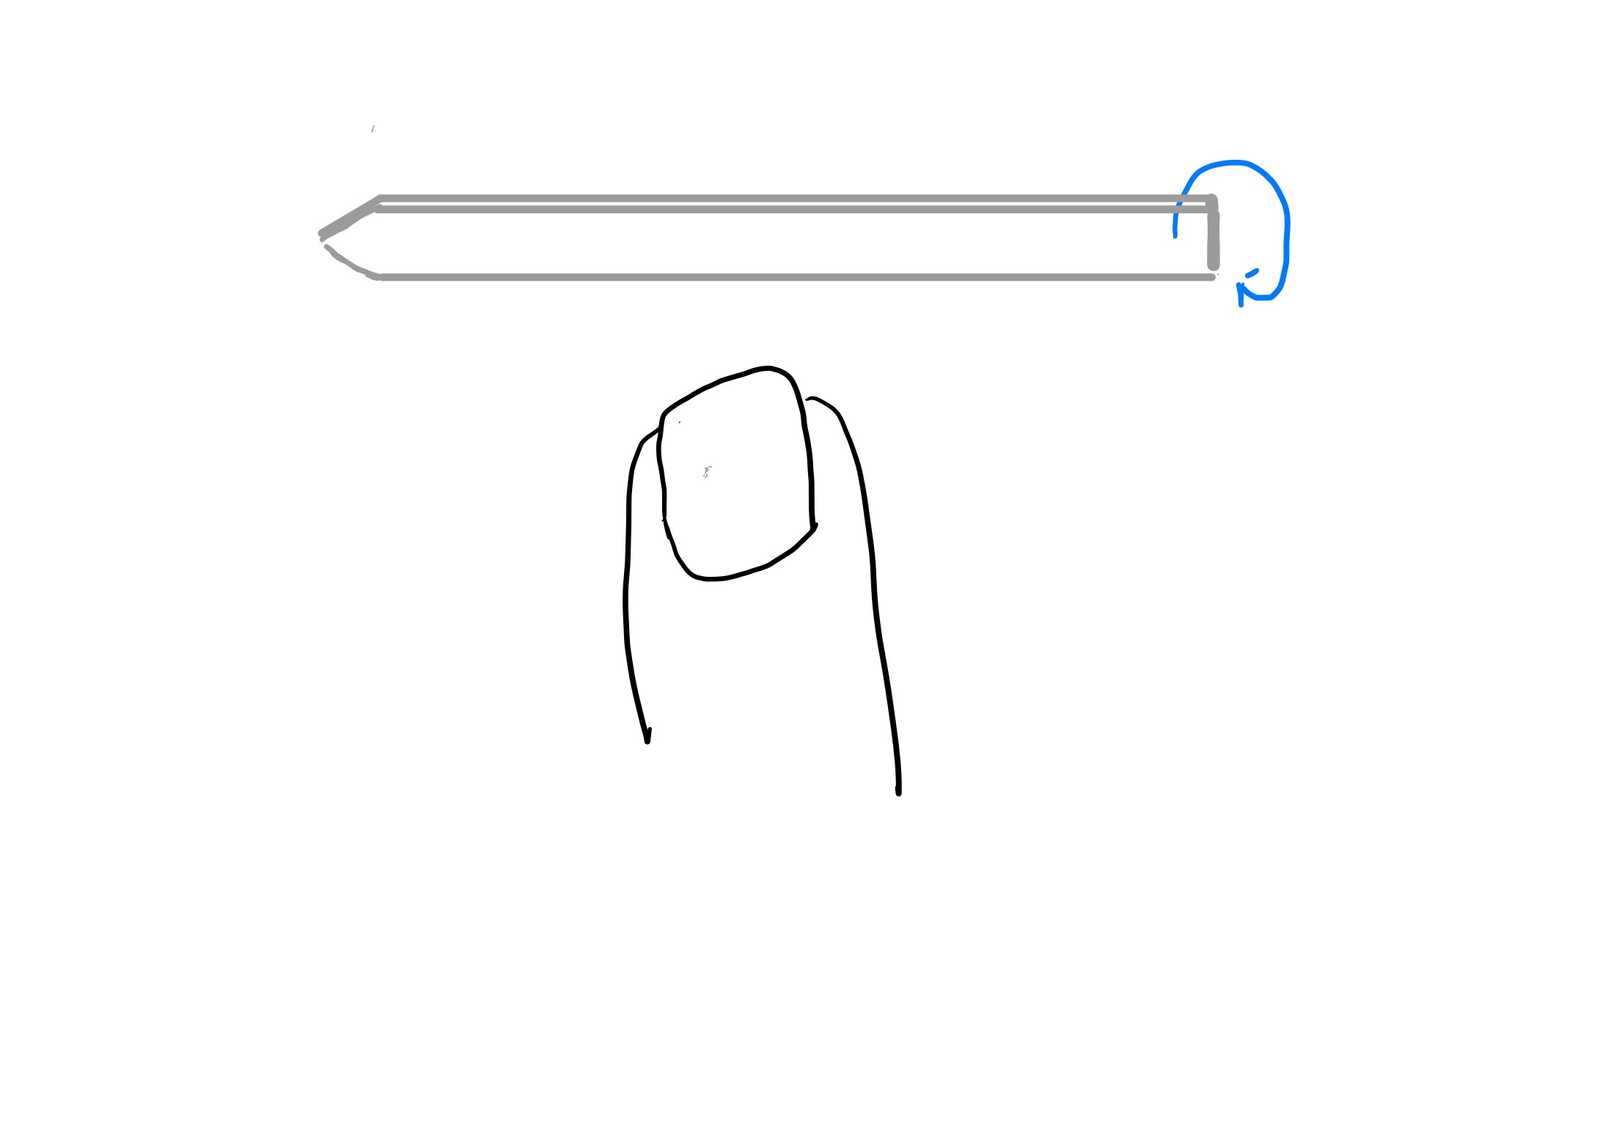
The file should now be slightly on the underside of the nail. Be sure that the file is covering the full surface of the nail.
3. Angle the file toward the thumb about 10 to 15 degrees.
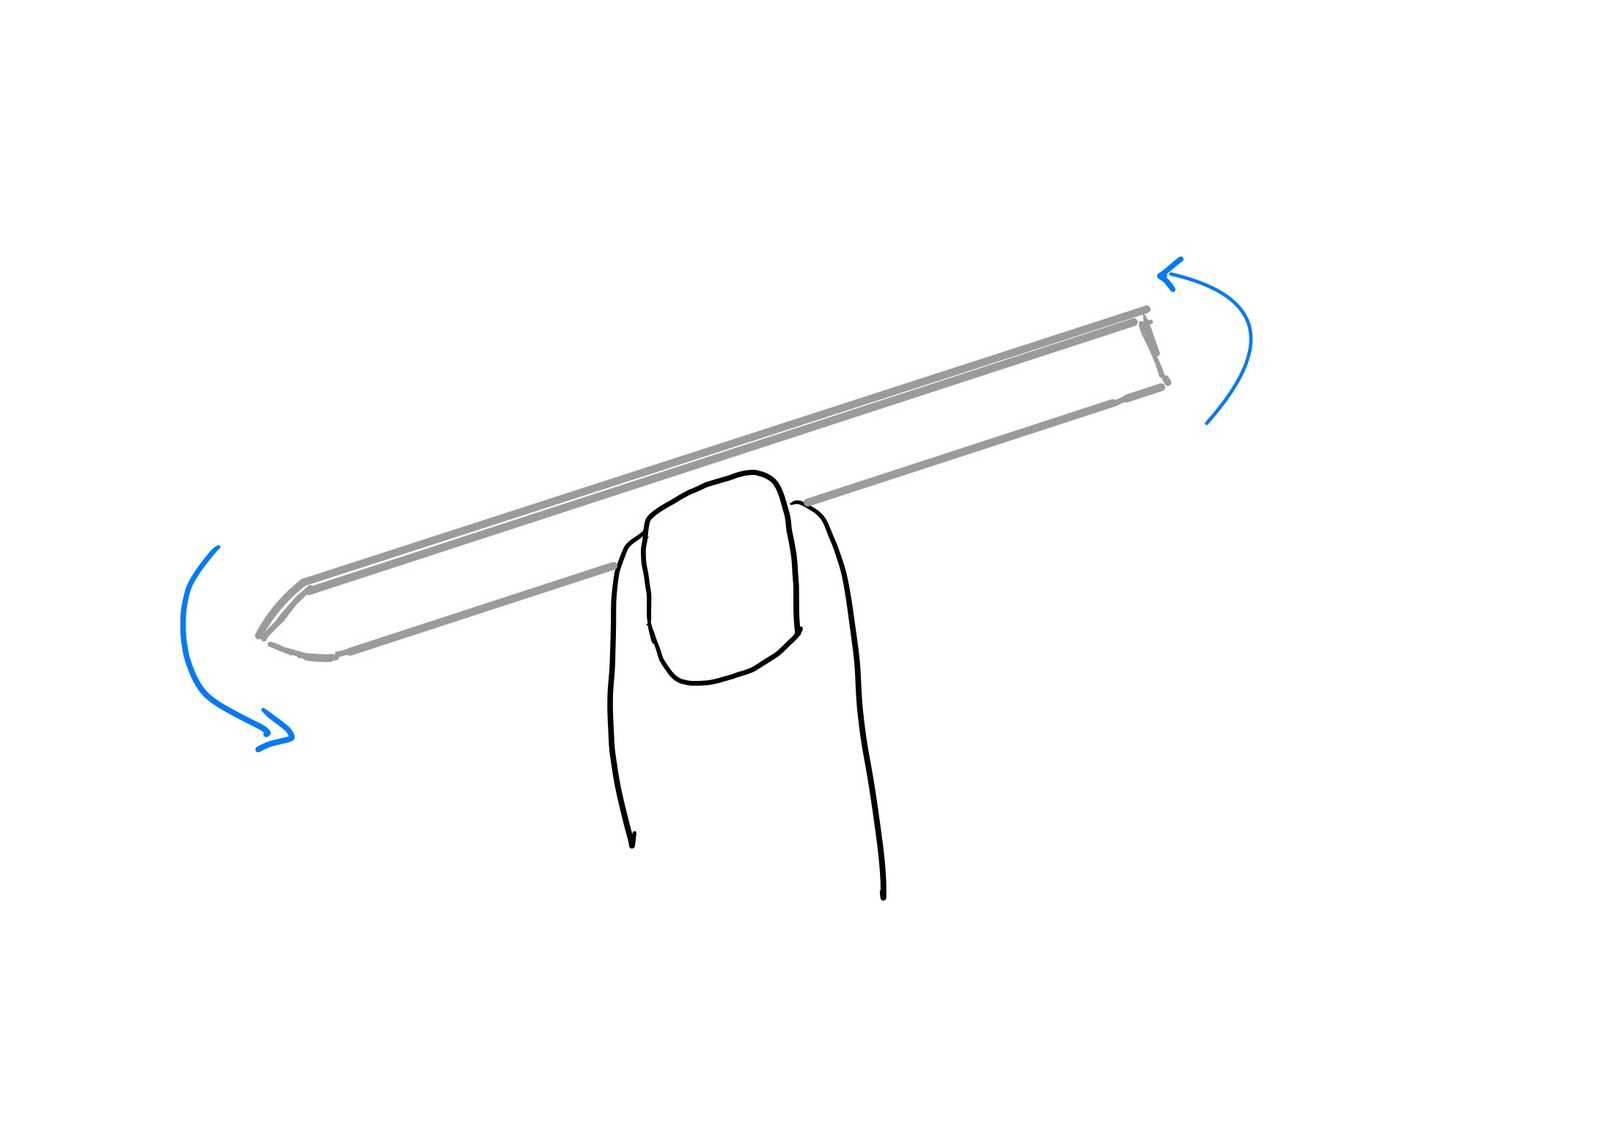
Angle the nail file towards the thumb, so that the side of the nail closest to the thumb will be shorter than the side of the nail that is farther away.
4. File the fingernail in a perfectly straight line.

Moving the file with the left hand and keeping the right hand stationary, file the fingernail in a perfectly straight line. If you move the right hand, you may get a curved nail shape which will not perform as well.
5. File the nail to the correct length, until the corner is "above" the string.
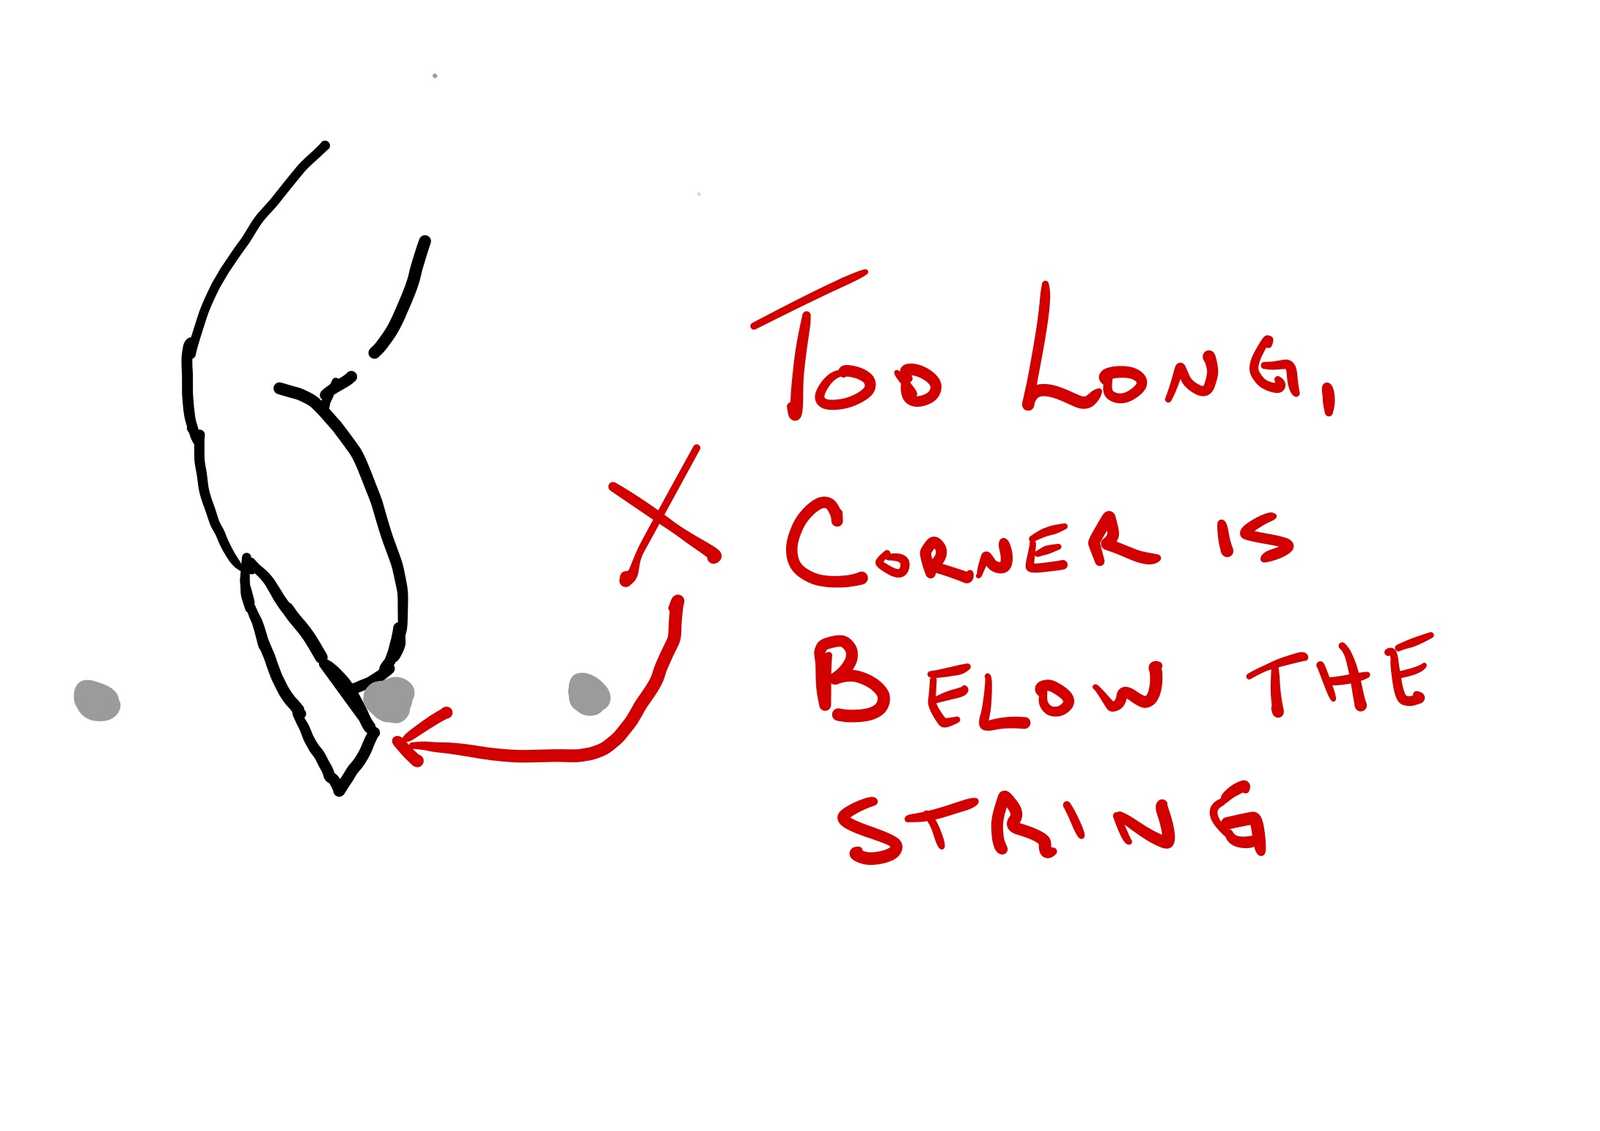
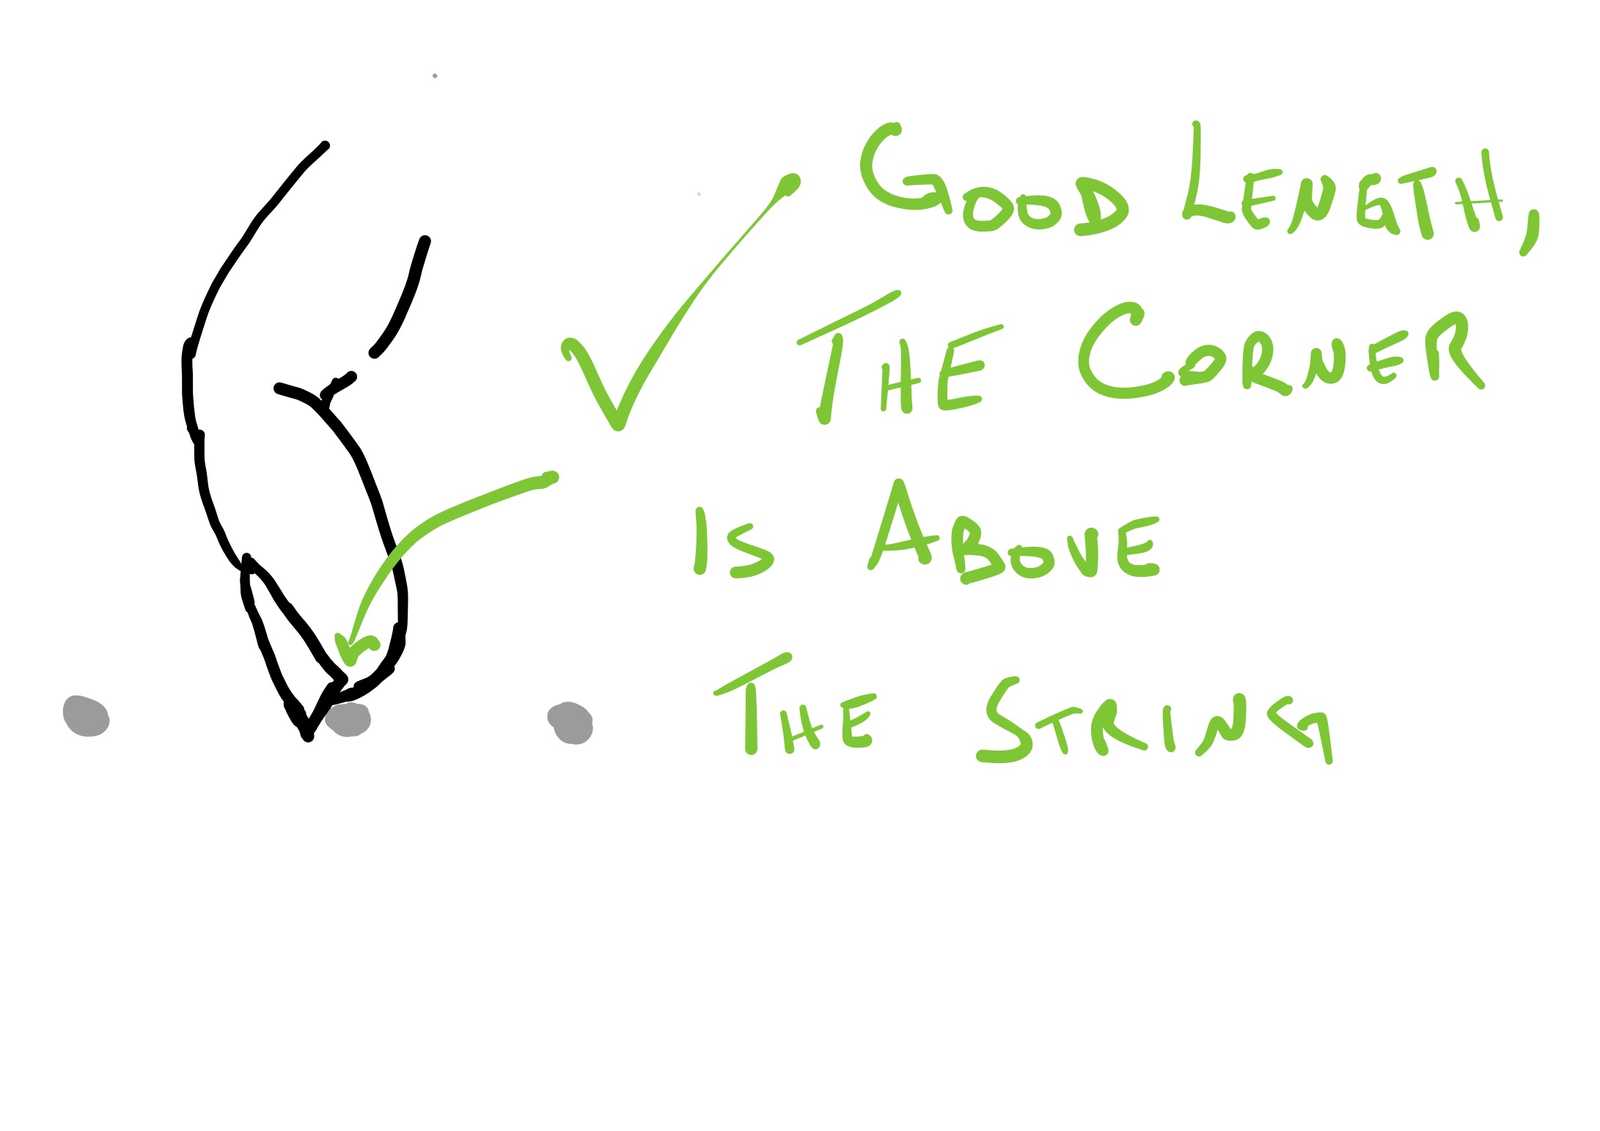
The nail will be the correct length when the finger is prepared on the string, the string is contacting both flesh and nail, and the corner of the nail is "above" the string so that it cannot get caught.
6. Check the sound and placement on the guitar, making adjustments to the angle as necessary
You'll want to check the sound of the nail on the guitar as you file the nail, so that you can really refine the sound.
7. Repeat steps 1 through 6 for the middle and ring fingers.
Remember, filing exactly the same angle on the middle and ring finger will produce the same sound.
8. Place the nail file on and perpendicular to the thumb nail
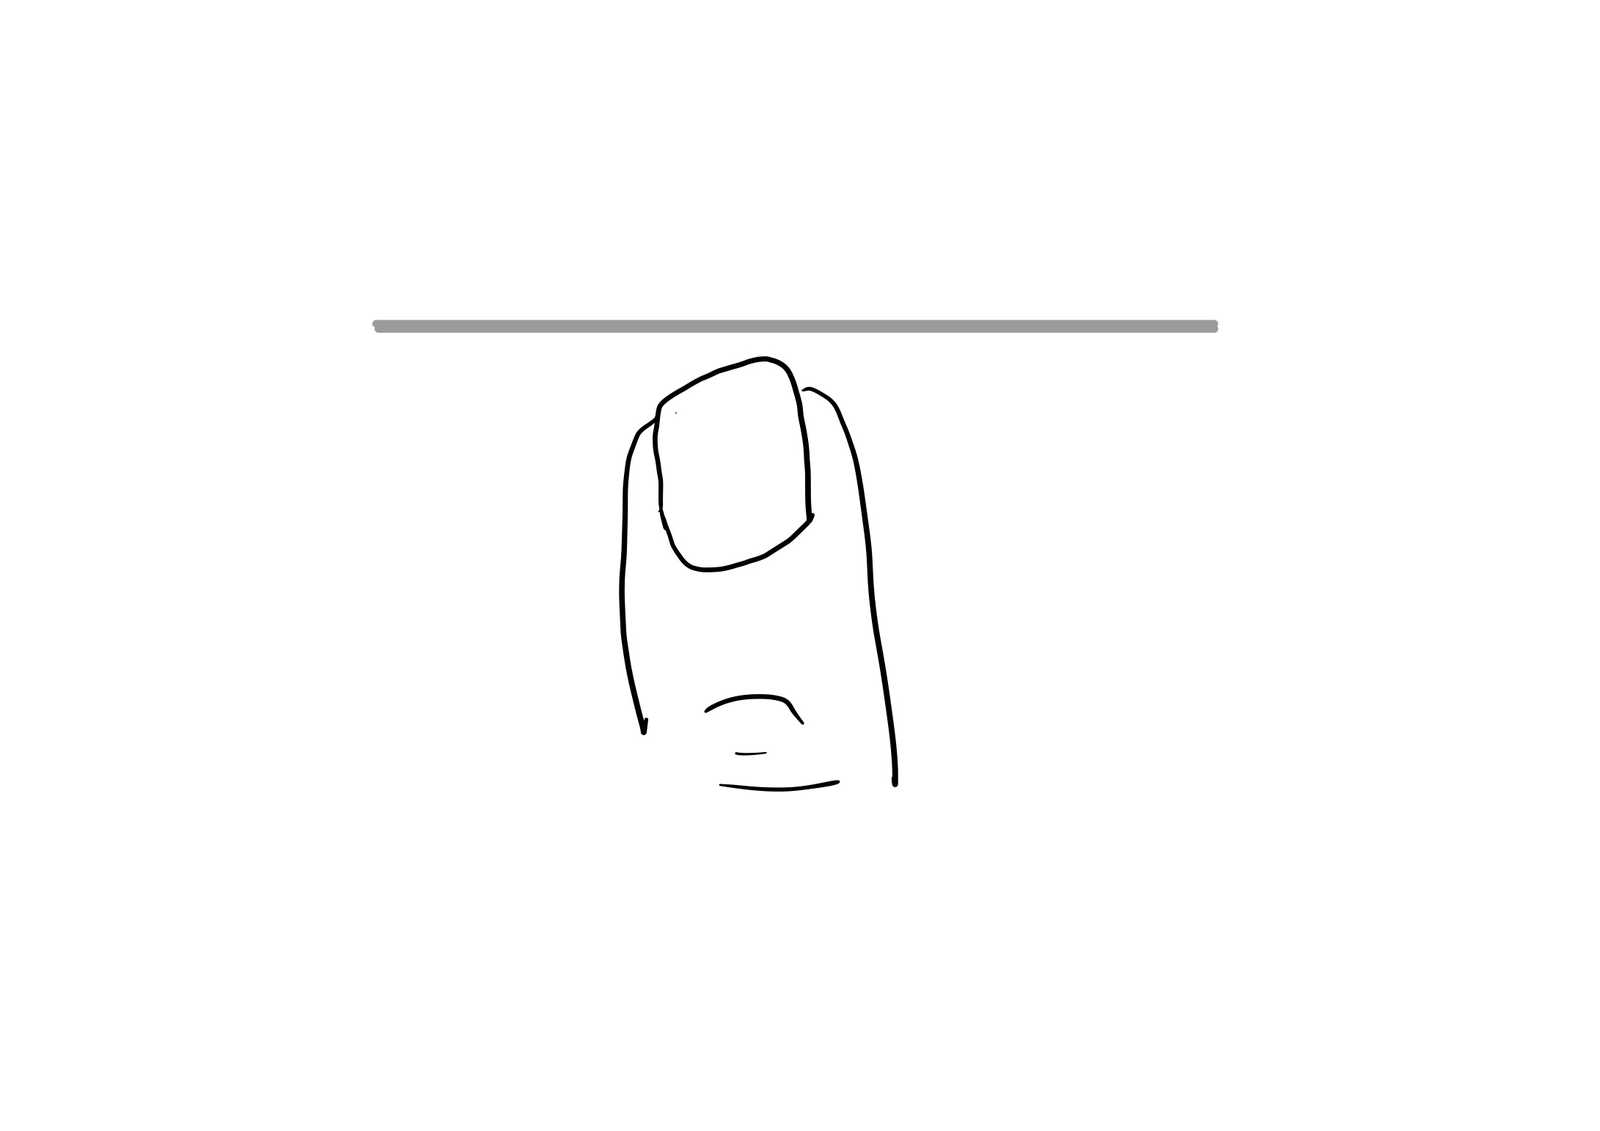
The file should be level, and perpendicular to the thumb.
9. Angle the nail file about 20-30 degrees away from the fingers
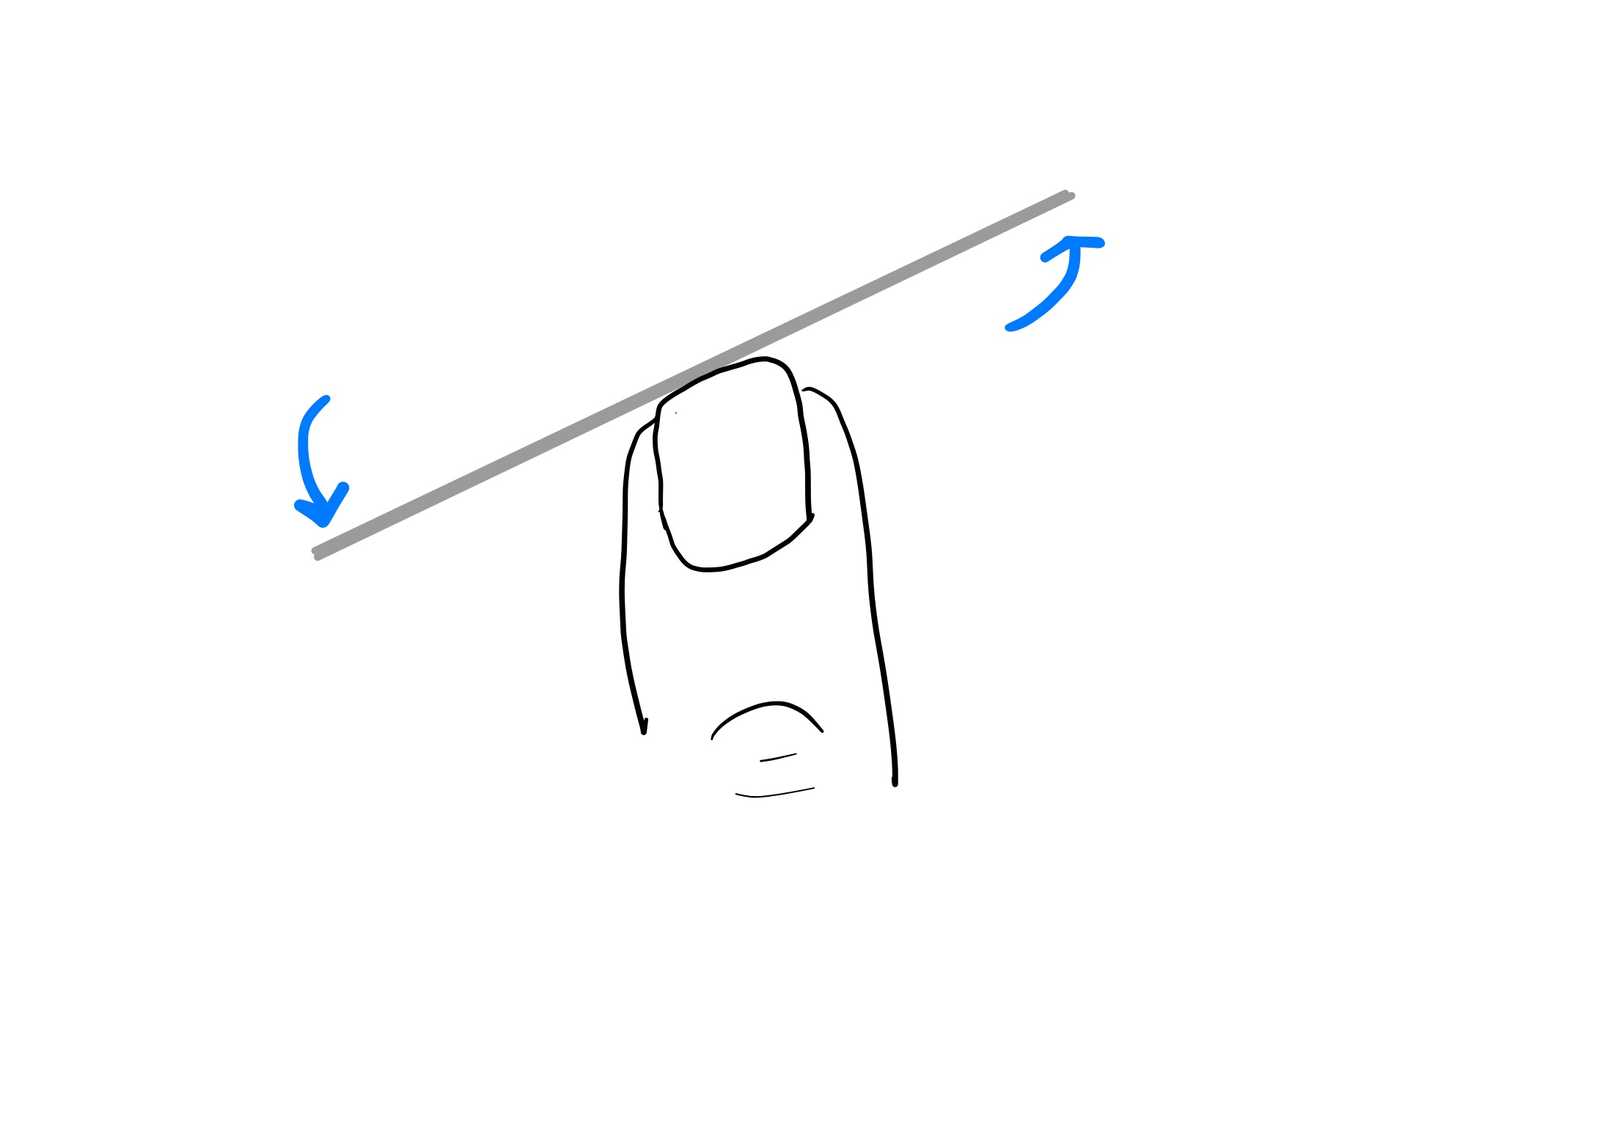
This step will take some practice and experience. The goal is to get the same angle of attack of the thumb nail to the string as the fingers have. Unlike the fingers, the file is not rotated under the thumbnail.
10. File the thumb nail in a perfectly straight line
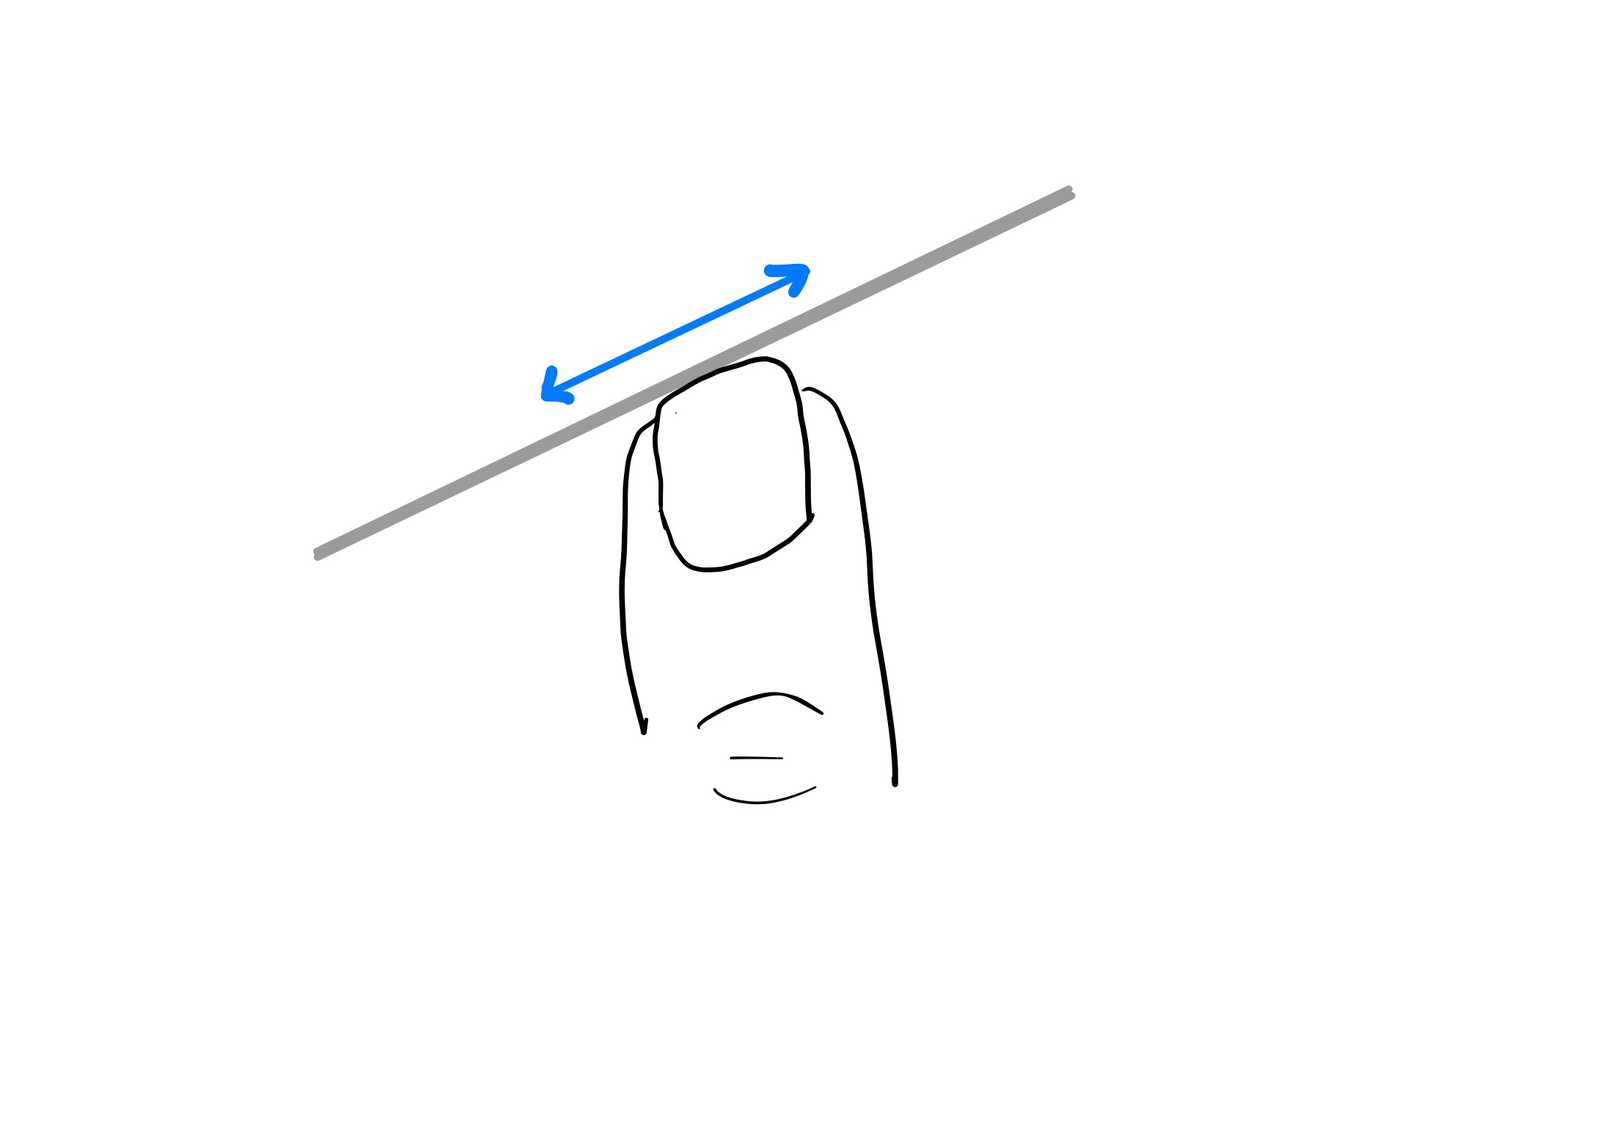
As with the fingers, be sure to move the file, and not the right hand. Moving the right hand will cause the thumb nail to take on a curved playing surface which will be less effective.
11. Check the sound on the guitar
Check to see if you are getting a sound that is quite similar to the fingers. If you are not, you may visually inspect to see if the angle of the thumb nail to the string is more or less steep than the finger. Then adujst your filing angle.
12. Buff the thumb and finger nails.
You can purchase a multi-step nail buffer from your local pharmacy, or you can order specialty nail buffing kits from many classical guitar shops. Use the buffer to smooth and polish the entire playing surface of your nail.
Start from the coarsest buffer, and progress through to the smoothest. Be sure to buff and polish any part of the nail that may contact the string.
Your sound will be amazing when you are done!
Related


Sage