How to play the G Major scale on piano
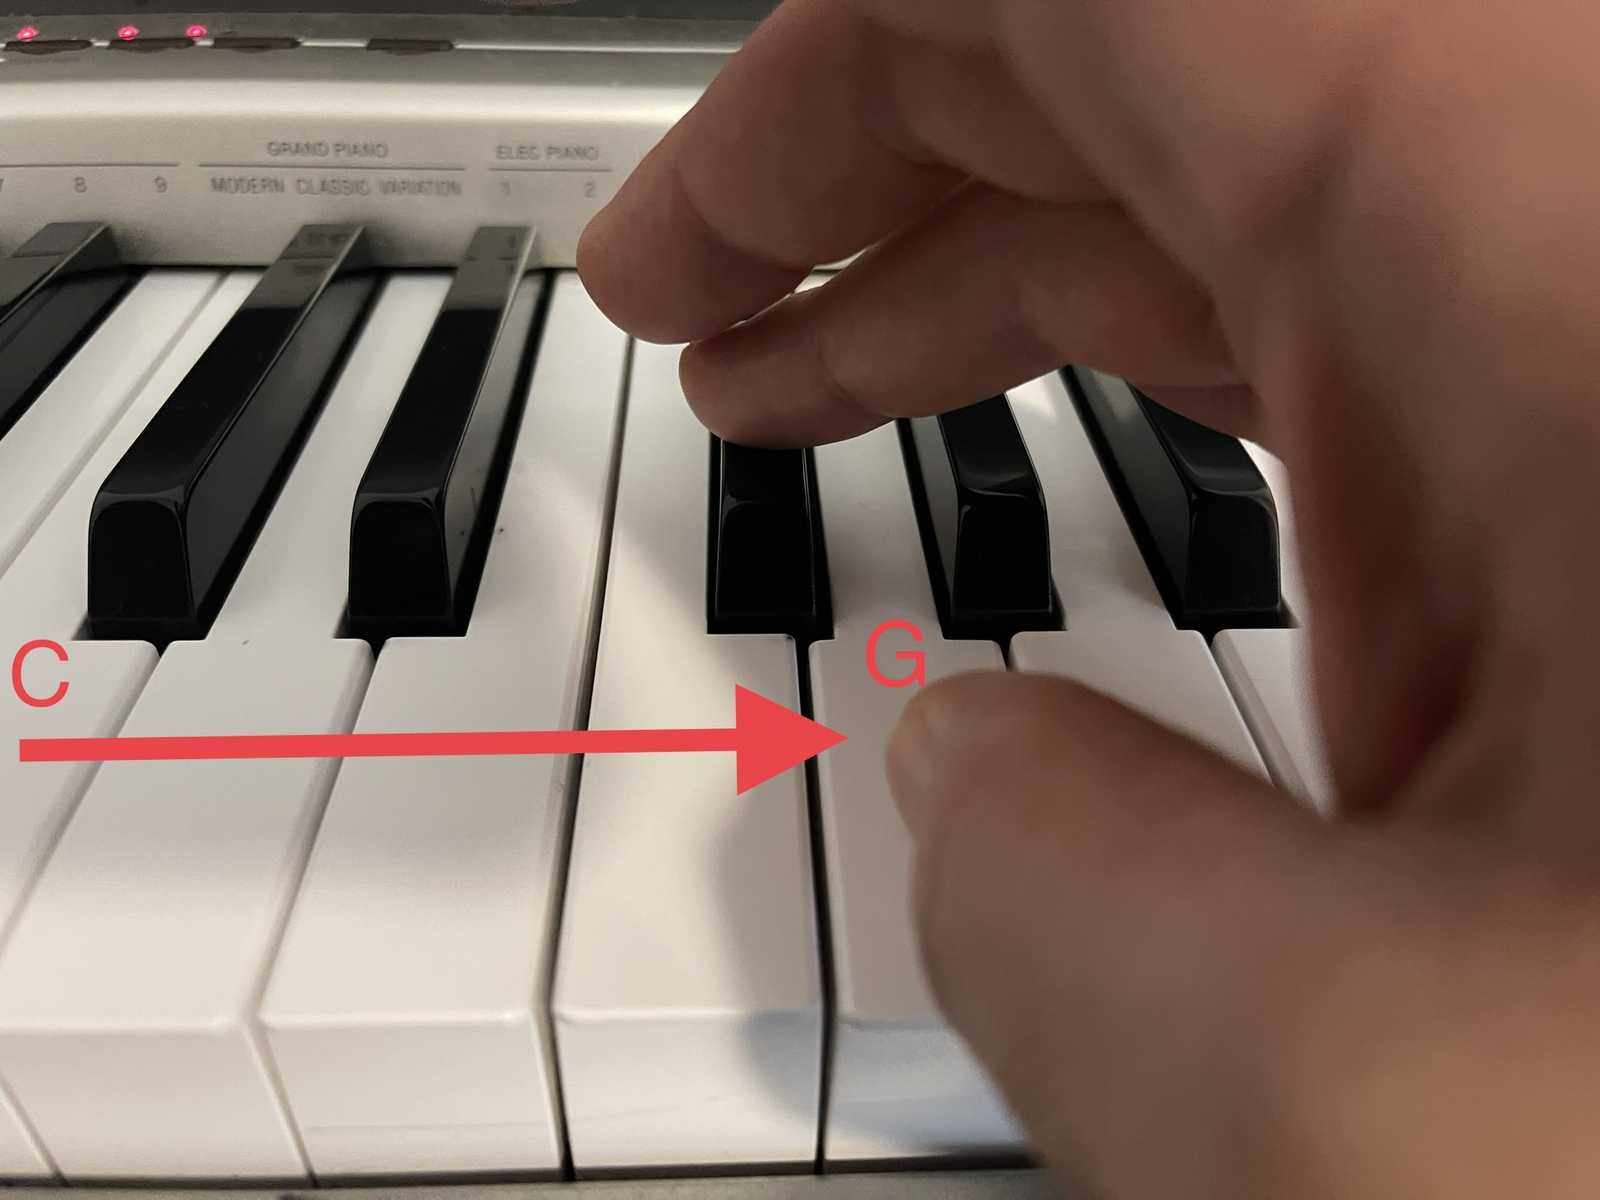

The G Major scale
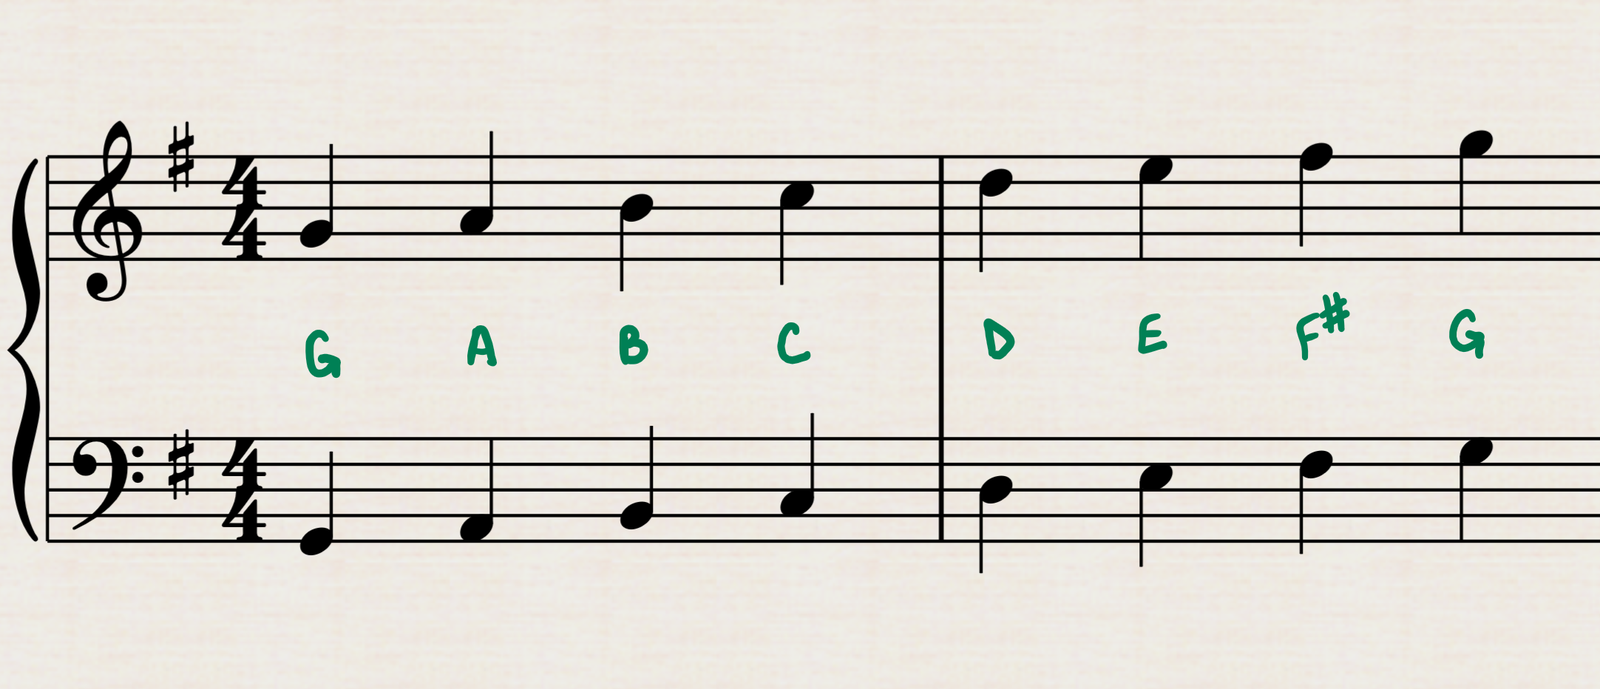
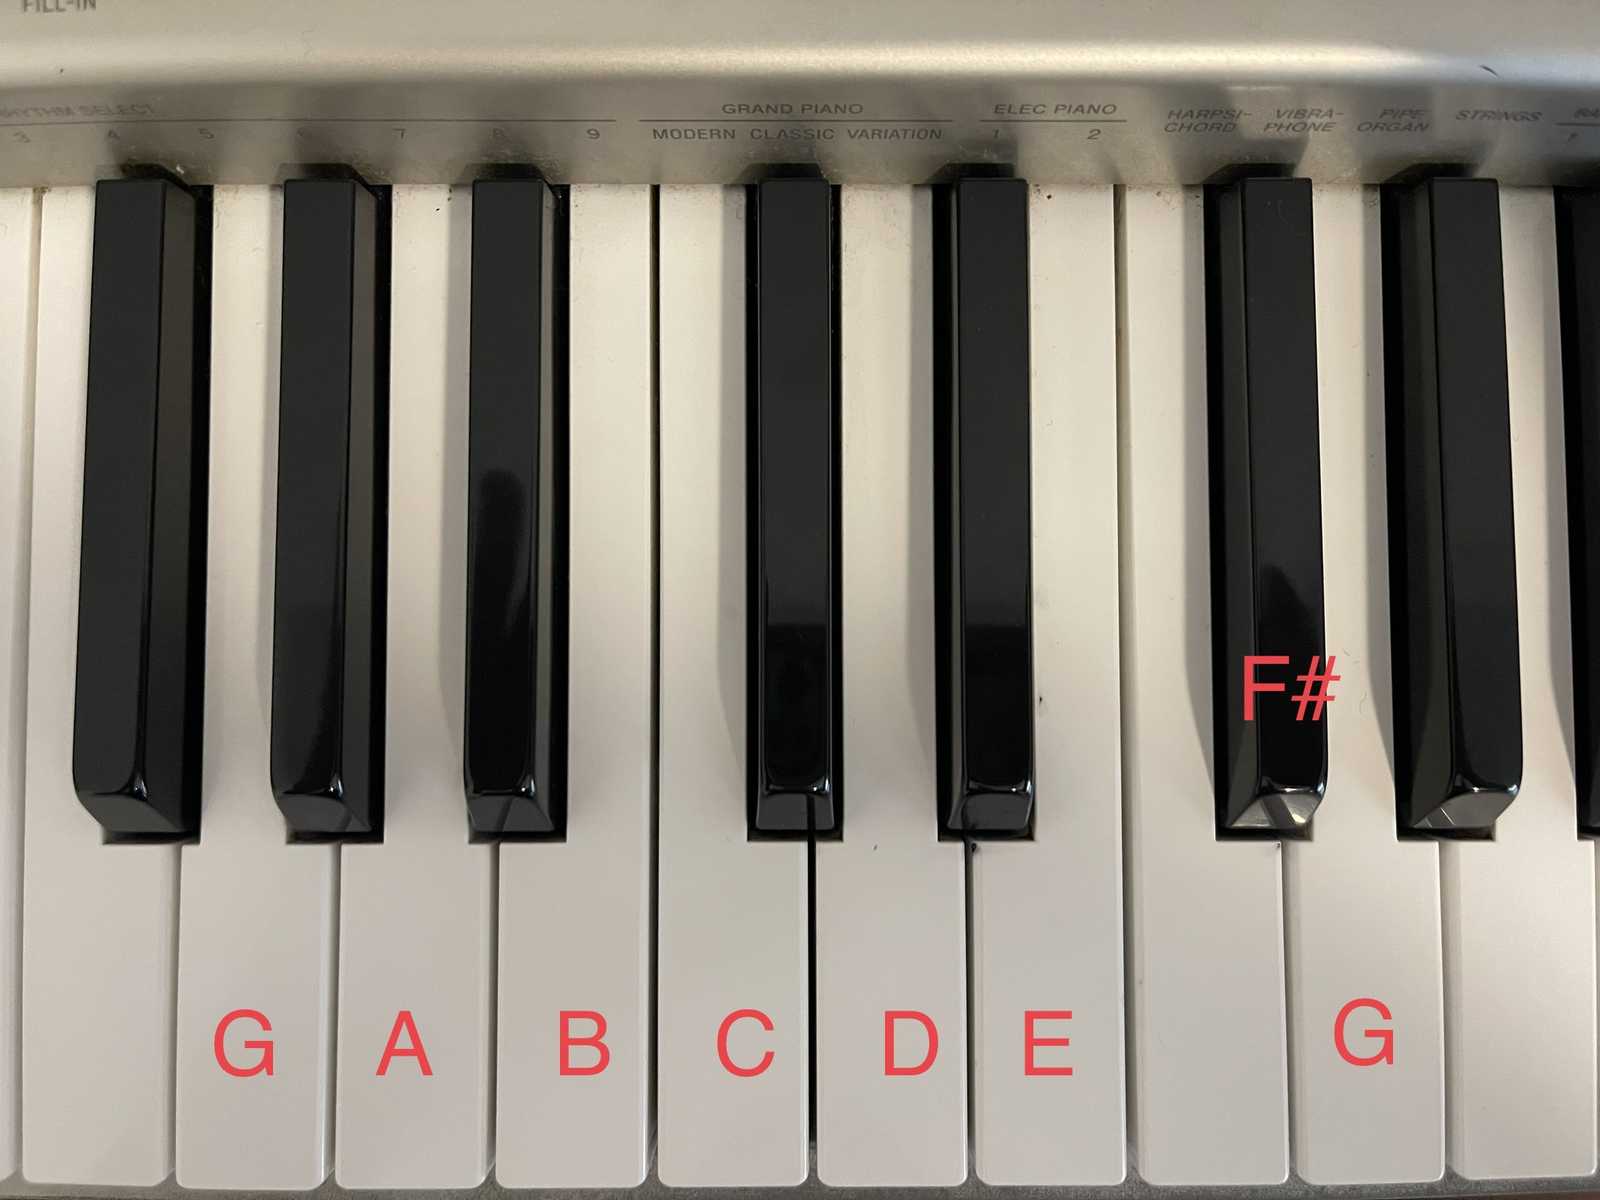
The G Major scale consists of 7 different notes, 6 of which are white keys, one which is a black key, and one repeated note which is the note which is the note we start with but either higher or lower. The space between the two G notes is called an octave.
How to play the G Major scale on piano with both hands
Let's go over the steps to play the G Major Scale on piano with both hands. We'll also learn how to play in one or many octaves. You may be also working on these scales with me in your piano lessons, and if so, I hope you find this explanation helpful.
1. Play notes G, A, and B
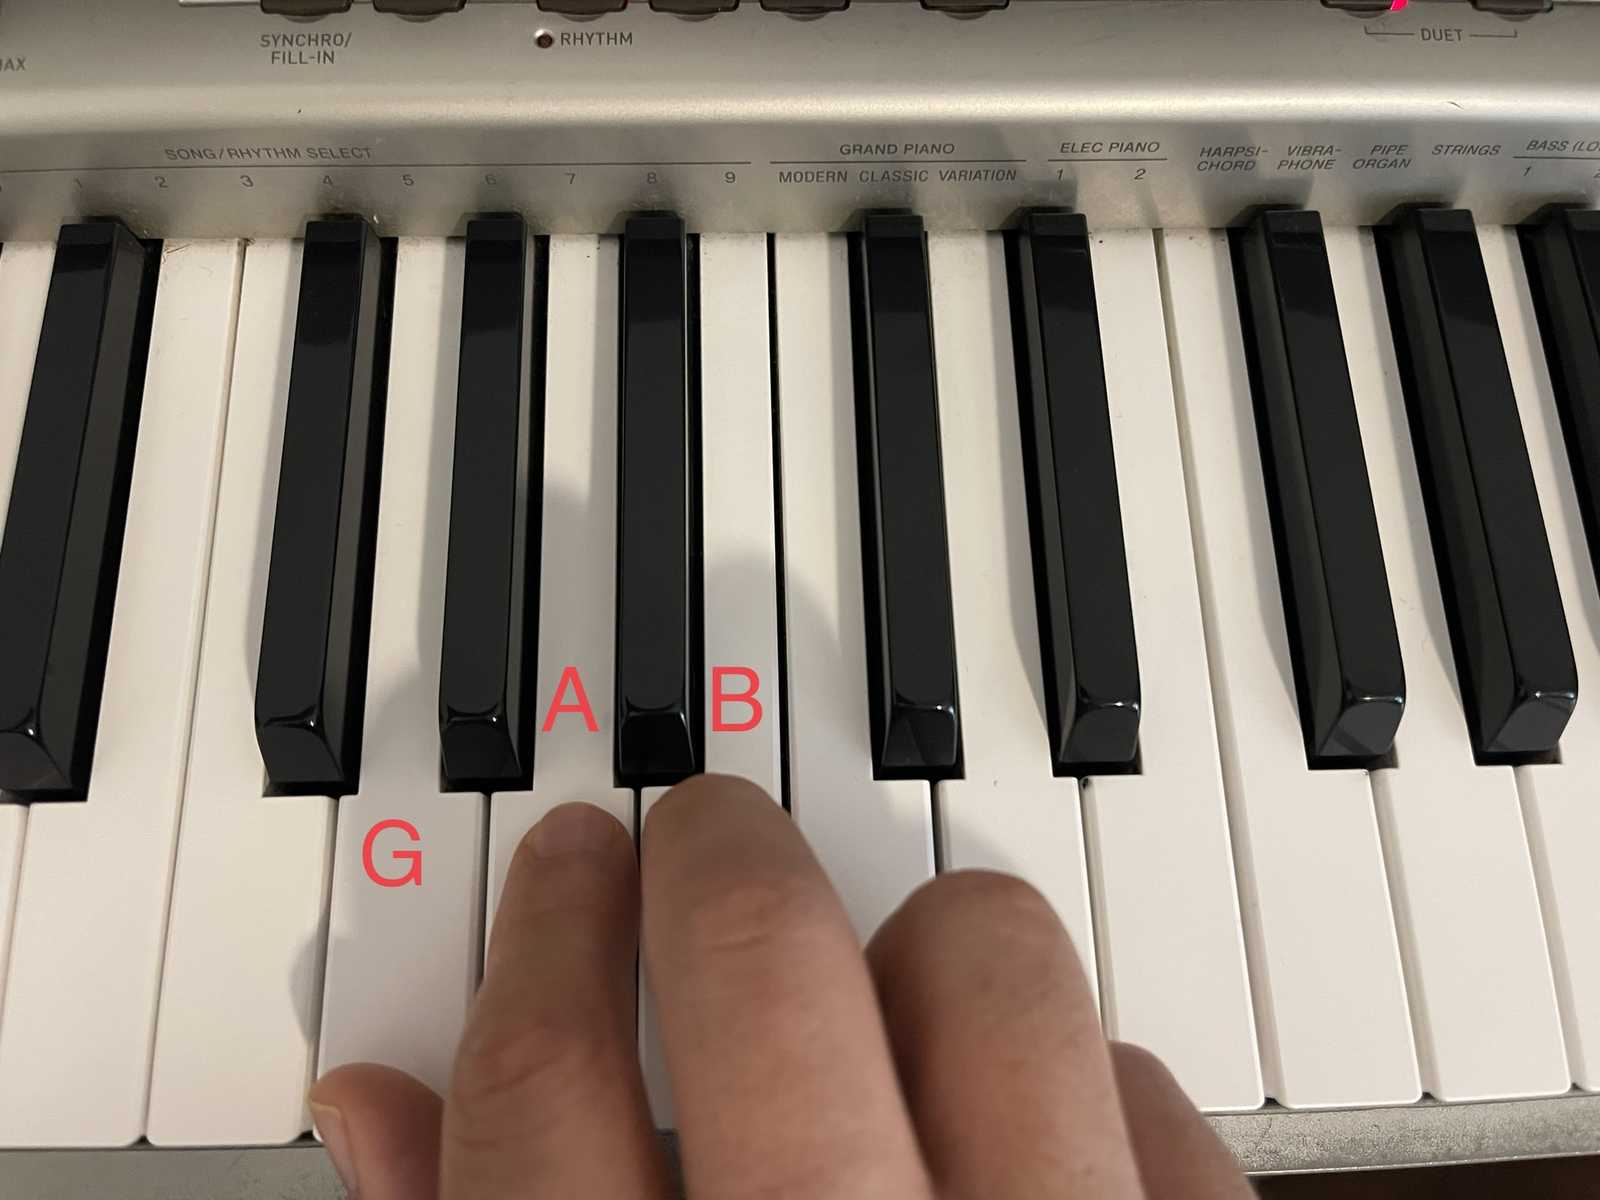
First play G with the 1st finger (thumb), then A with the second finger (pointer), and then B with the 3rd finger (middle).
2. Bring the thumb underneath the middle finger.
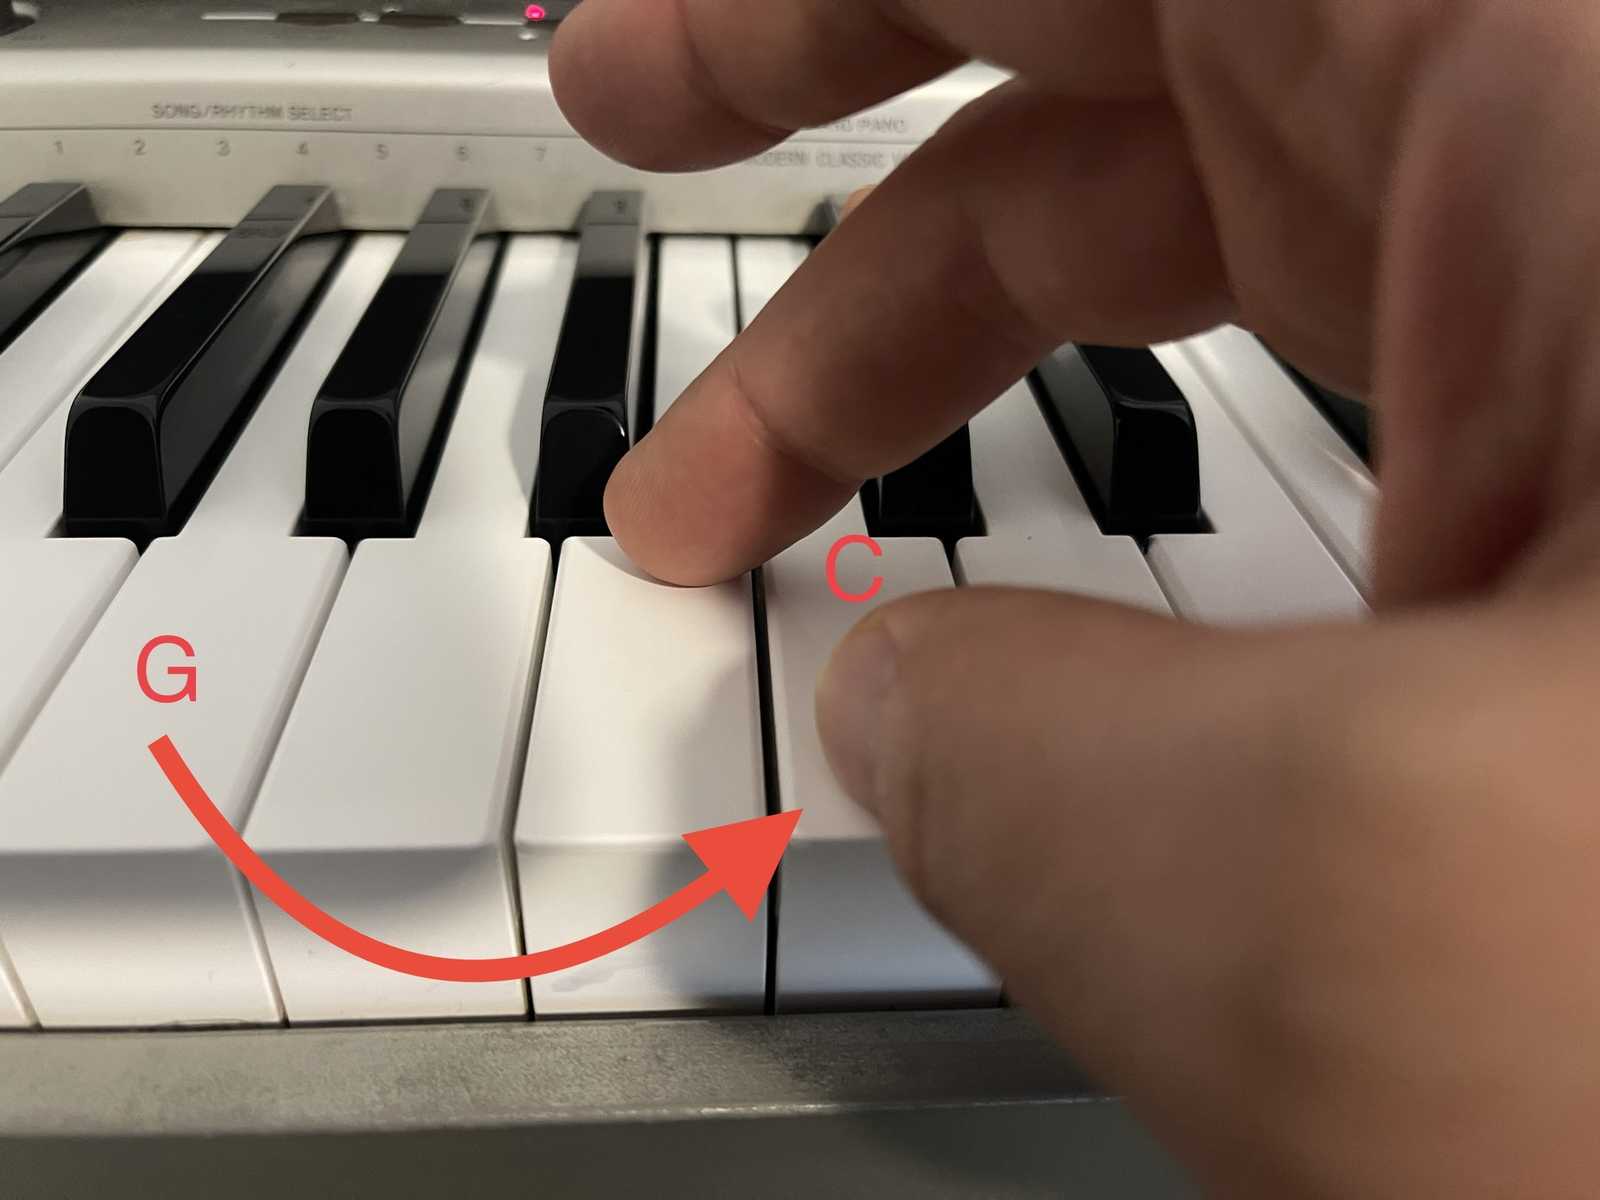
Keep the middle finger down while you slide the thumb underneath to the next note, C.
3. Play notes C, D, E, F#, and G
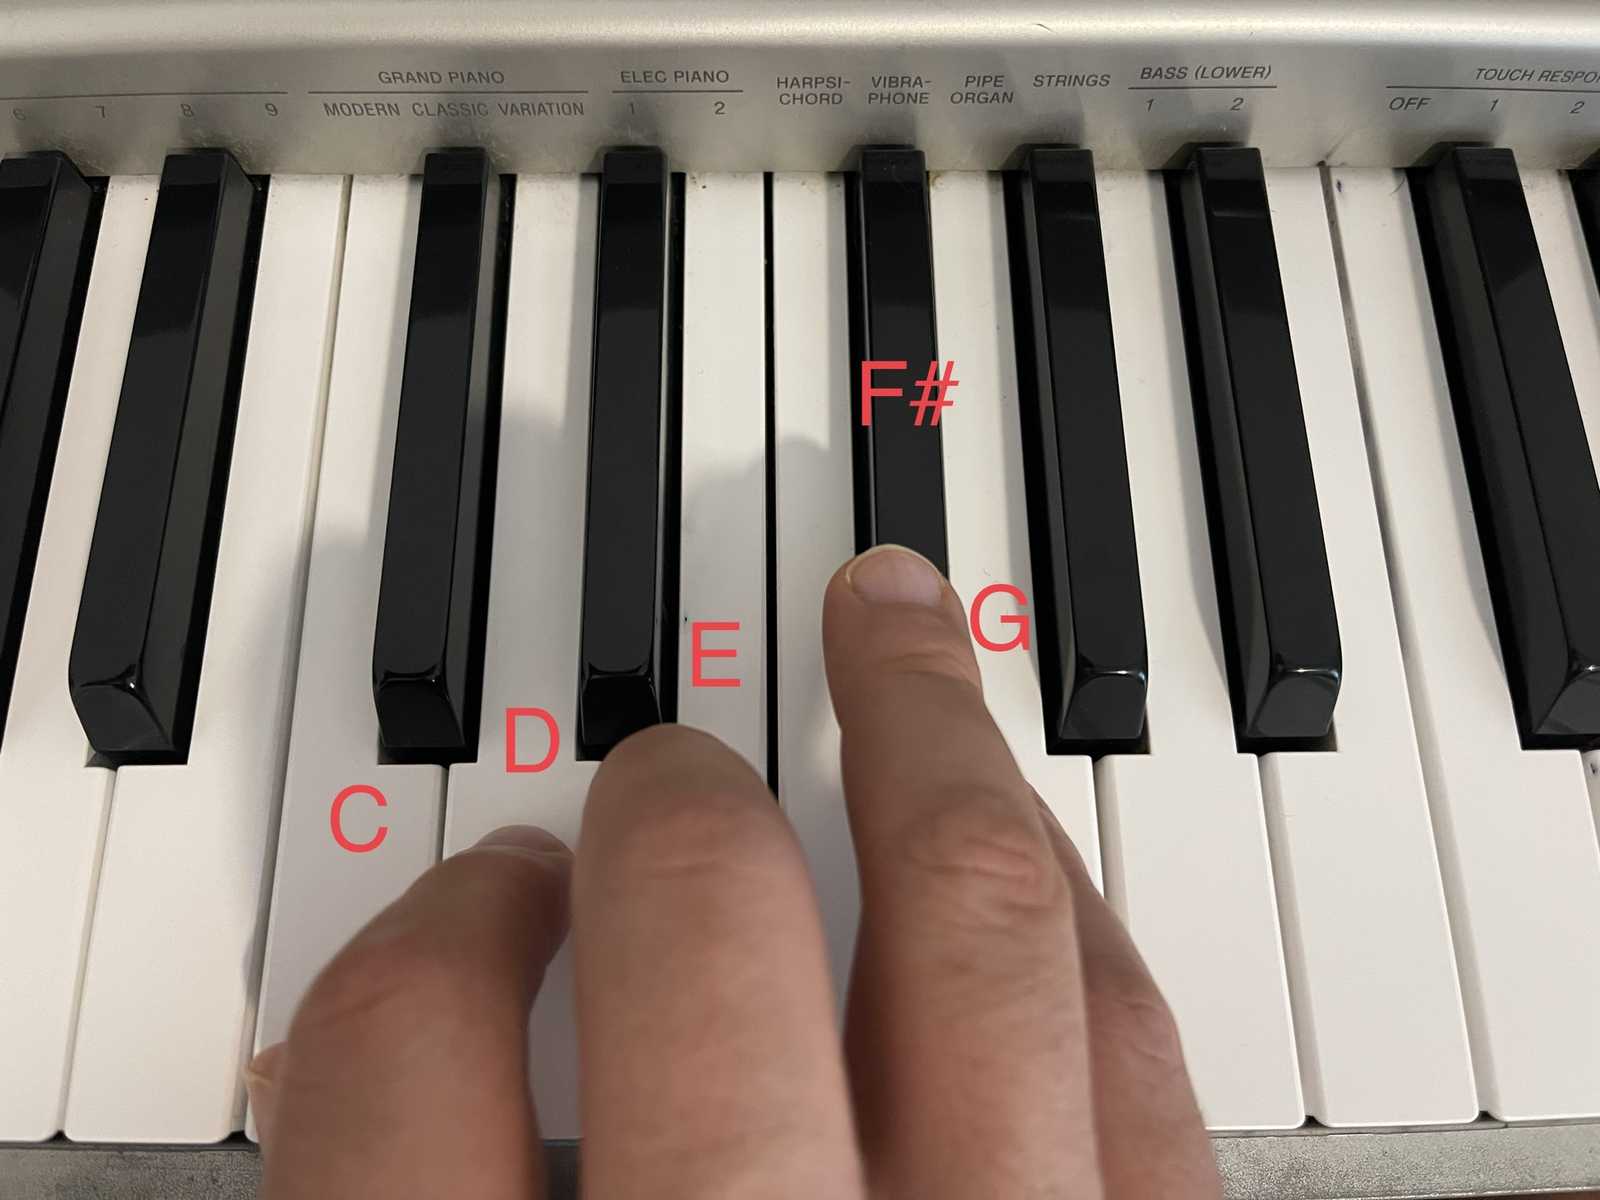
Use your index finger for the note D, your middle finger for the note E, your ring finger for the note F#, and finally your pinky for the note G.
4. Start the scale downward with notes G, F#, E, D, and C.

To play this scale descending, we simply reverse the fingerings. Begin at the pinky on G, then the ring finger on F#, then the middle finger on E, the index (pointer) finger on D, and the thumb on C.
5. Bring the middle finger over the thumb.
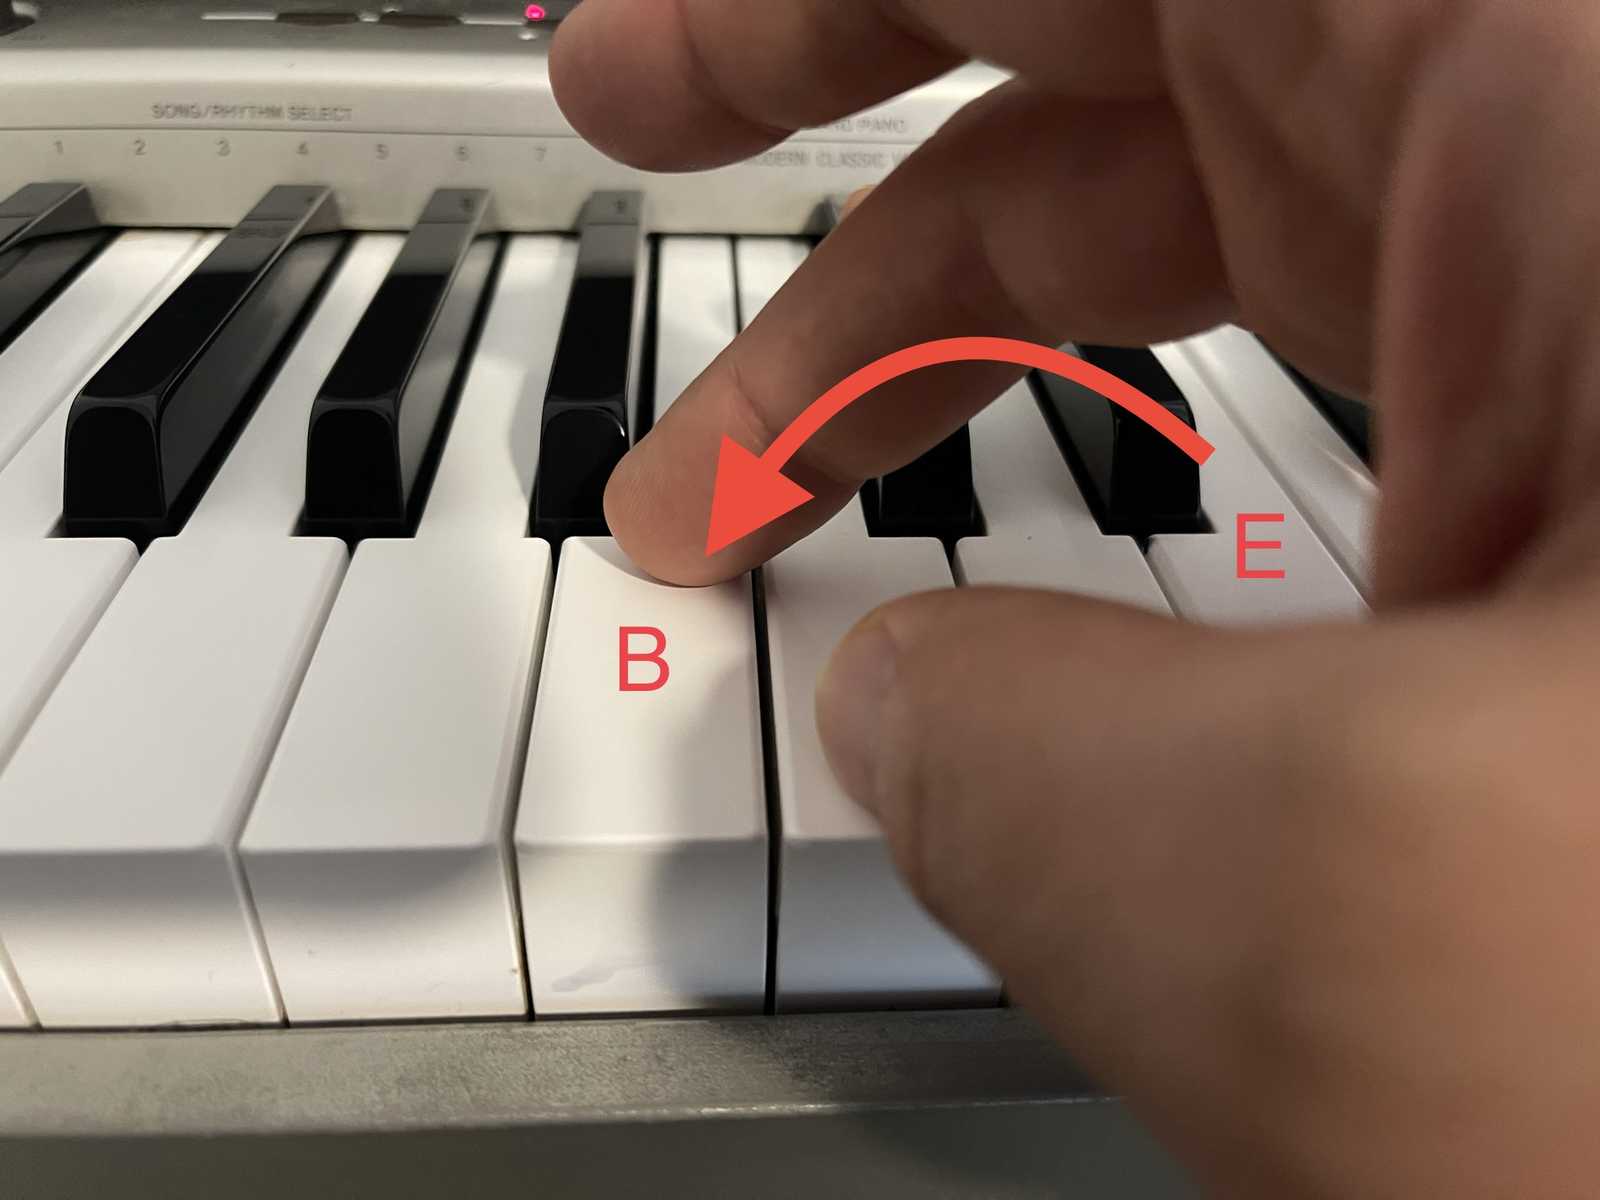
Keep the thumb down, depressing note C, and cross the middle finger over the thumb to use it to play the note B.
6. Play notes B, A, and G.

Bring the thumb back to the left side of the hand and use the index (pointer) finger to play A first, then the thumb to play G.
7. Usint the left hand, play the notes G, A, B, C, and D.
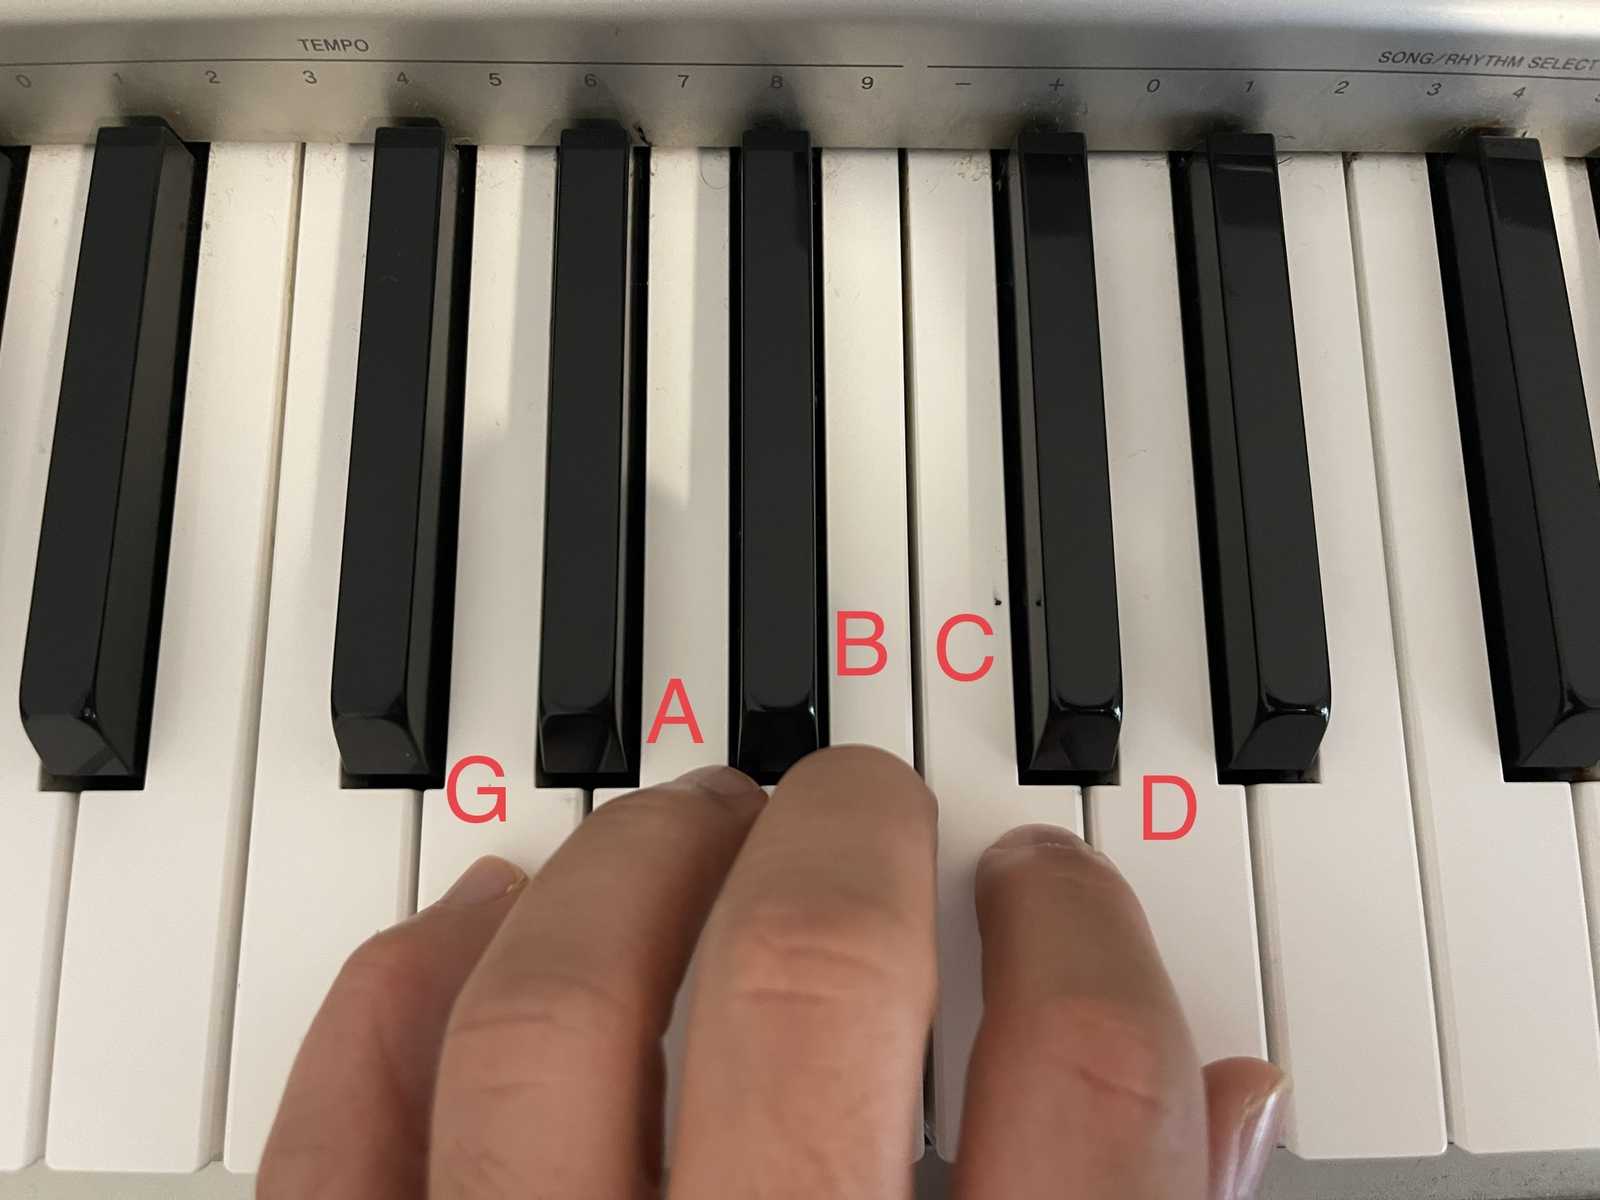
First play G with your pinky. Then use your ring finger to play the note A, your middle finger to play the note B, index to play the note C, and your thumb to play the note D.
8. Cross the middle finger over the thumb
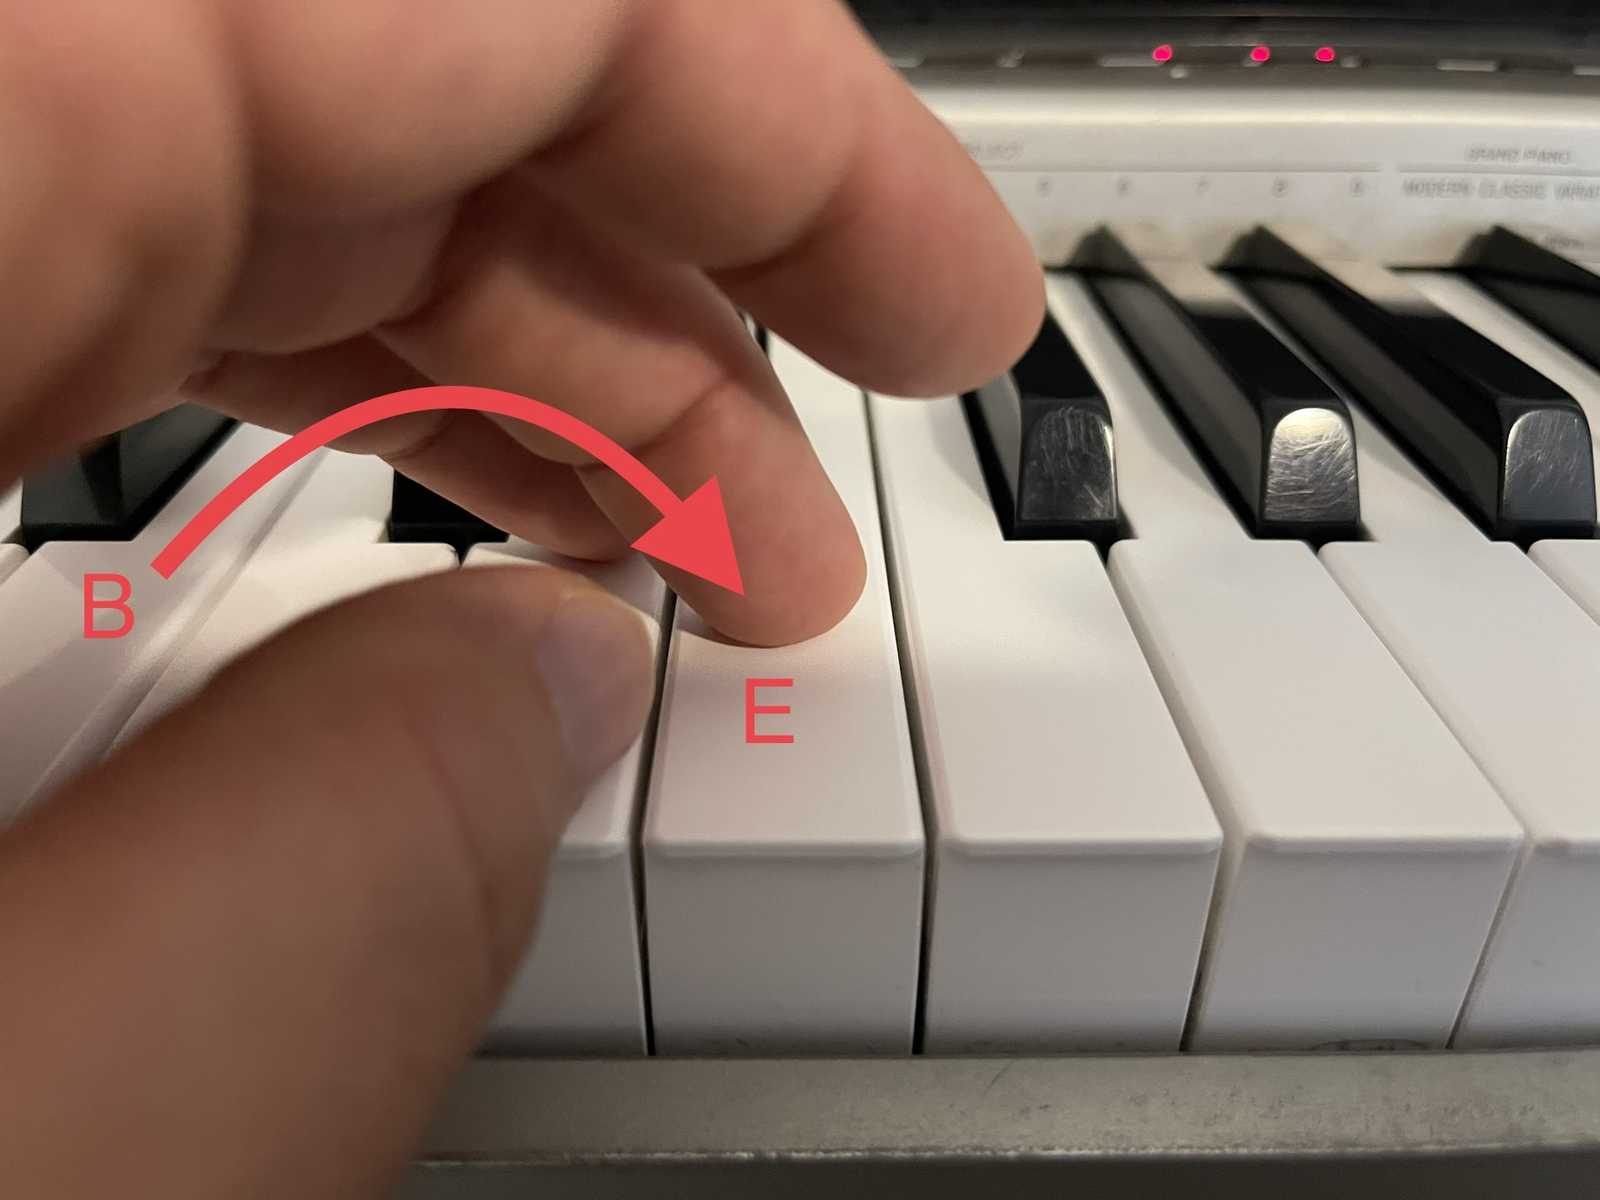
Slide the middle finger over the thumb and use it to play the note E.
9. Play notes E, F#, and G.
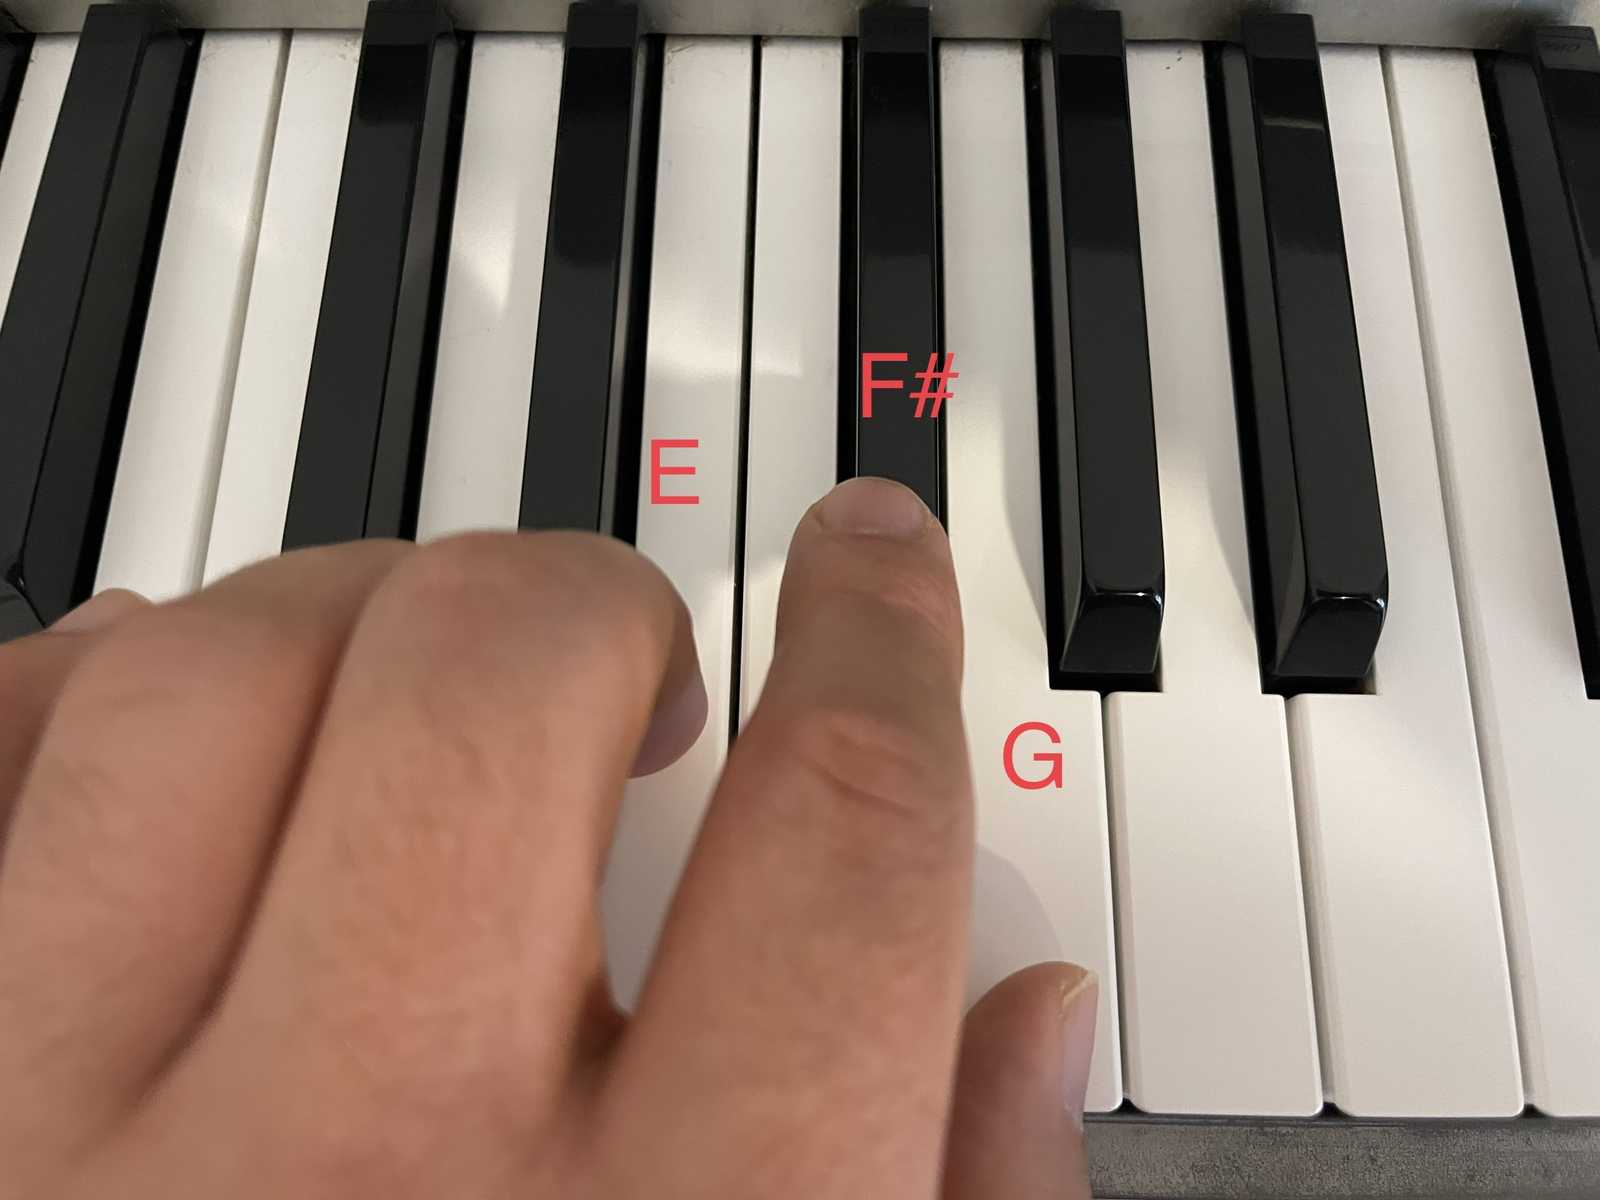
Then we use the remaining fingers to finish the scale starting with the index finger on the note F#, and the thumb to play the final note G.
10. Start in this position to play the descending scale

Now we reverse the fingerings. Starting with the thumb on G, then play the index on F#, and the middle finger on E.
11. Slide your thumb underneath the middle finger
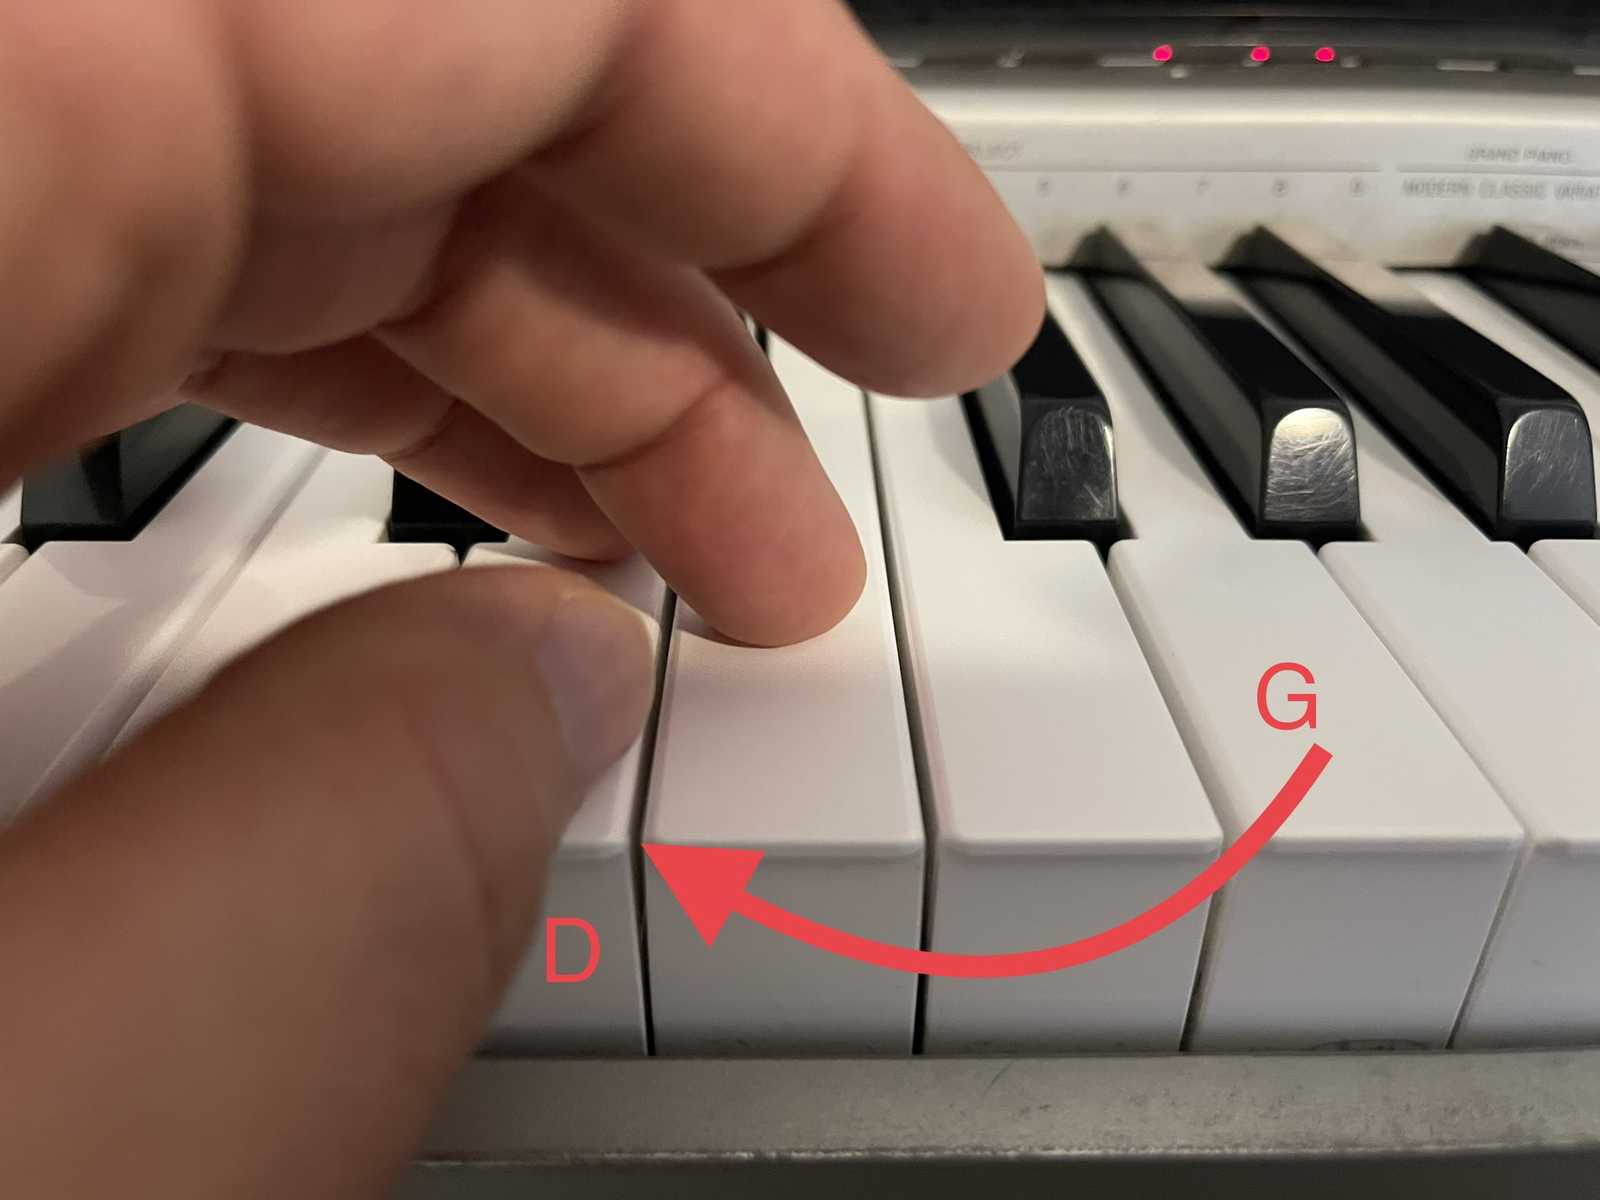
Slide the thumb underneath the middle finger and use it to play the note D.
12. Play notes D, C, B, A, and G.

Now we use the index finger to play C, the middle finger to play B, the ring finger to play A, and the pinky to play G.
13. Start in the same position as before to play multiple octaves

Begin as before by playing the first three notes of the scale (GAB) with the thumb on G, the index on A, and the middle on B.
14. Slide the thumb under the middle finger.

Use the thumb to slide underneath the middle finger so it can play the note C.
15. Play notes C, D, E, and F#.
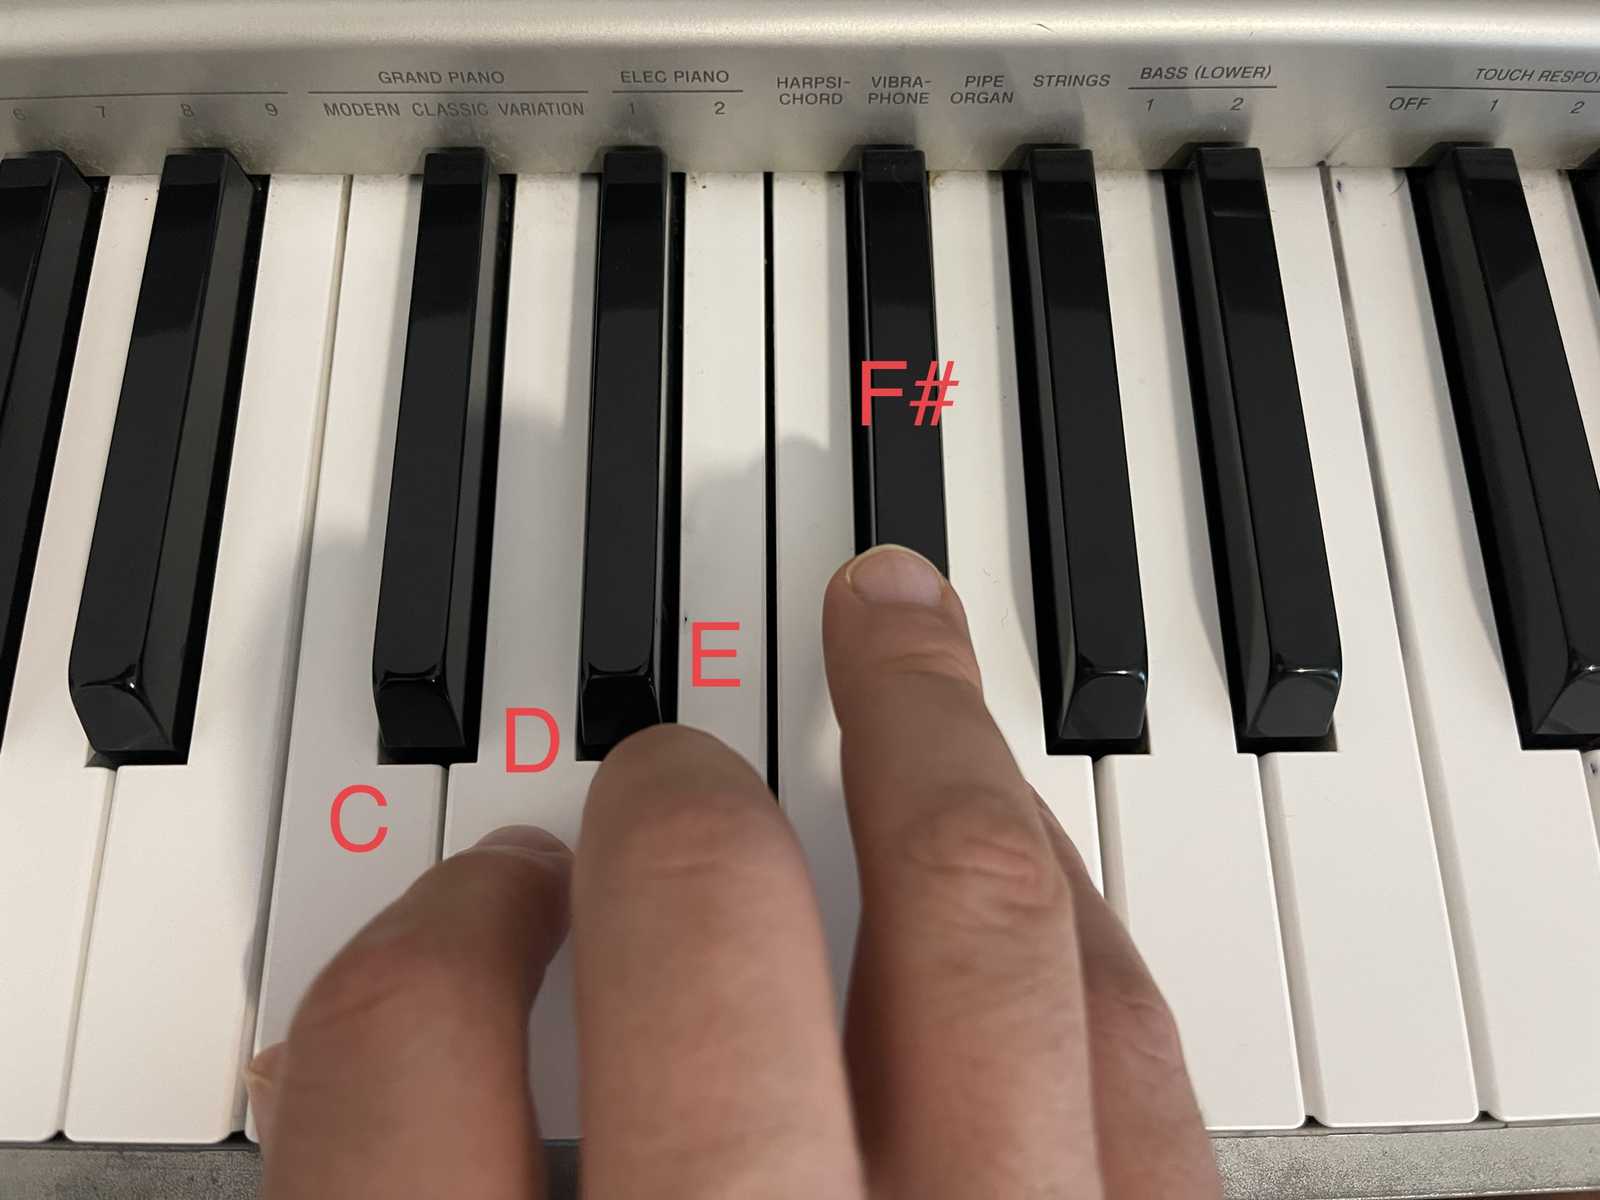
For this step use the index finger to play the note D, the middle finger to play the note E, and the ring finger to play the note F#, but don't play the note G with your pinky here.
16. Slide the thumb under the ring finger.

Our next step is to slide the thumb underneath one more time, this time underneath the ring finger, and use our thumb to play the note G.
17. Now repeat the process from steps 1-3


At this point we can repeat the fingerings from steps 1-3 to play one more octave and finish with the pinky on the note G, or we can extend the scale again by repeating steps 13-15.
18. Begin in the same position as step 7 to play multiple octaves with the left hand

Start by playing the first 5 notes of the scale, starting with your pinky on G, ring on A, middle on B, index on C, and thumb on D.
19. Now cross over the thumb with your middle finger.

Take your middle finger and cross over the thumb to use it to play the note E.
20. Play notes E, F#, and G

Use the middle finger to play the note E, the index finger to play the note F#, and the thumb to play the note G.
21. Cross over the thumb with the ring finger
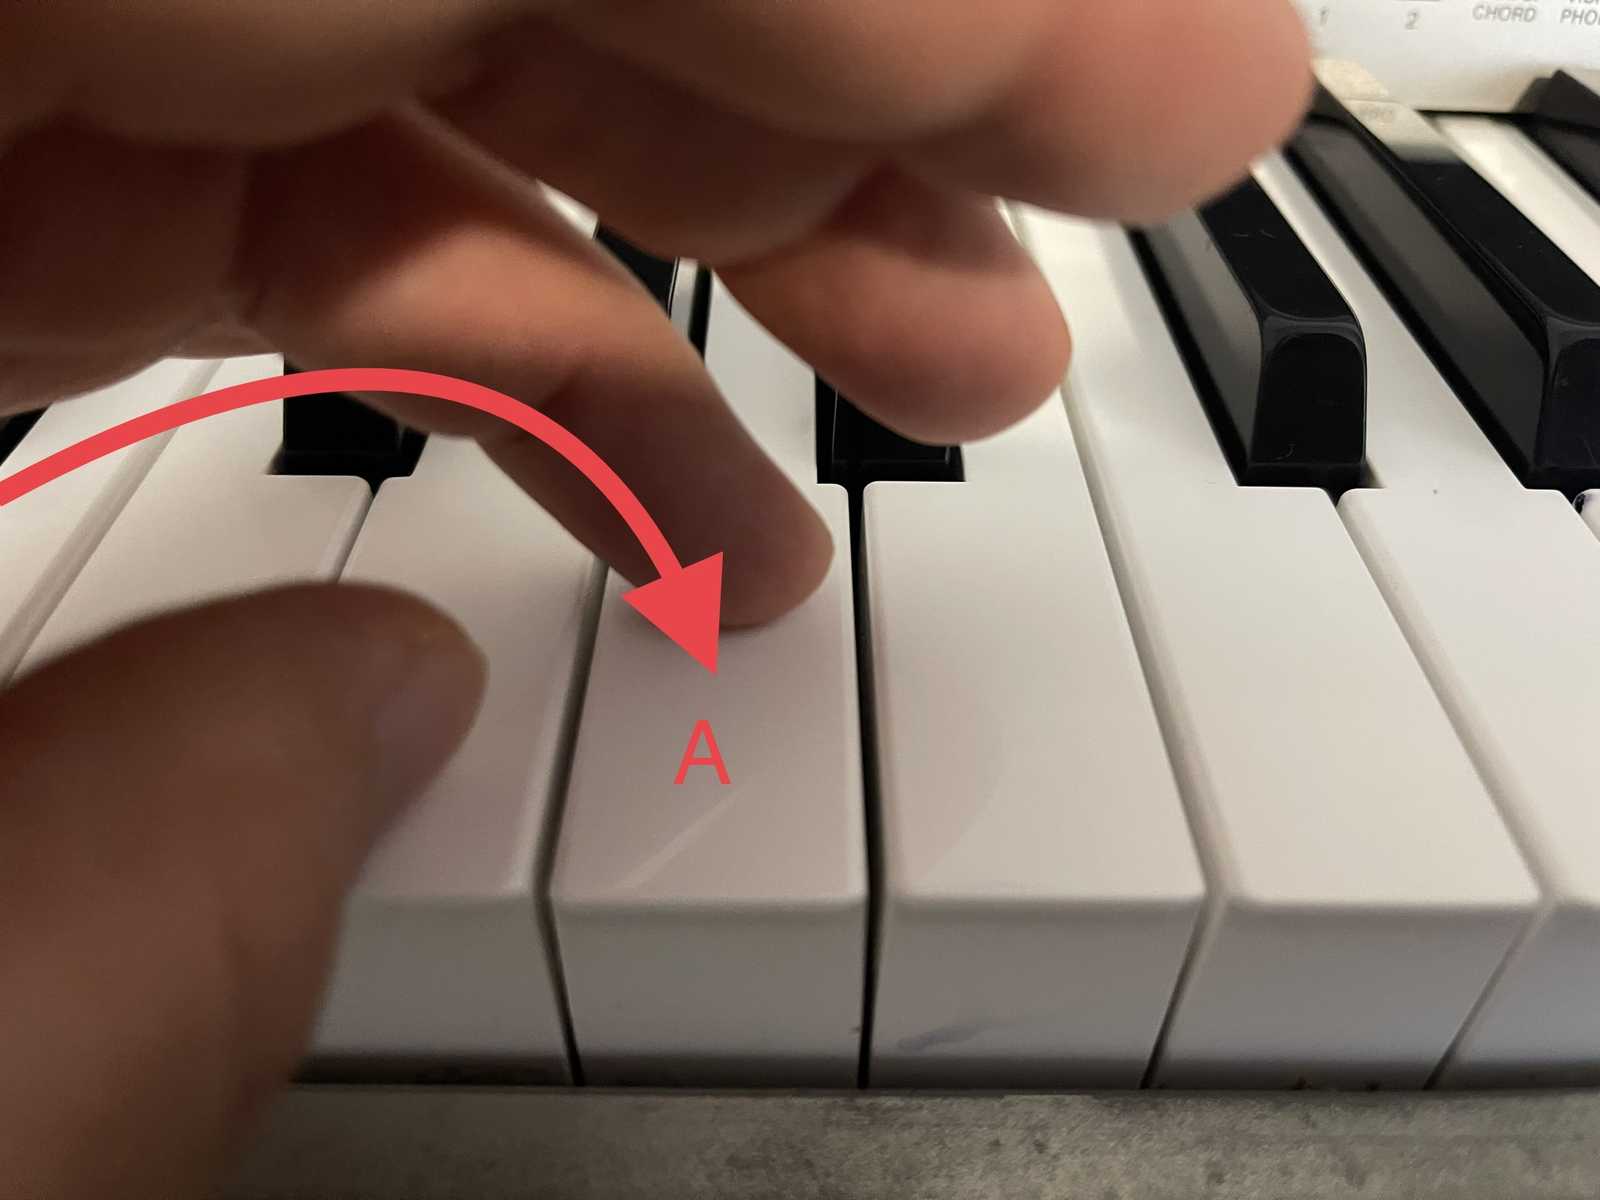
Our final step is to cross the ring finger over the thumb and play the note A.
22. Repeat steps 7-9


At this point we can use the first fingerings from steps 7-9 to play one more octave and finish with the thumb on the note G, or we can extend the scale again by redoing steps 13-16.
Conclusion
Let's summarize what we've discussed now. The G Major scale is a series of 6 white keys and one black key in between any two Gs on the piano and that the range between the two Gs is called an octave. To play this scale we need to place the hand in two different positions by having the middle finger pass over or under the thumb. We can reverse these fingerings to play the scale backwards, or descending. Lastly, we can extend these scales fluidly to play multiple octaves by altering the fingering at the end of the scale.
Related

Article
Basics of Interpretation on the piano
Learn three basic ways to interpret music on the piano.
Staff


