How to set up your clarinet mouthpiece
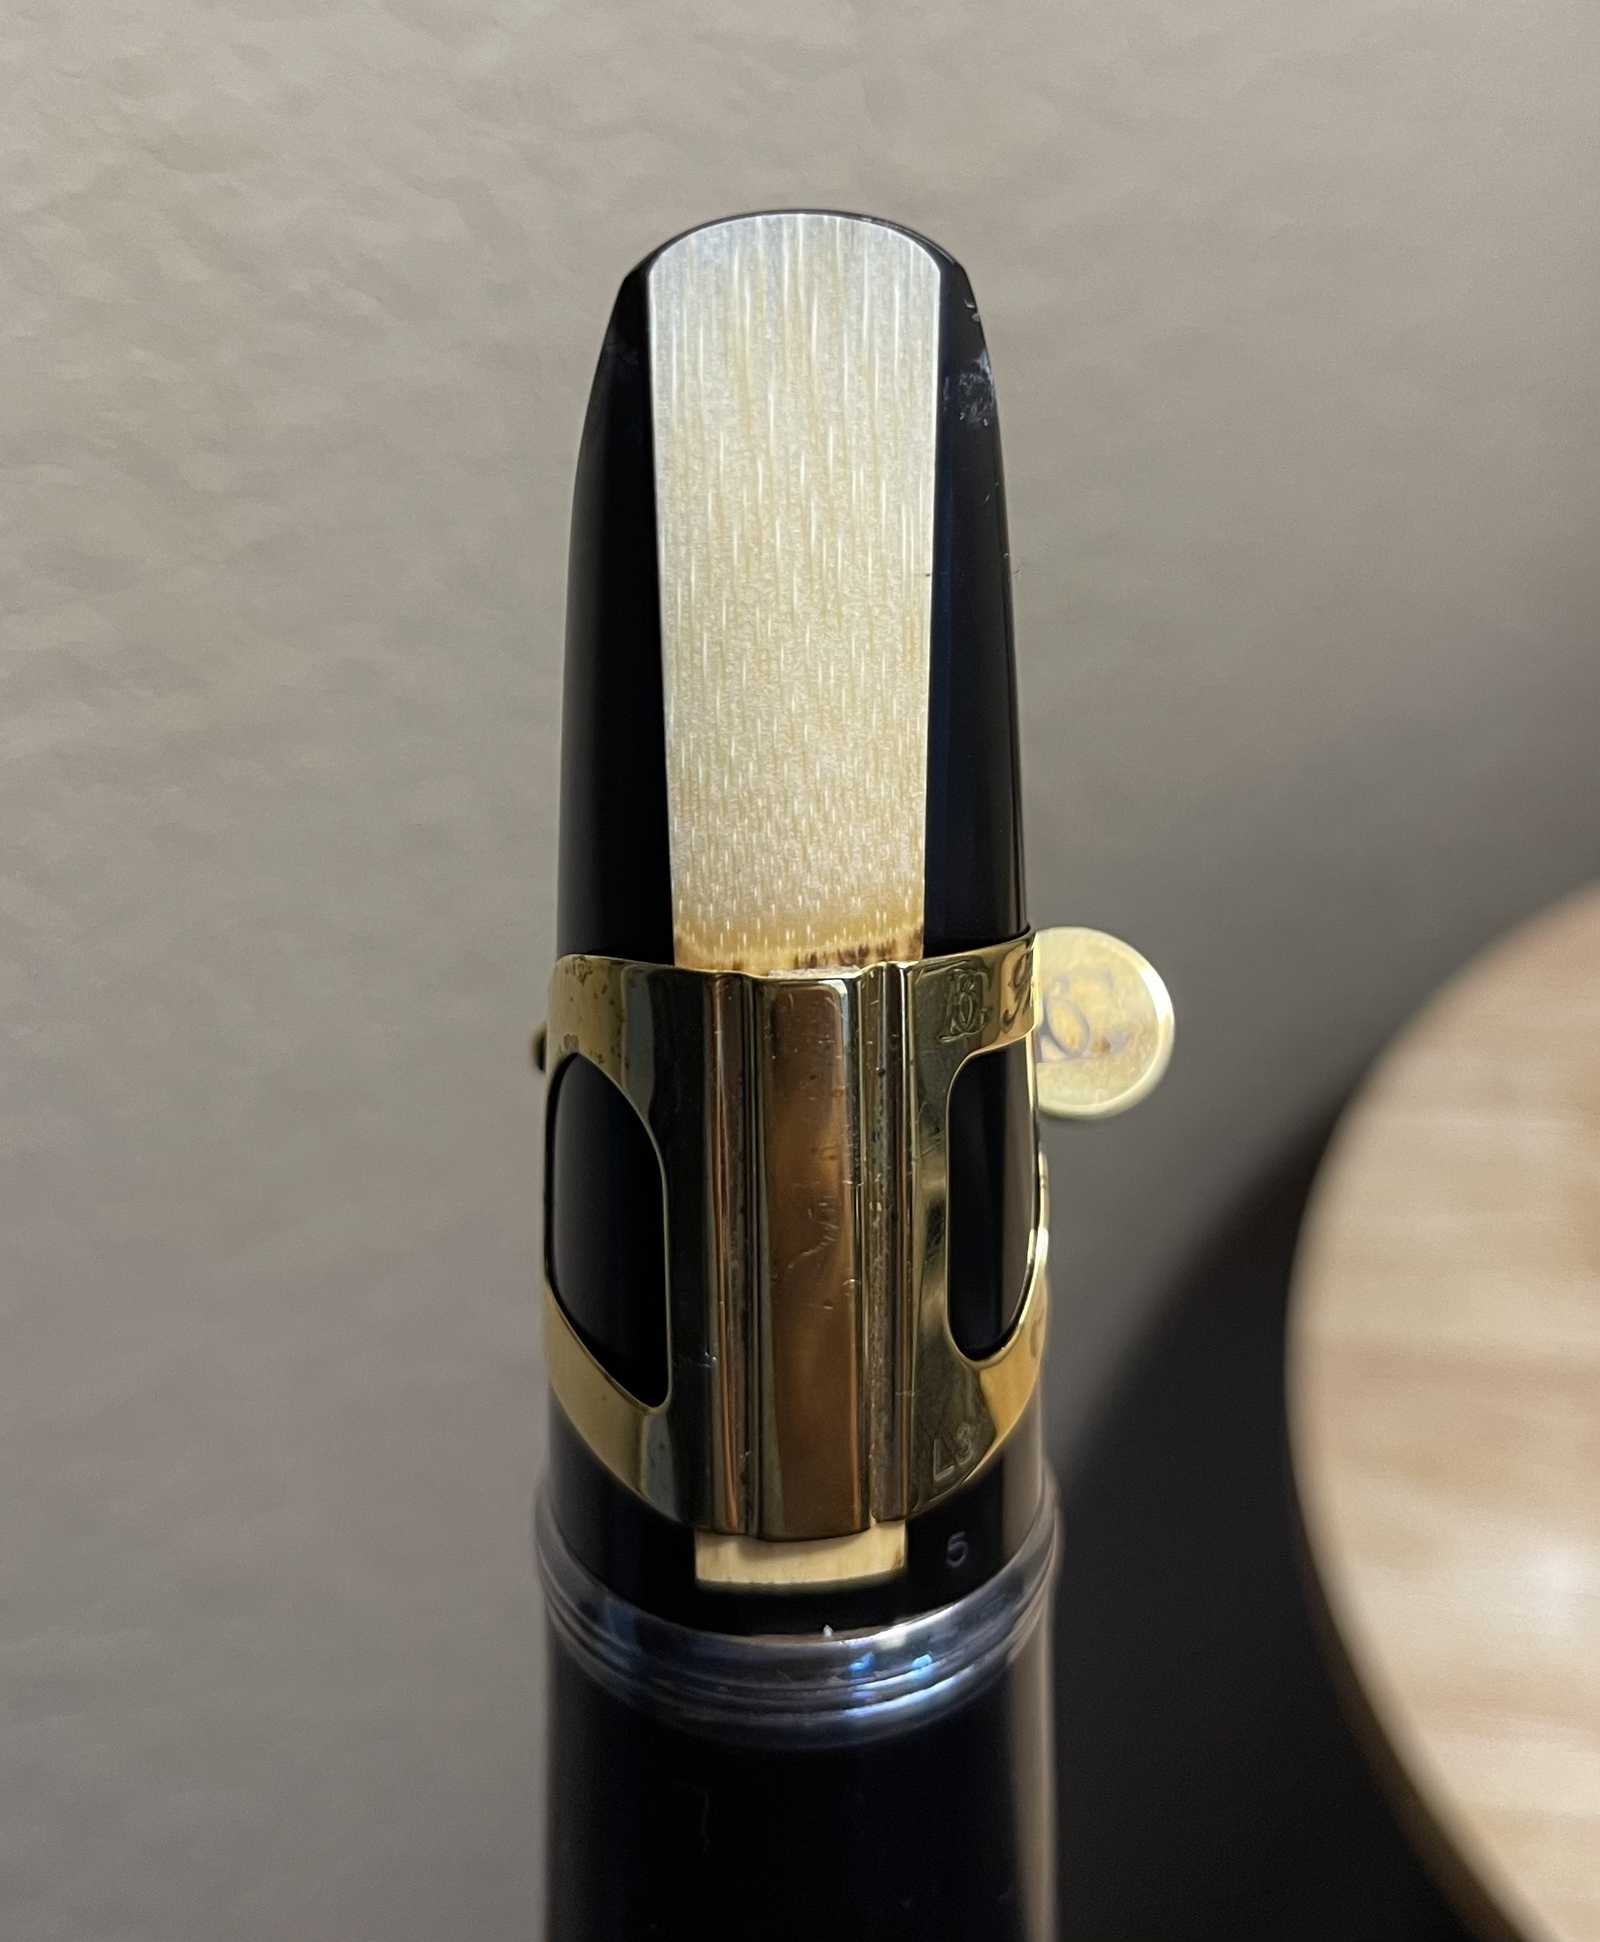
Getting familiar with the mouthpiece and reed
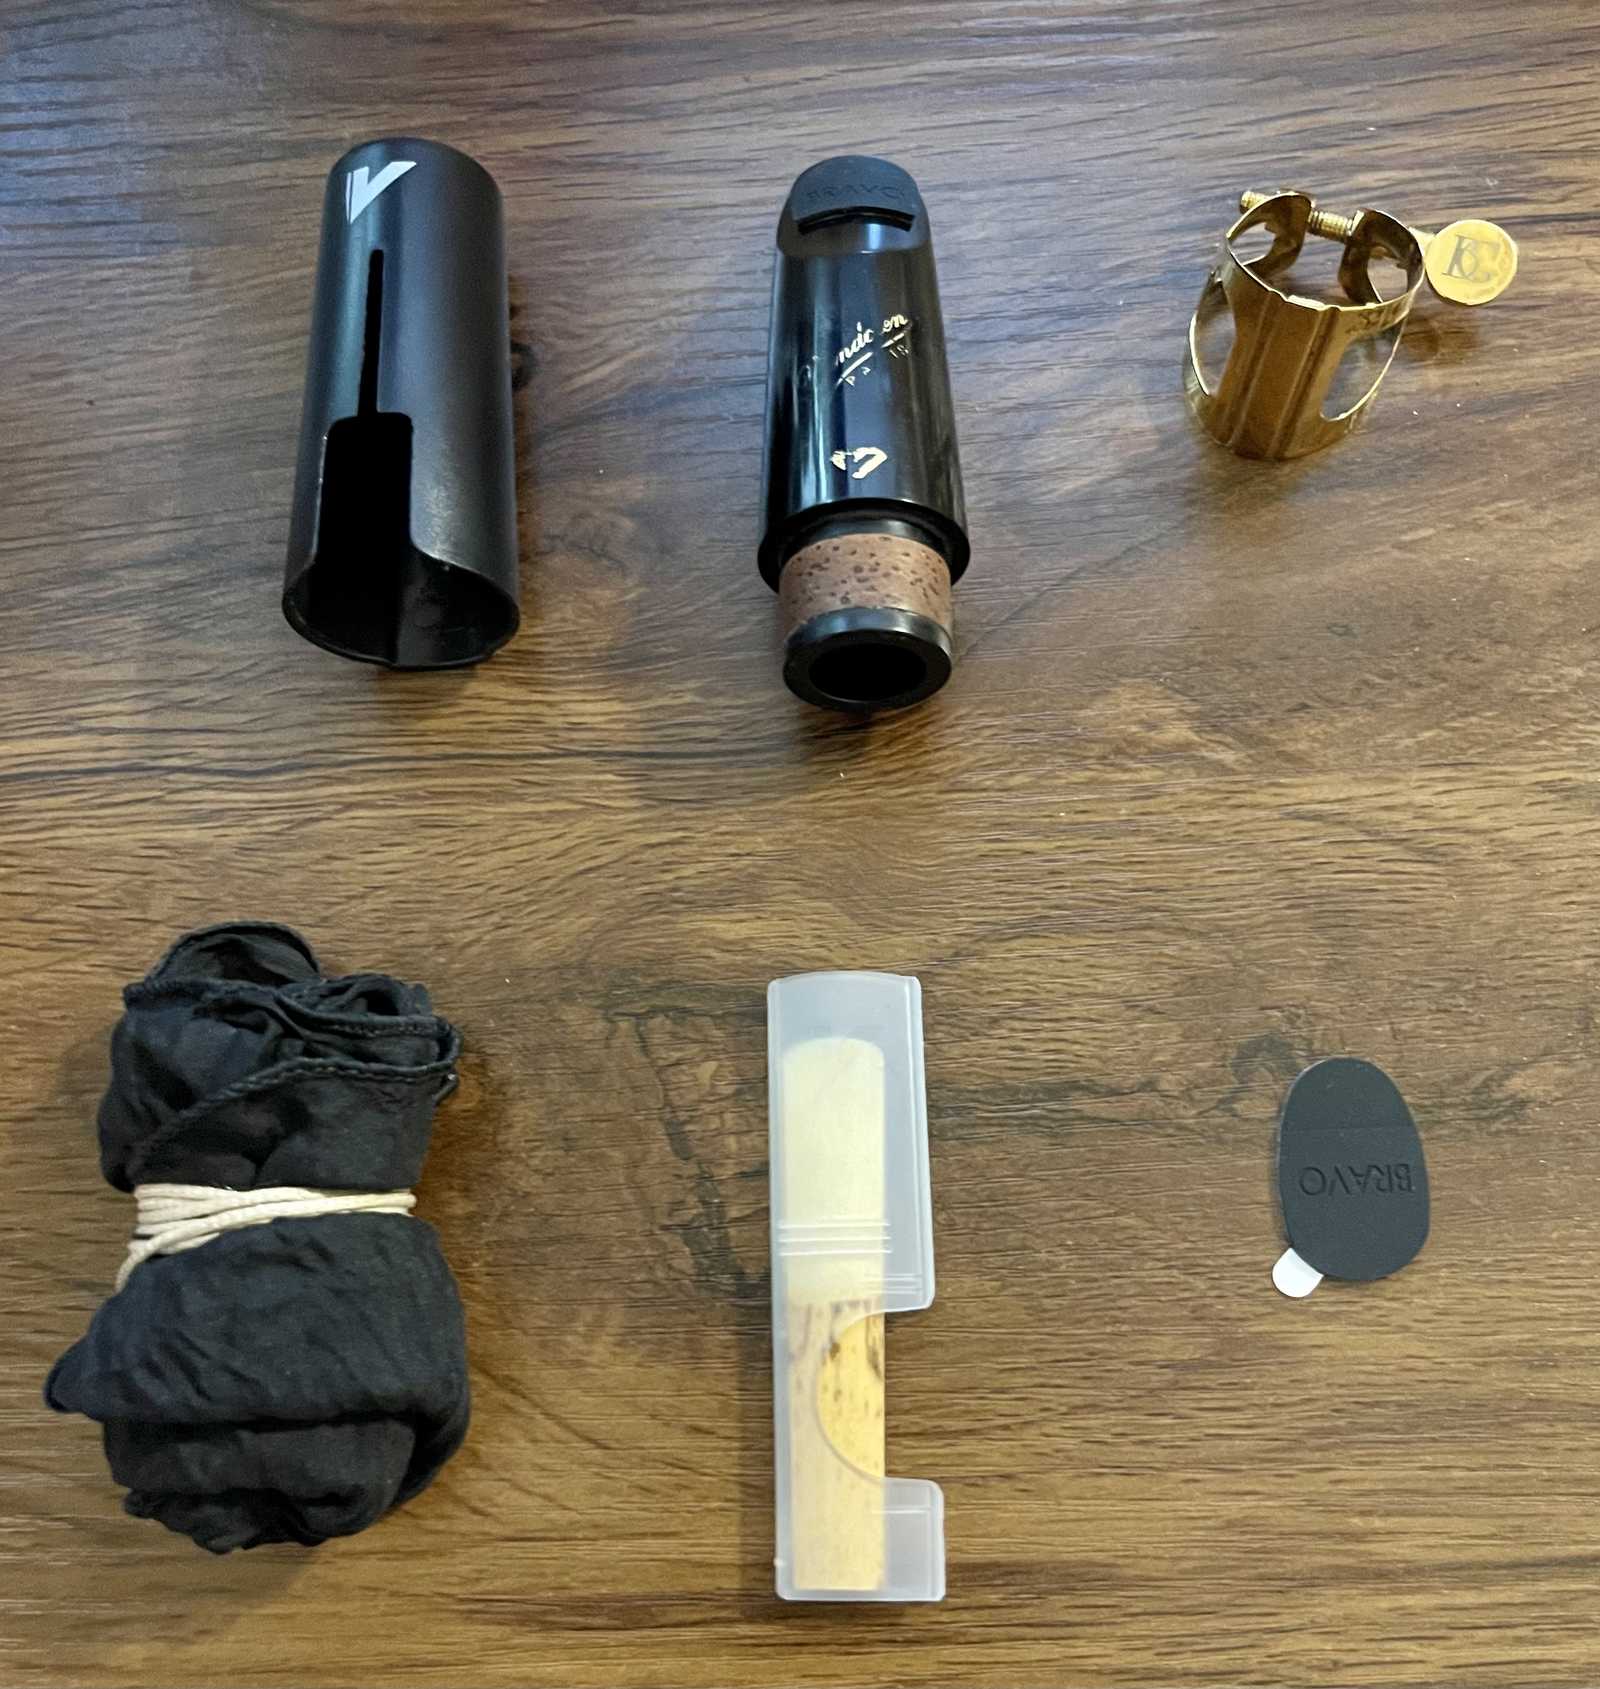
Before we learn how to assemble a clarinet mouthpiece, we will first go over the materials that we will need to assemble and clean the mouthpiece. You'll need to get good at this during your clarinet lessons, so you can spend more time playing and less time putting your instrument together.
- Mouthpiece
- Mouthpiece cap
- Ligature
- Swab
- Reed
- Mouthpiece cushion
- And most importantly an already assembled clarinet!
Mouthpiece Anatomy
The clarinet mouthpiece has three basic parts: the mouthpiece facing, the tone chamber, and the bore. You will need to identify where the facing is placed.
The facing contains the reed table, two side rails and the tip rail. This will be where you place the reed on the mouthpiece.
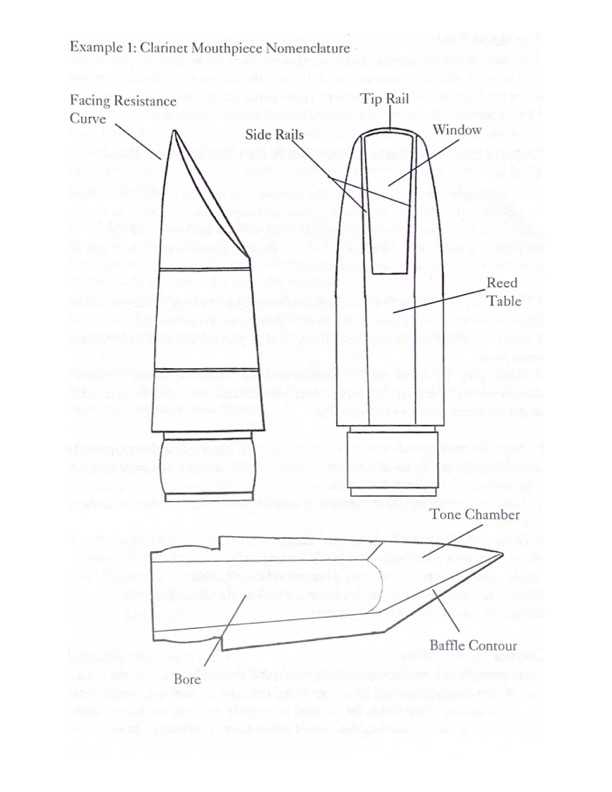
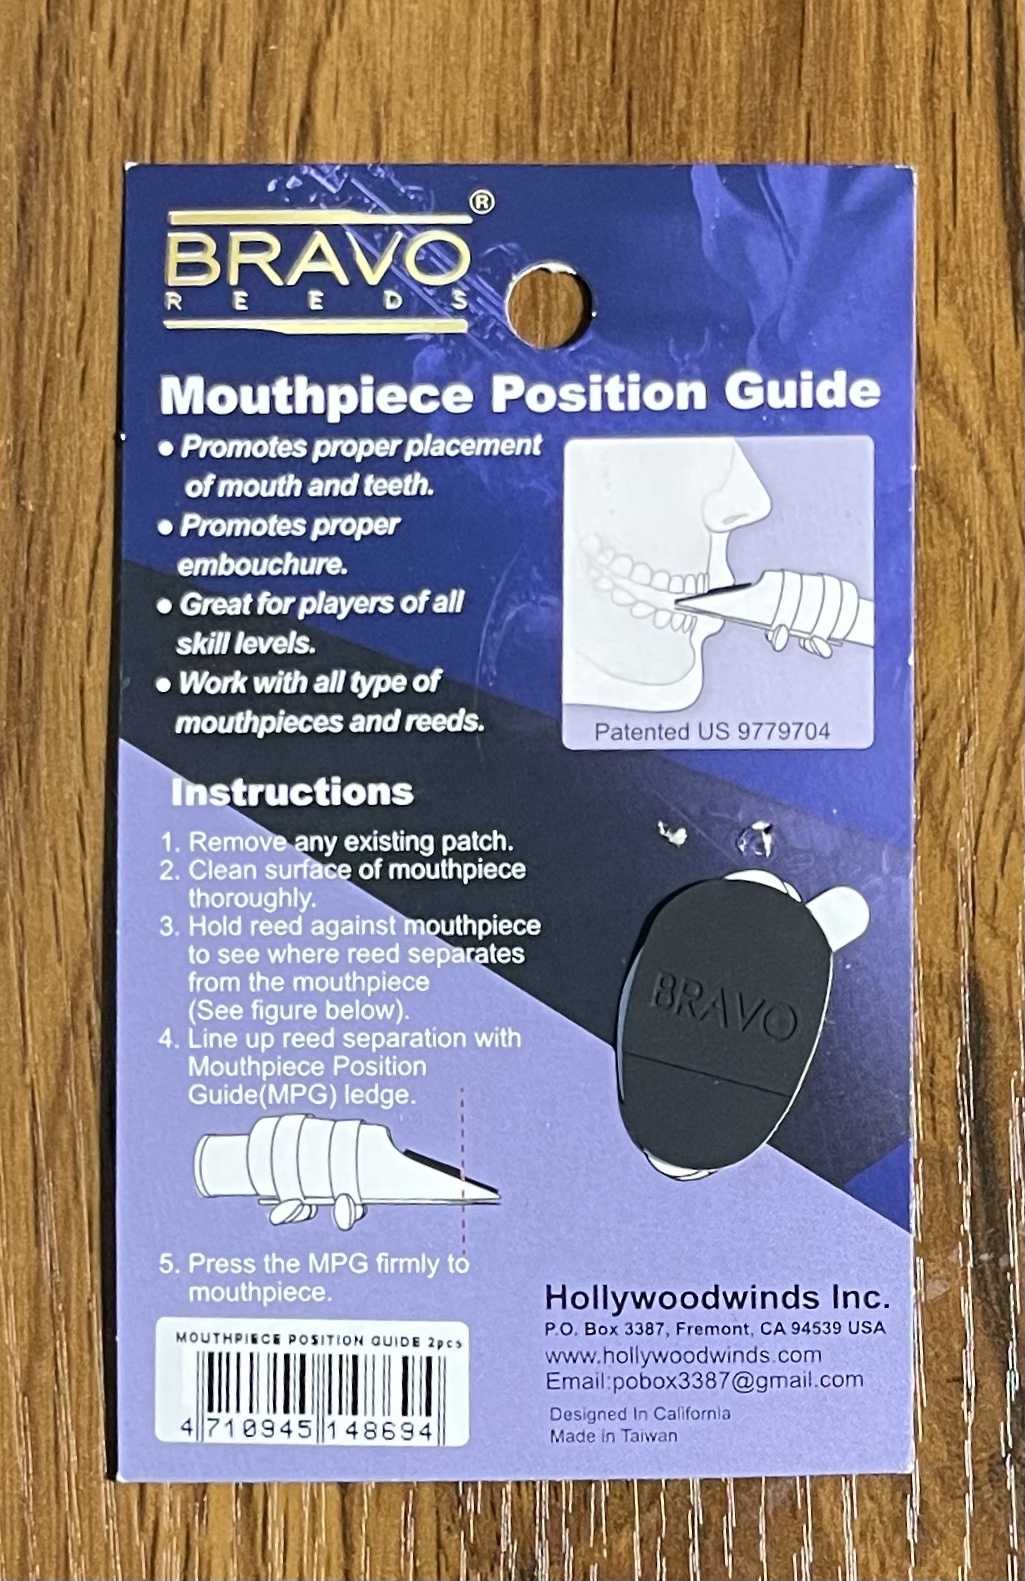
The external area opposite the internal baffle contour (see Example 1 above) is known as the "beak". The beak is where you will place the mouthpiece cushion.
The cushion helps protect the mouthpiece and makes is more comfortable when resting the teeth on the mouthpiece. The mouthpiece cushion will also help prevent your mouthpiece from moving around as you play, allowing you to keep a steady embouchure.
Clarinet Reed Anatomy
Reed Table
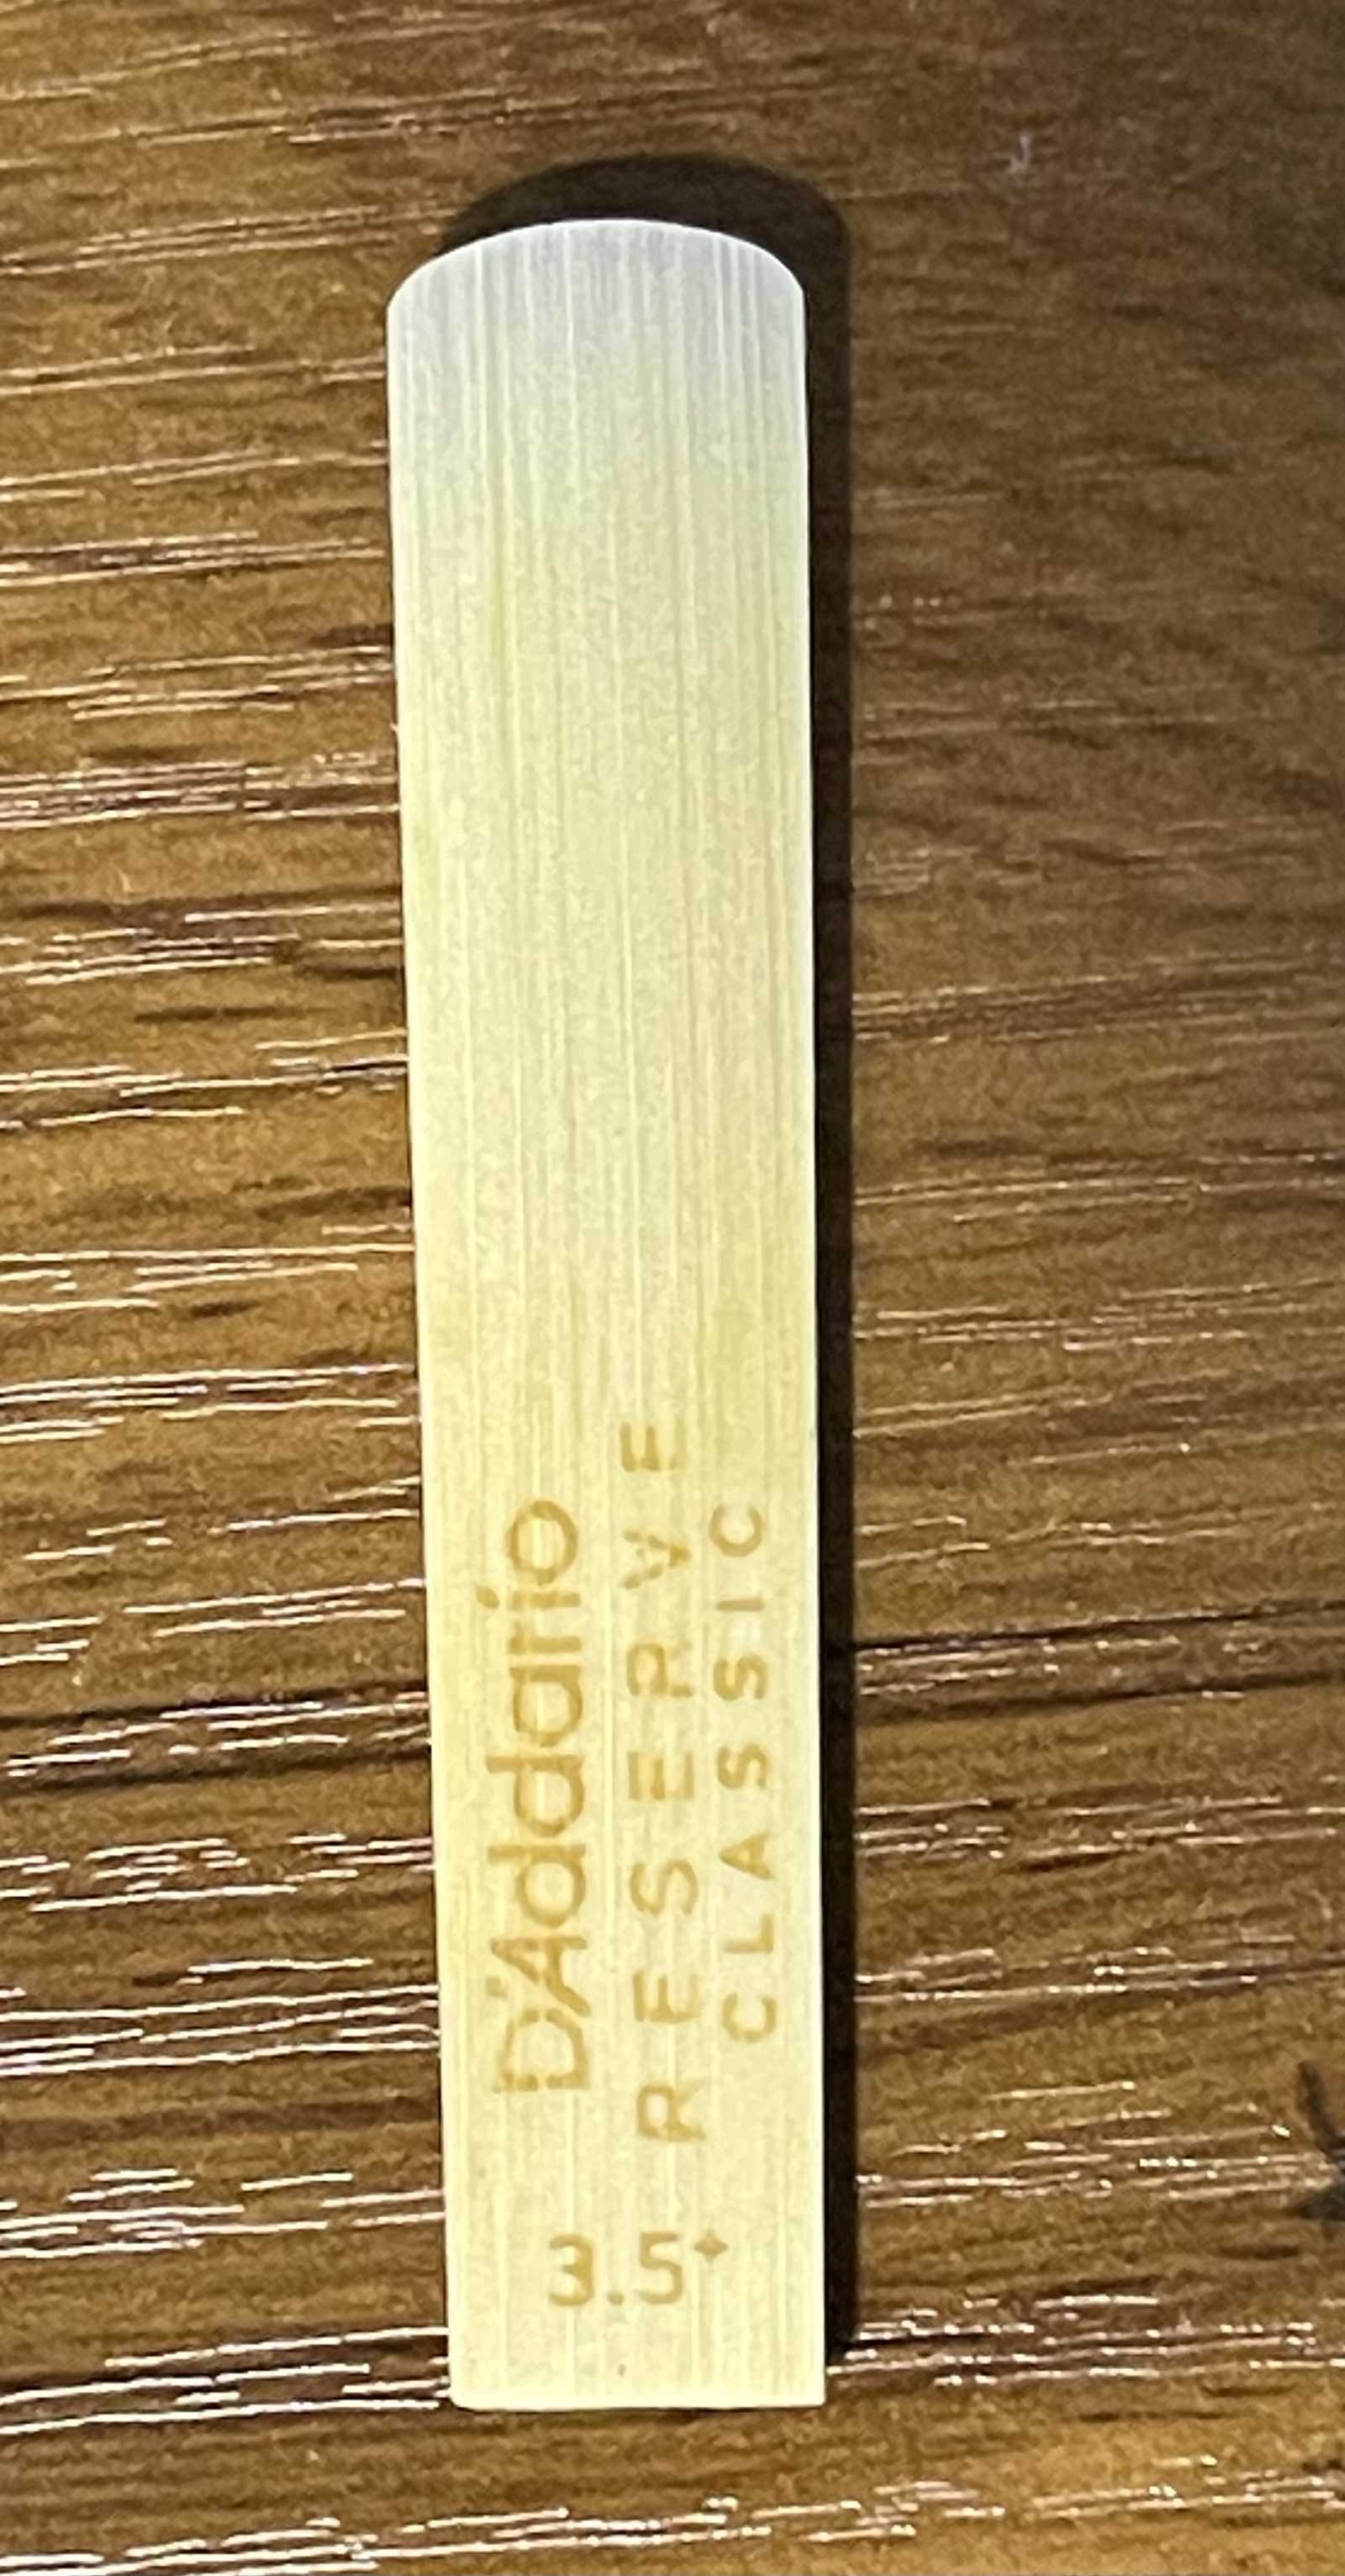
On this side you will find the strength of the reed, and any branding marks from the reed company.
Higher reed strength means that the reed gives more resistance or backpressure when air is passed through. Most beginners should start with a reed strength in the 1.5-2.5 range.
You will later attach the reed with the flat table-side of the reed flush with the mouthpiece table.
Front side of the clarinet reed
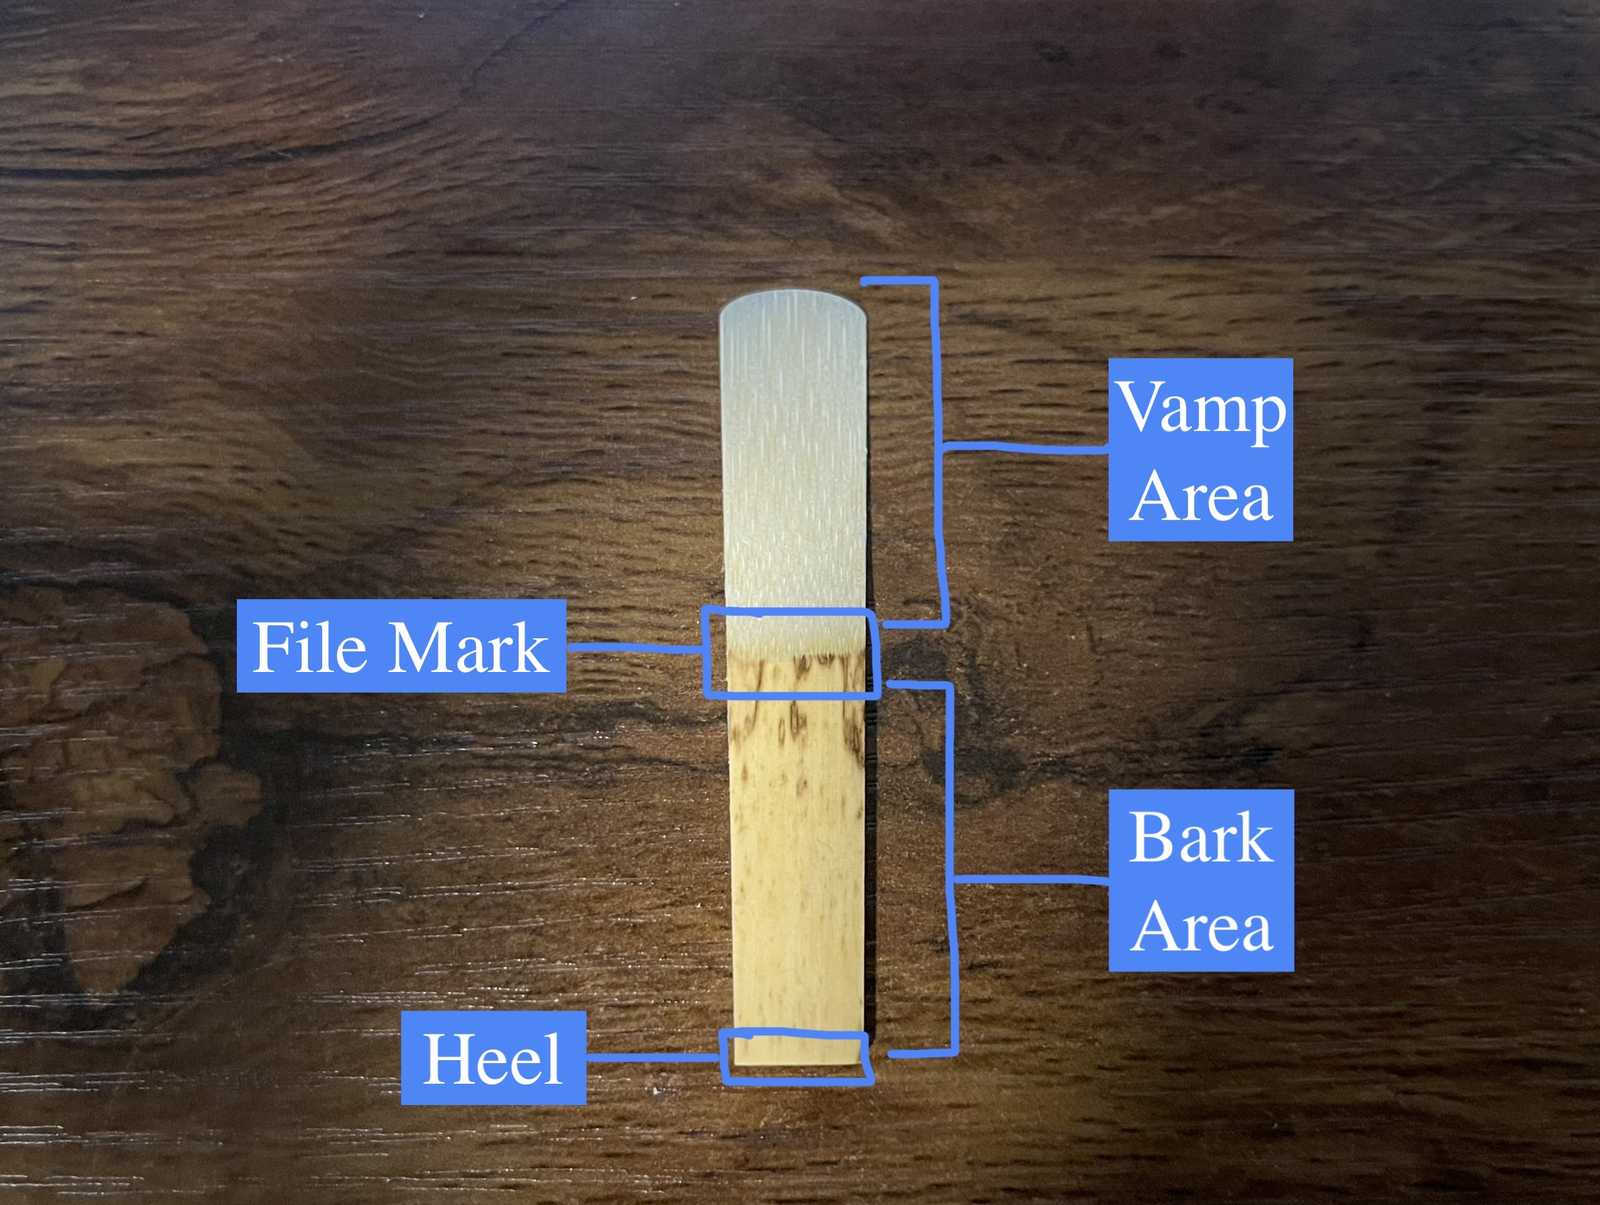
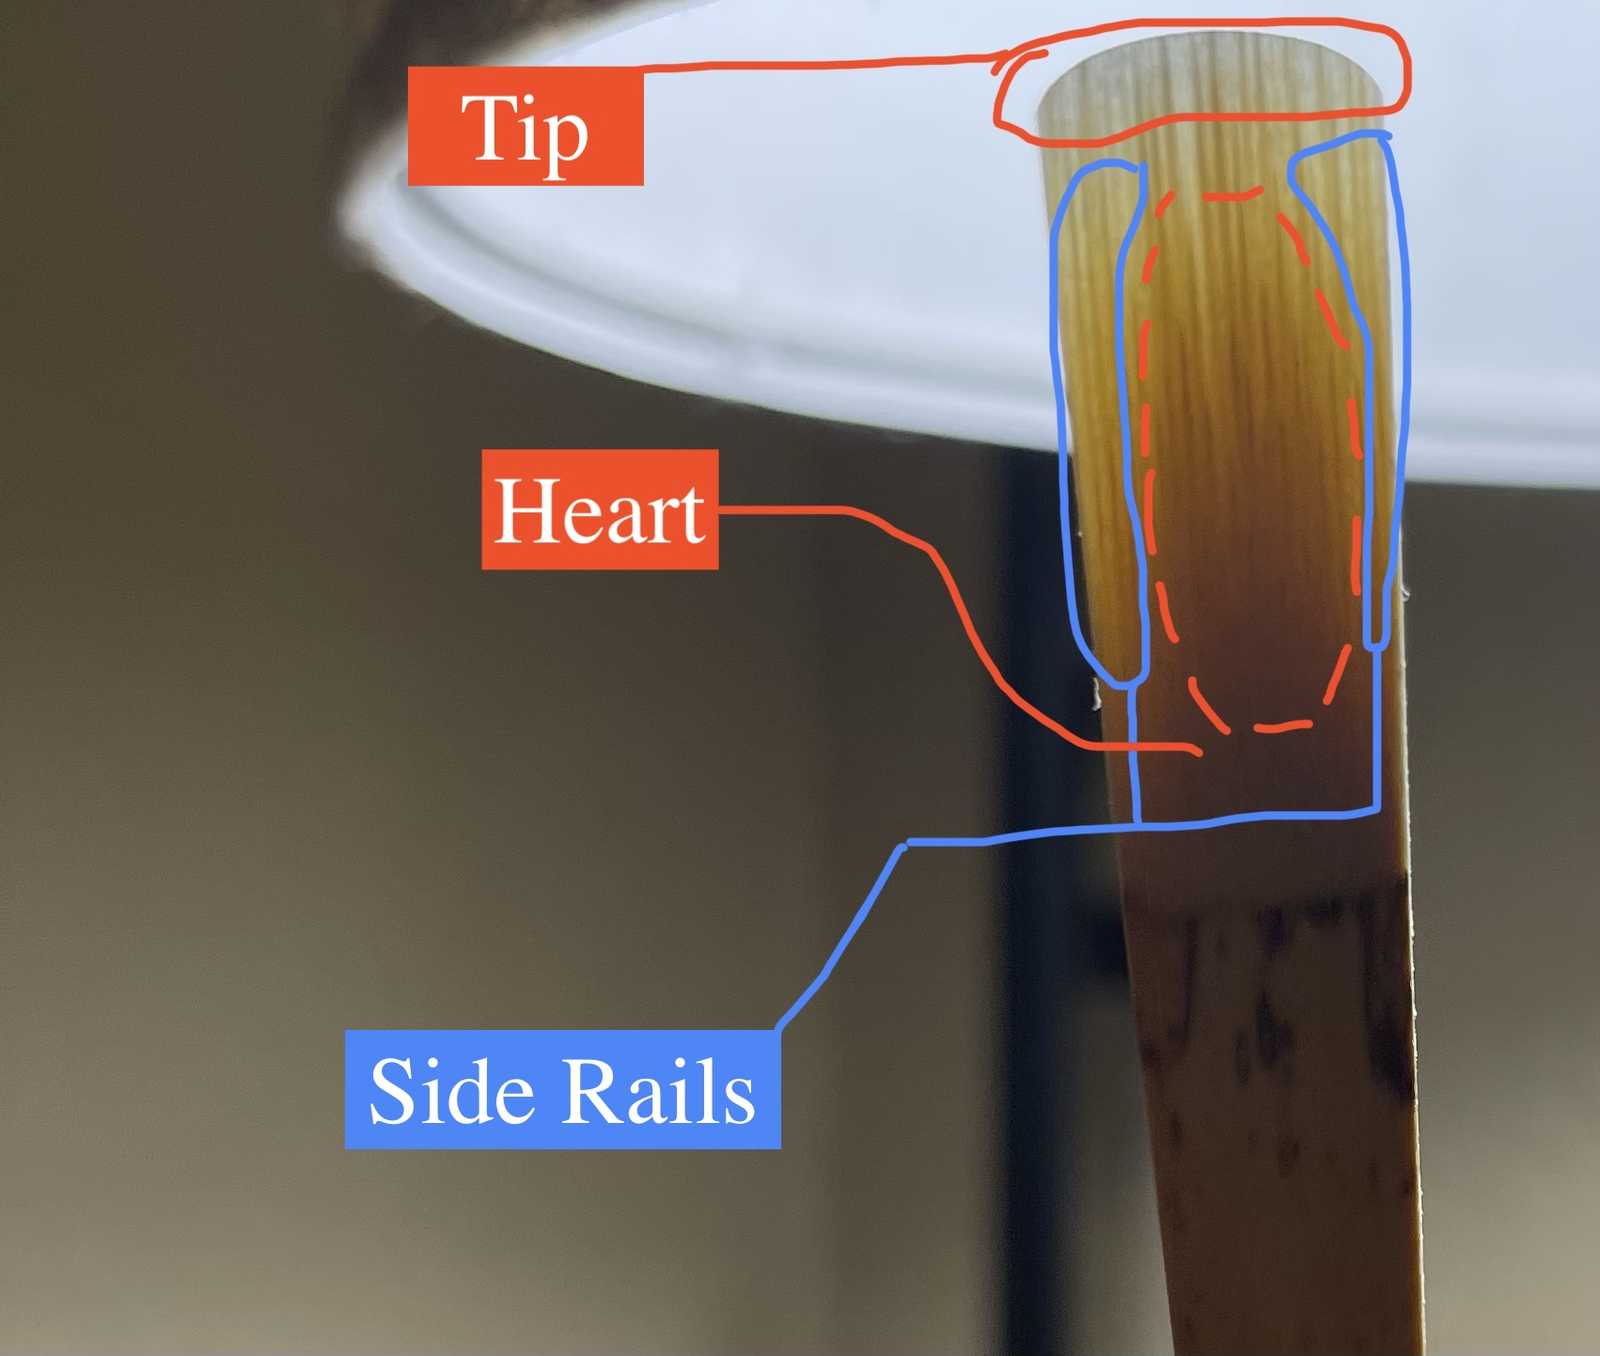
The front part of the clarinet reed has two main areas, the vamp and bark. The vamp area includes the tip, heart and rail. The bark includes the file mark and heel.
How to assemble and disassemble the clarinet mouthpiece
Step by step on setting the mouthpiece up to play on the clarinet. You should already have the clarinet assembled at this point.
1. Take the reed out of the case
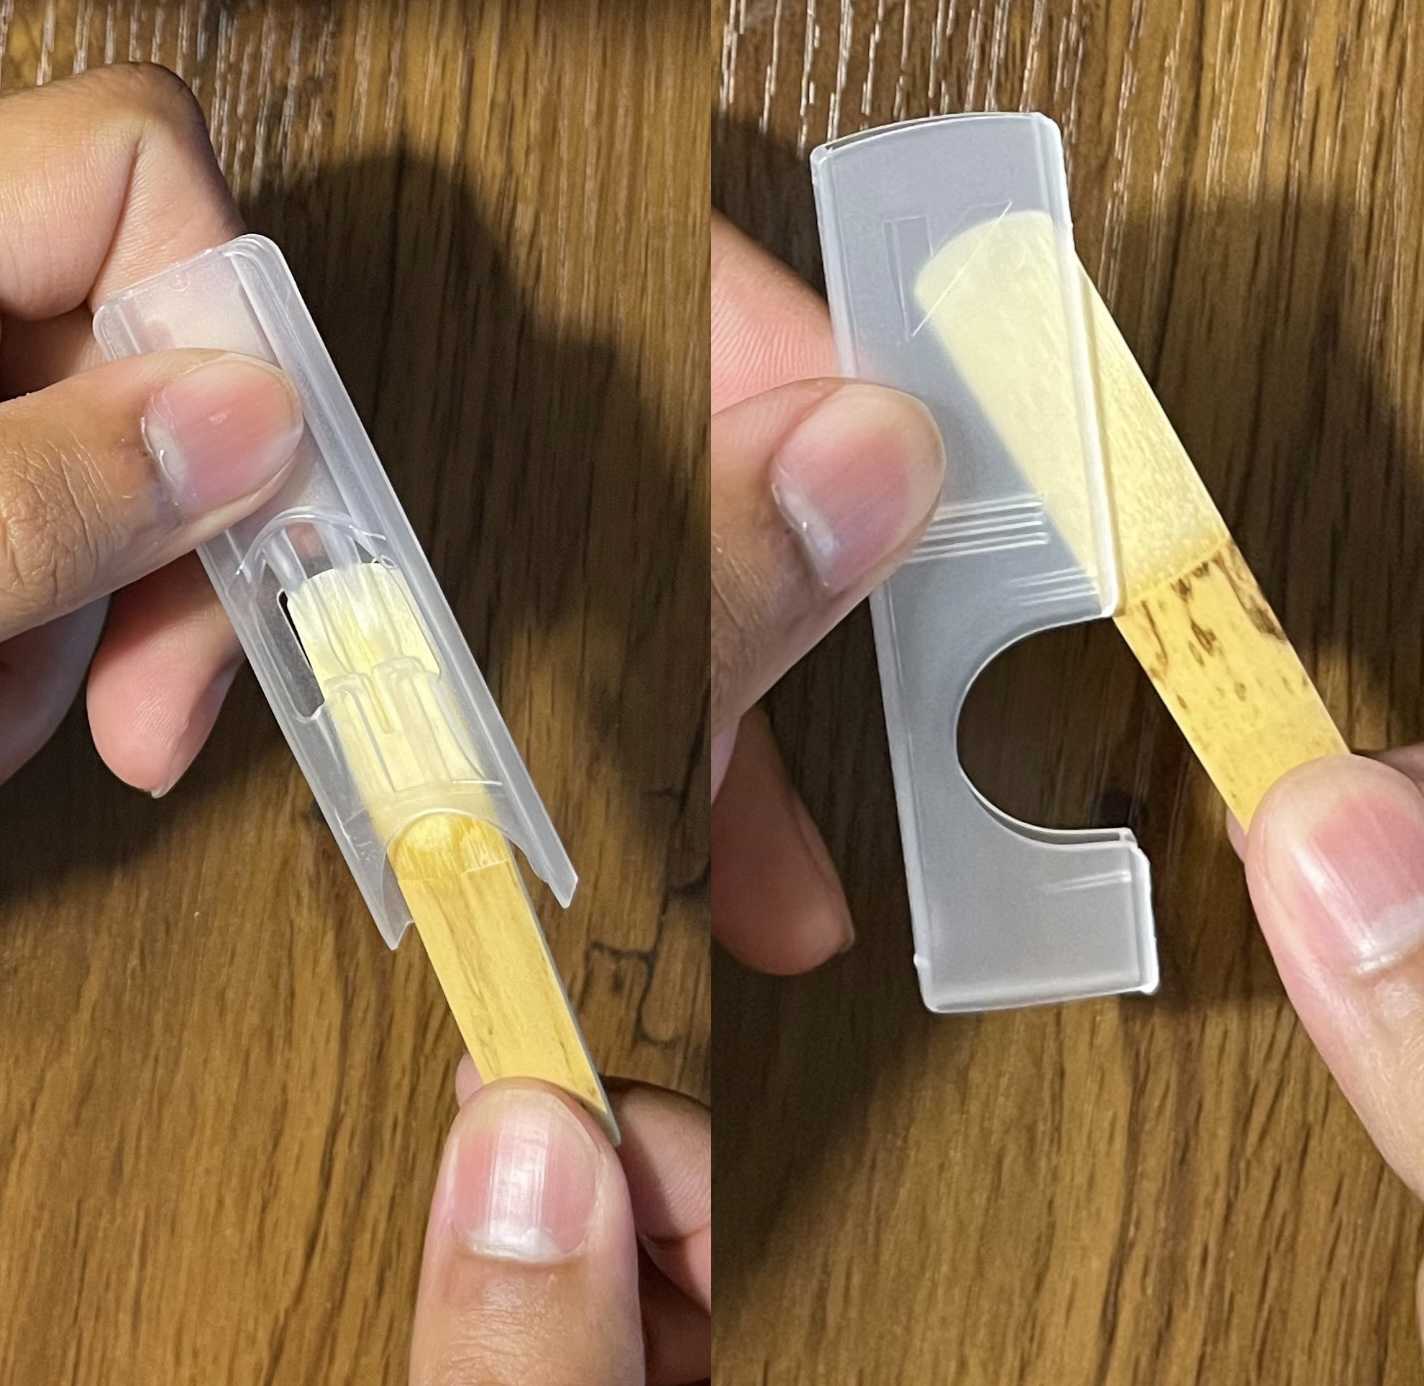
Take the used reed out of the plastic cover.
2. Place reed into your mouth for soaking time
place it in your mouth to soak for about 1 minute. If the reed is new then some additional soaking time will be required.
3. Put the ligature on the mouthpiece
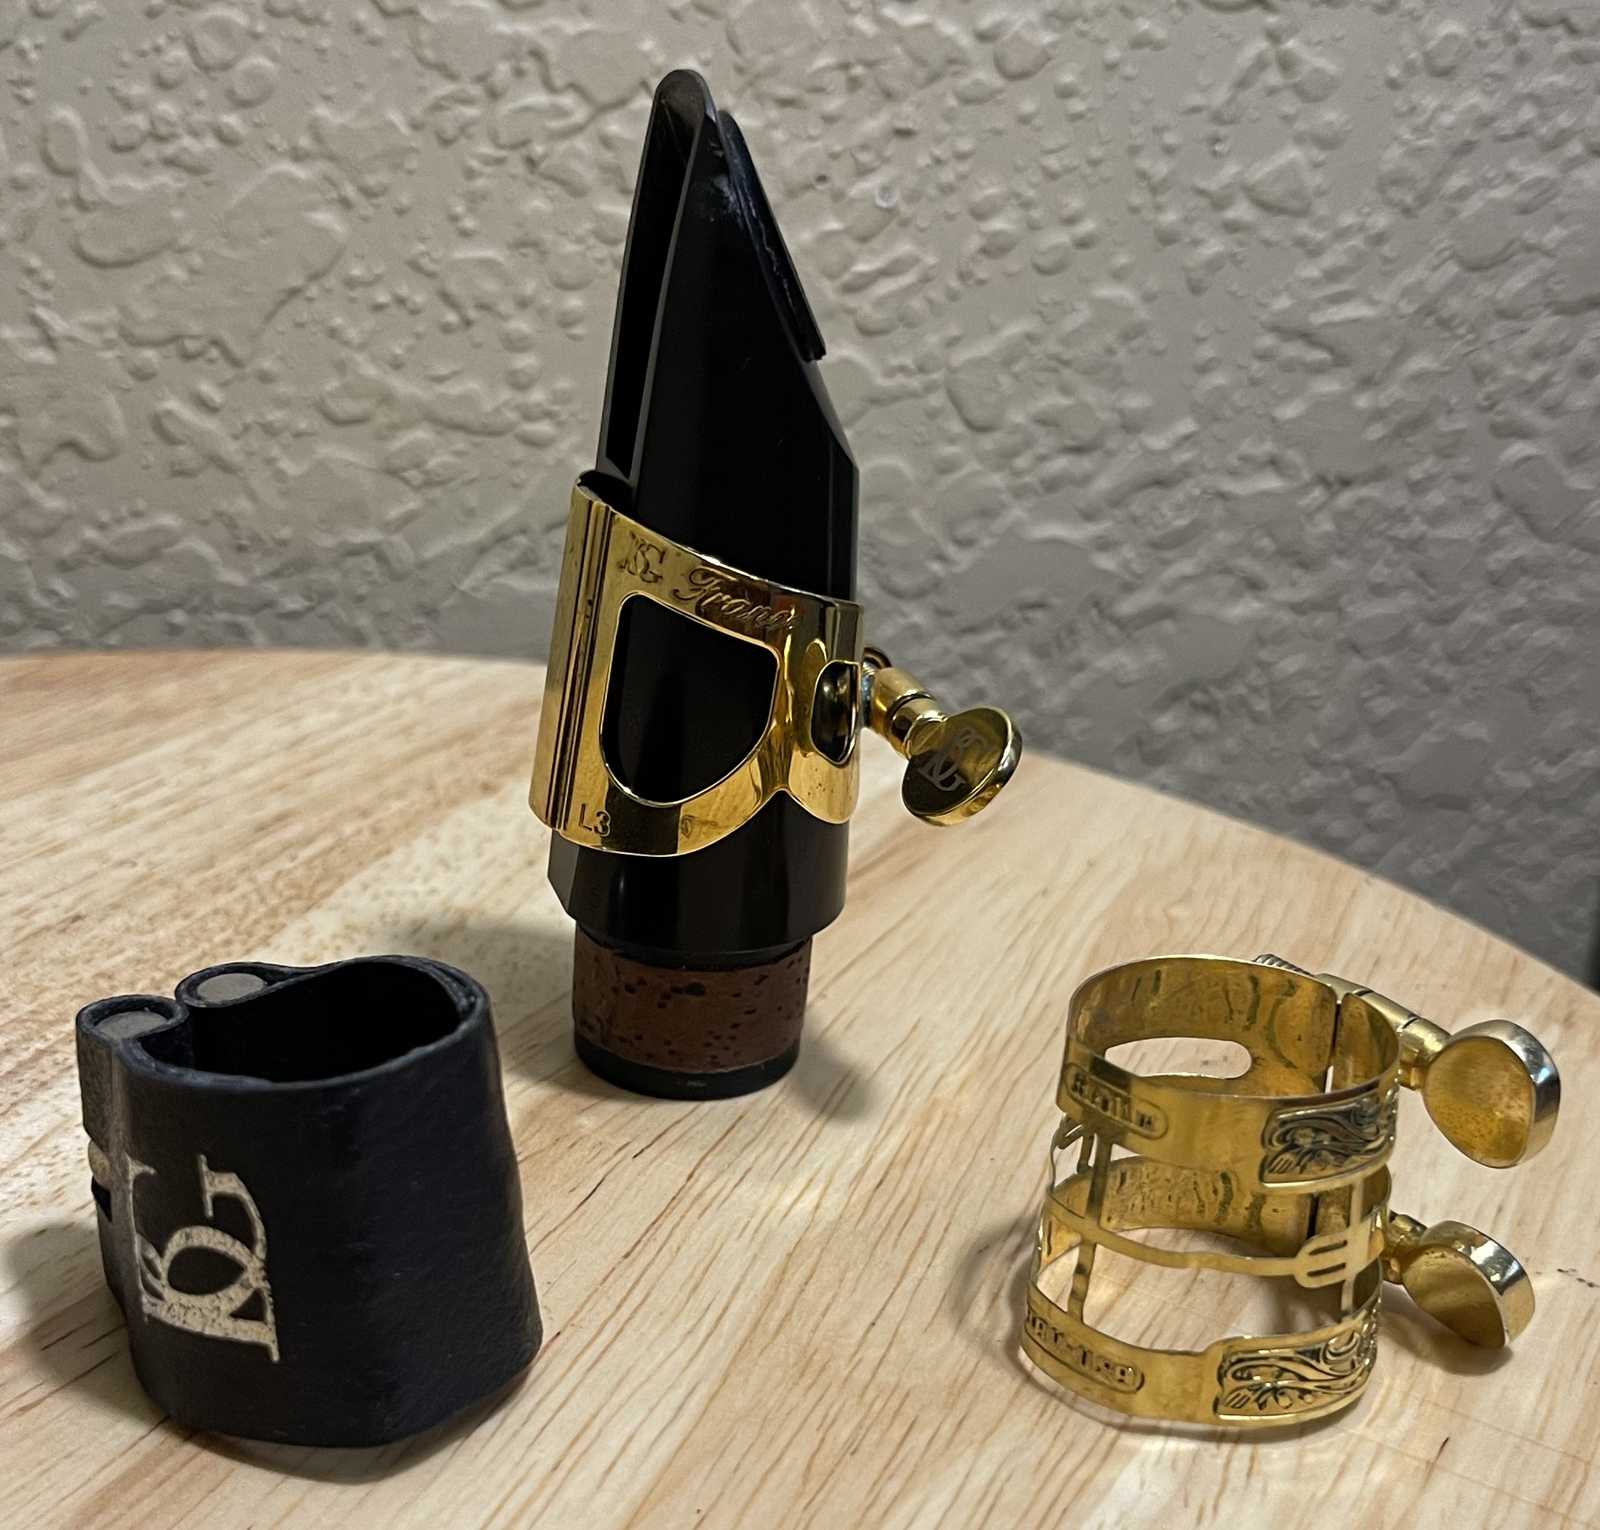
Get your ligature and make sure the screws are loose before placing it around the mouthpiece. The screws head should be on the right side of the mouthpiece as you are facing the reed table.
4. Slide the reed between the ligature and mouthpiece
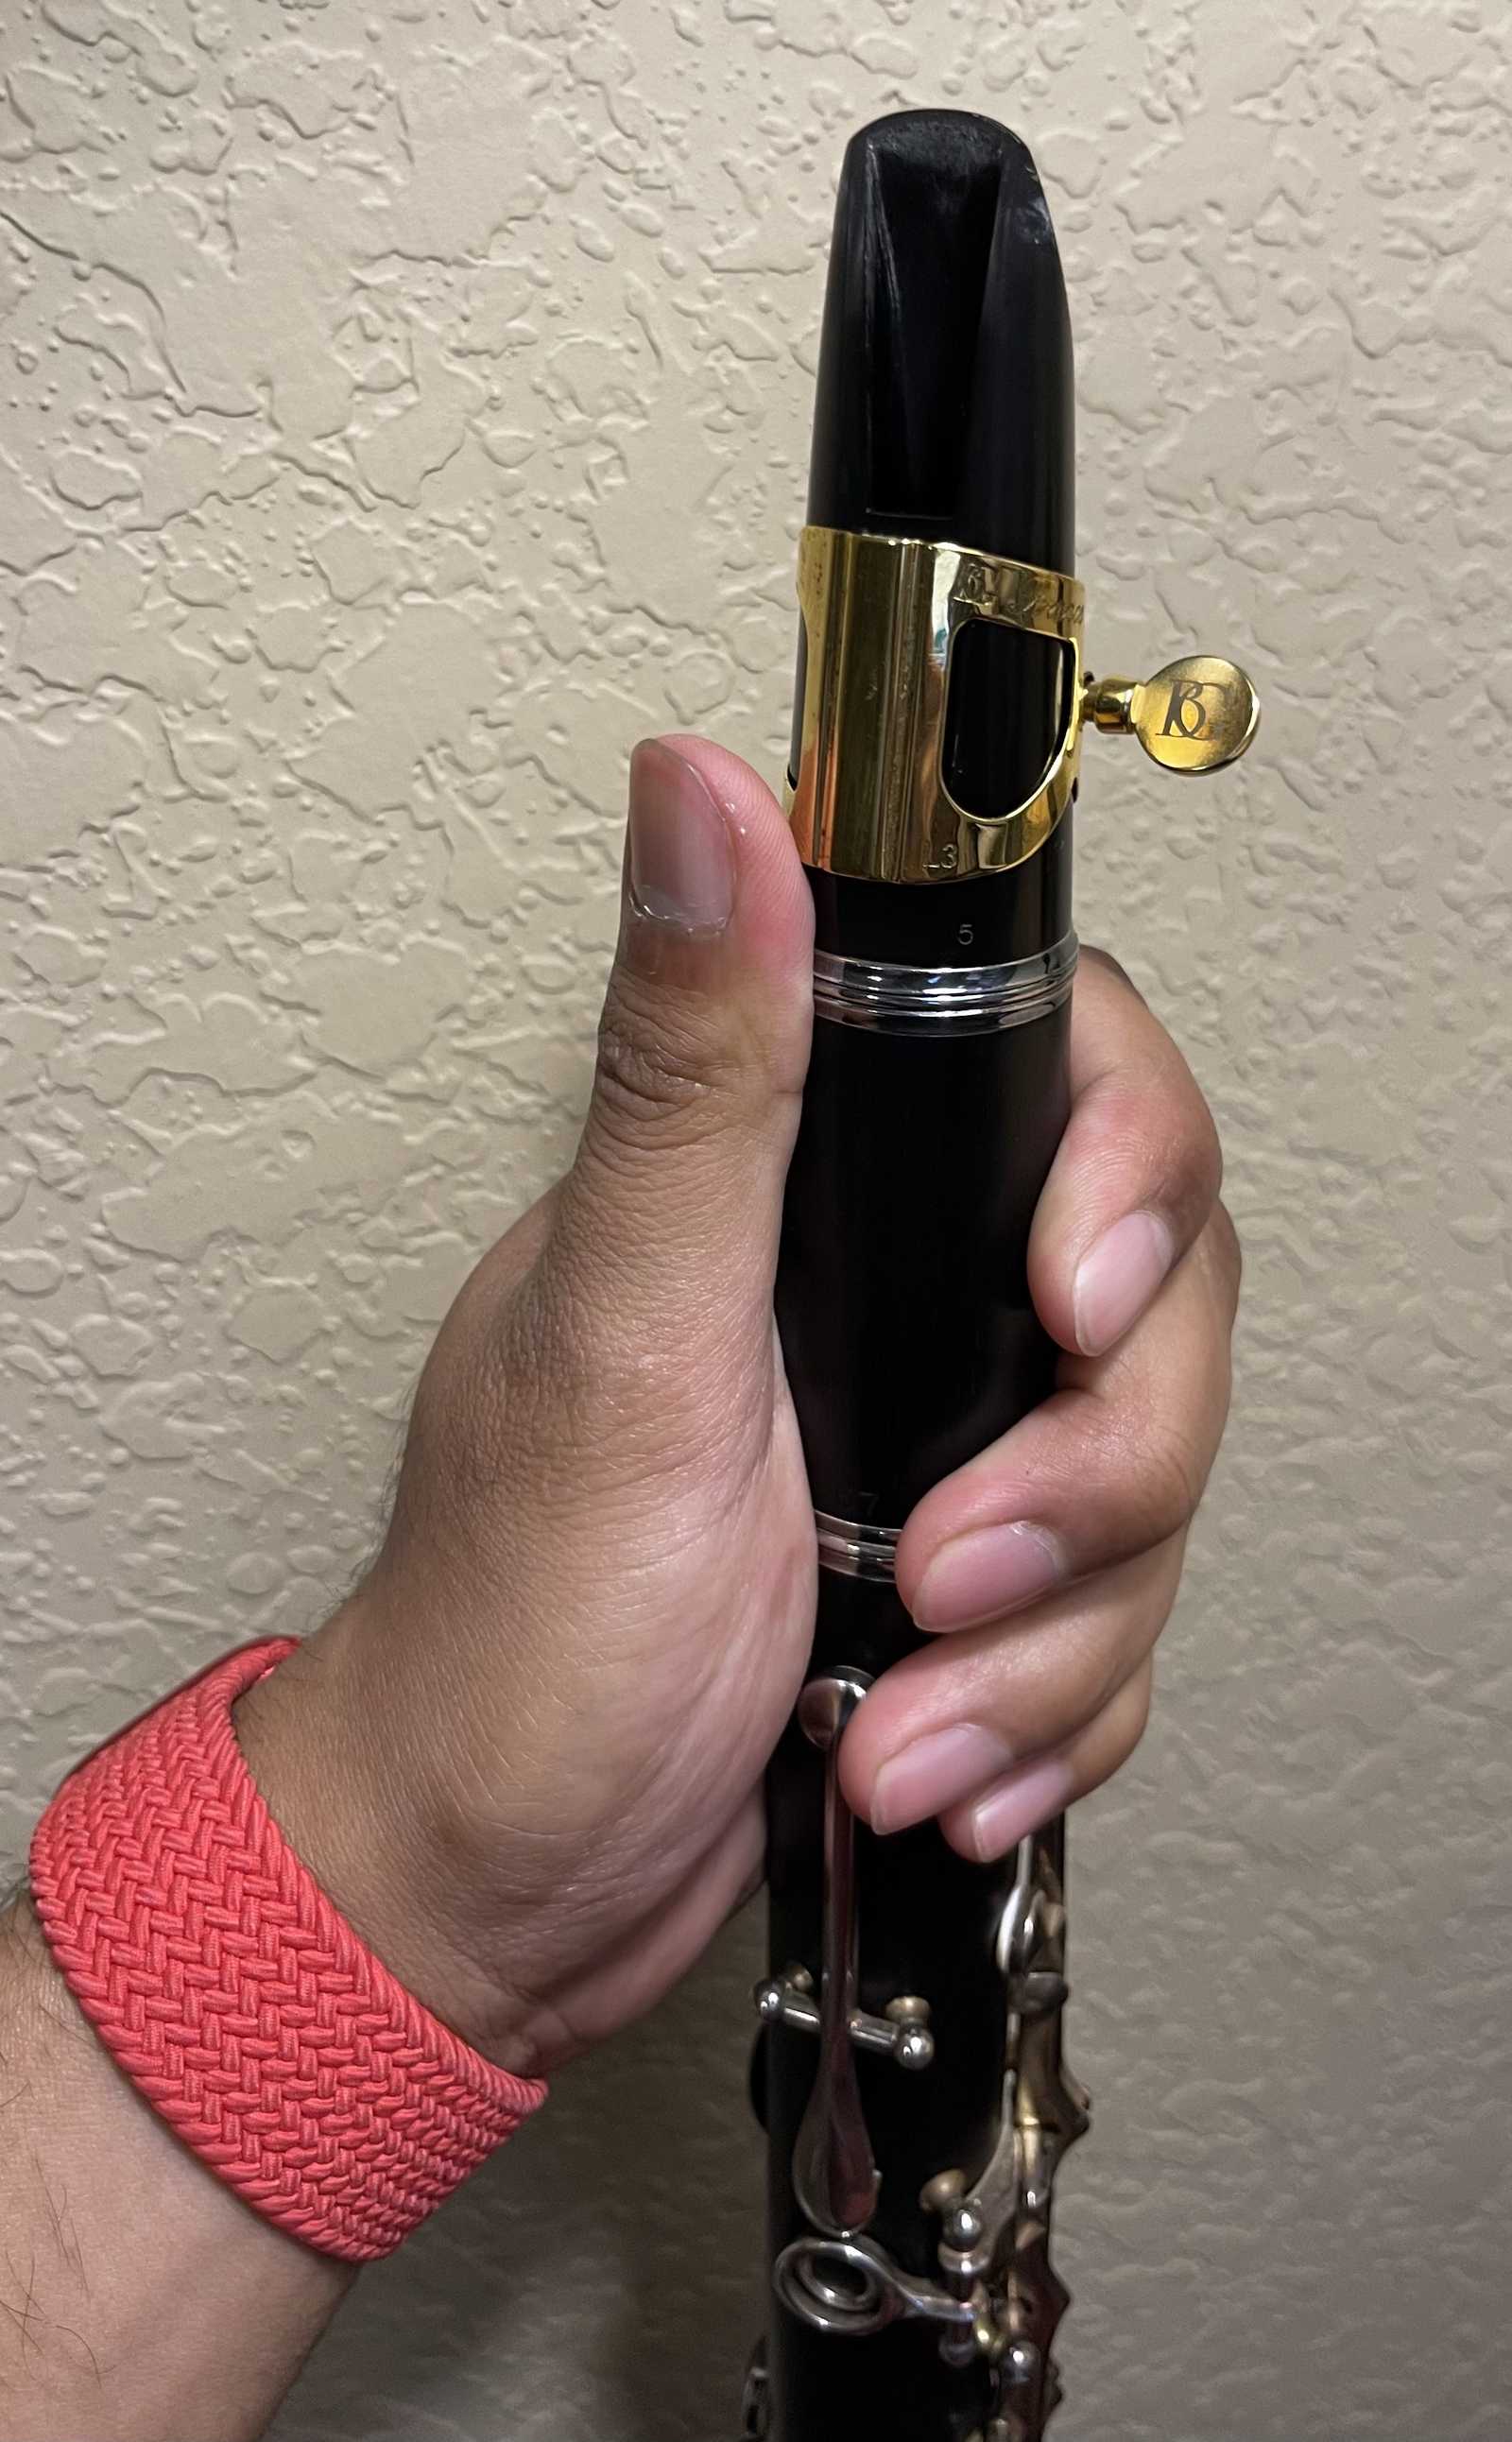
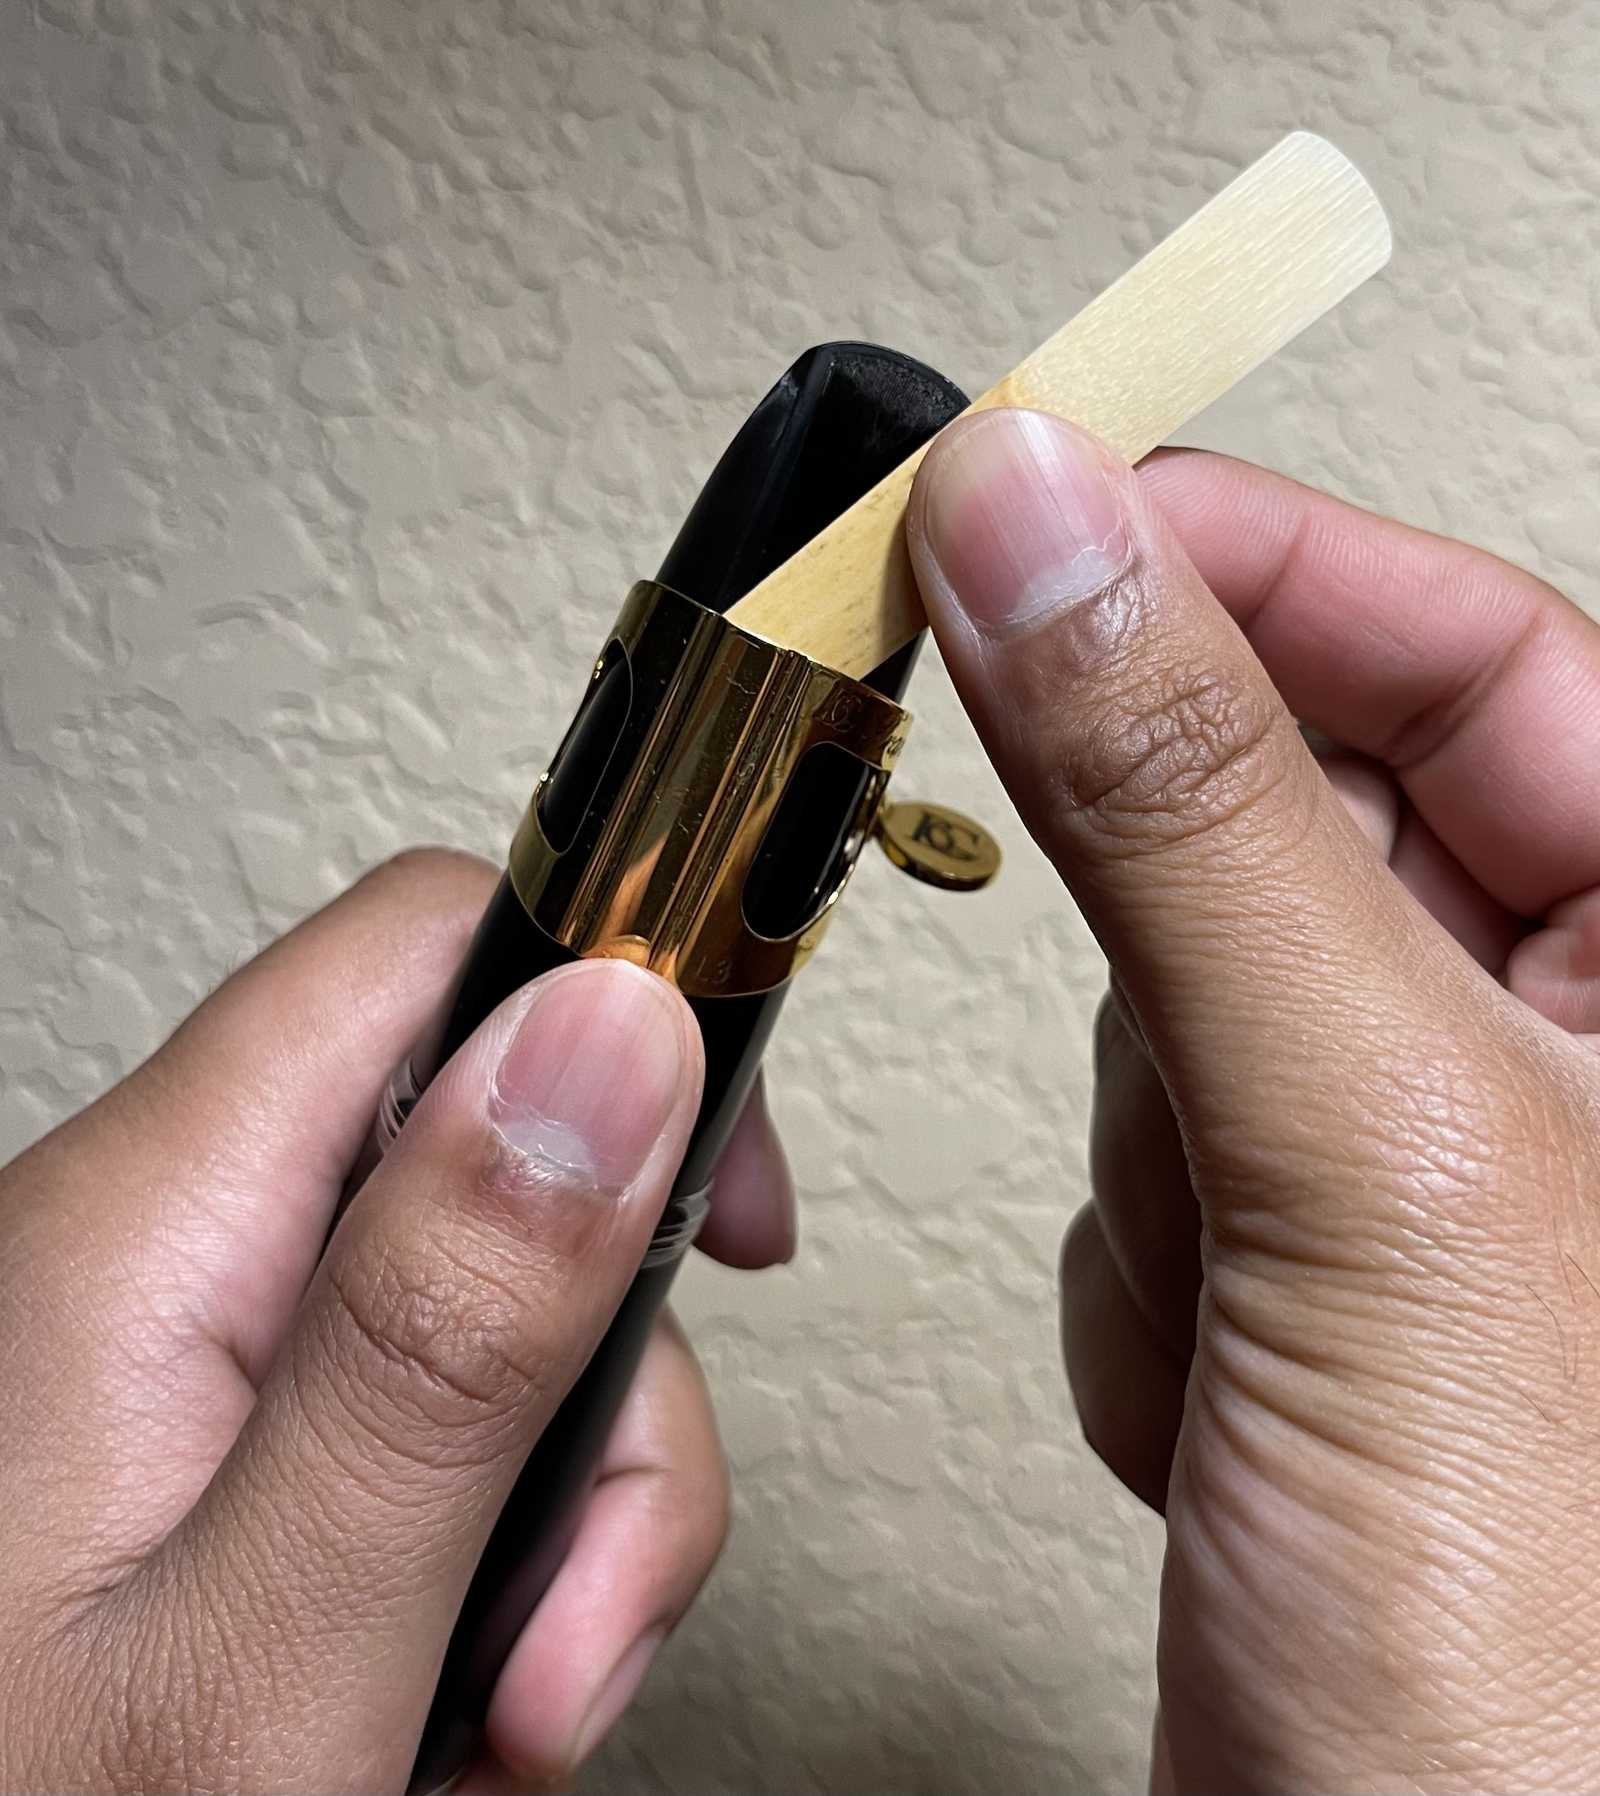
Hold the clarinet with your non dominant hand near the barrel with the thumb placed around the ligature area. Hold the reed from the bark with your dominant hand, making sure the flat, table side is flush with the mouthpiece table.
Place the heel of the reed near the middle of the window on the mouthpiece and slowly lower the reed between the mouthpiece and ligature.
The tip of the reed should float a few millimeters off of the facing resistance curve.
5. Align the reed between the rails
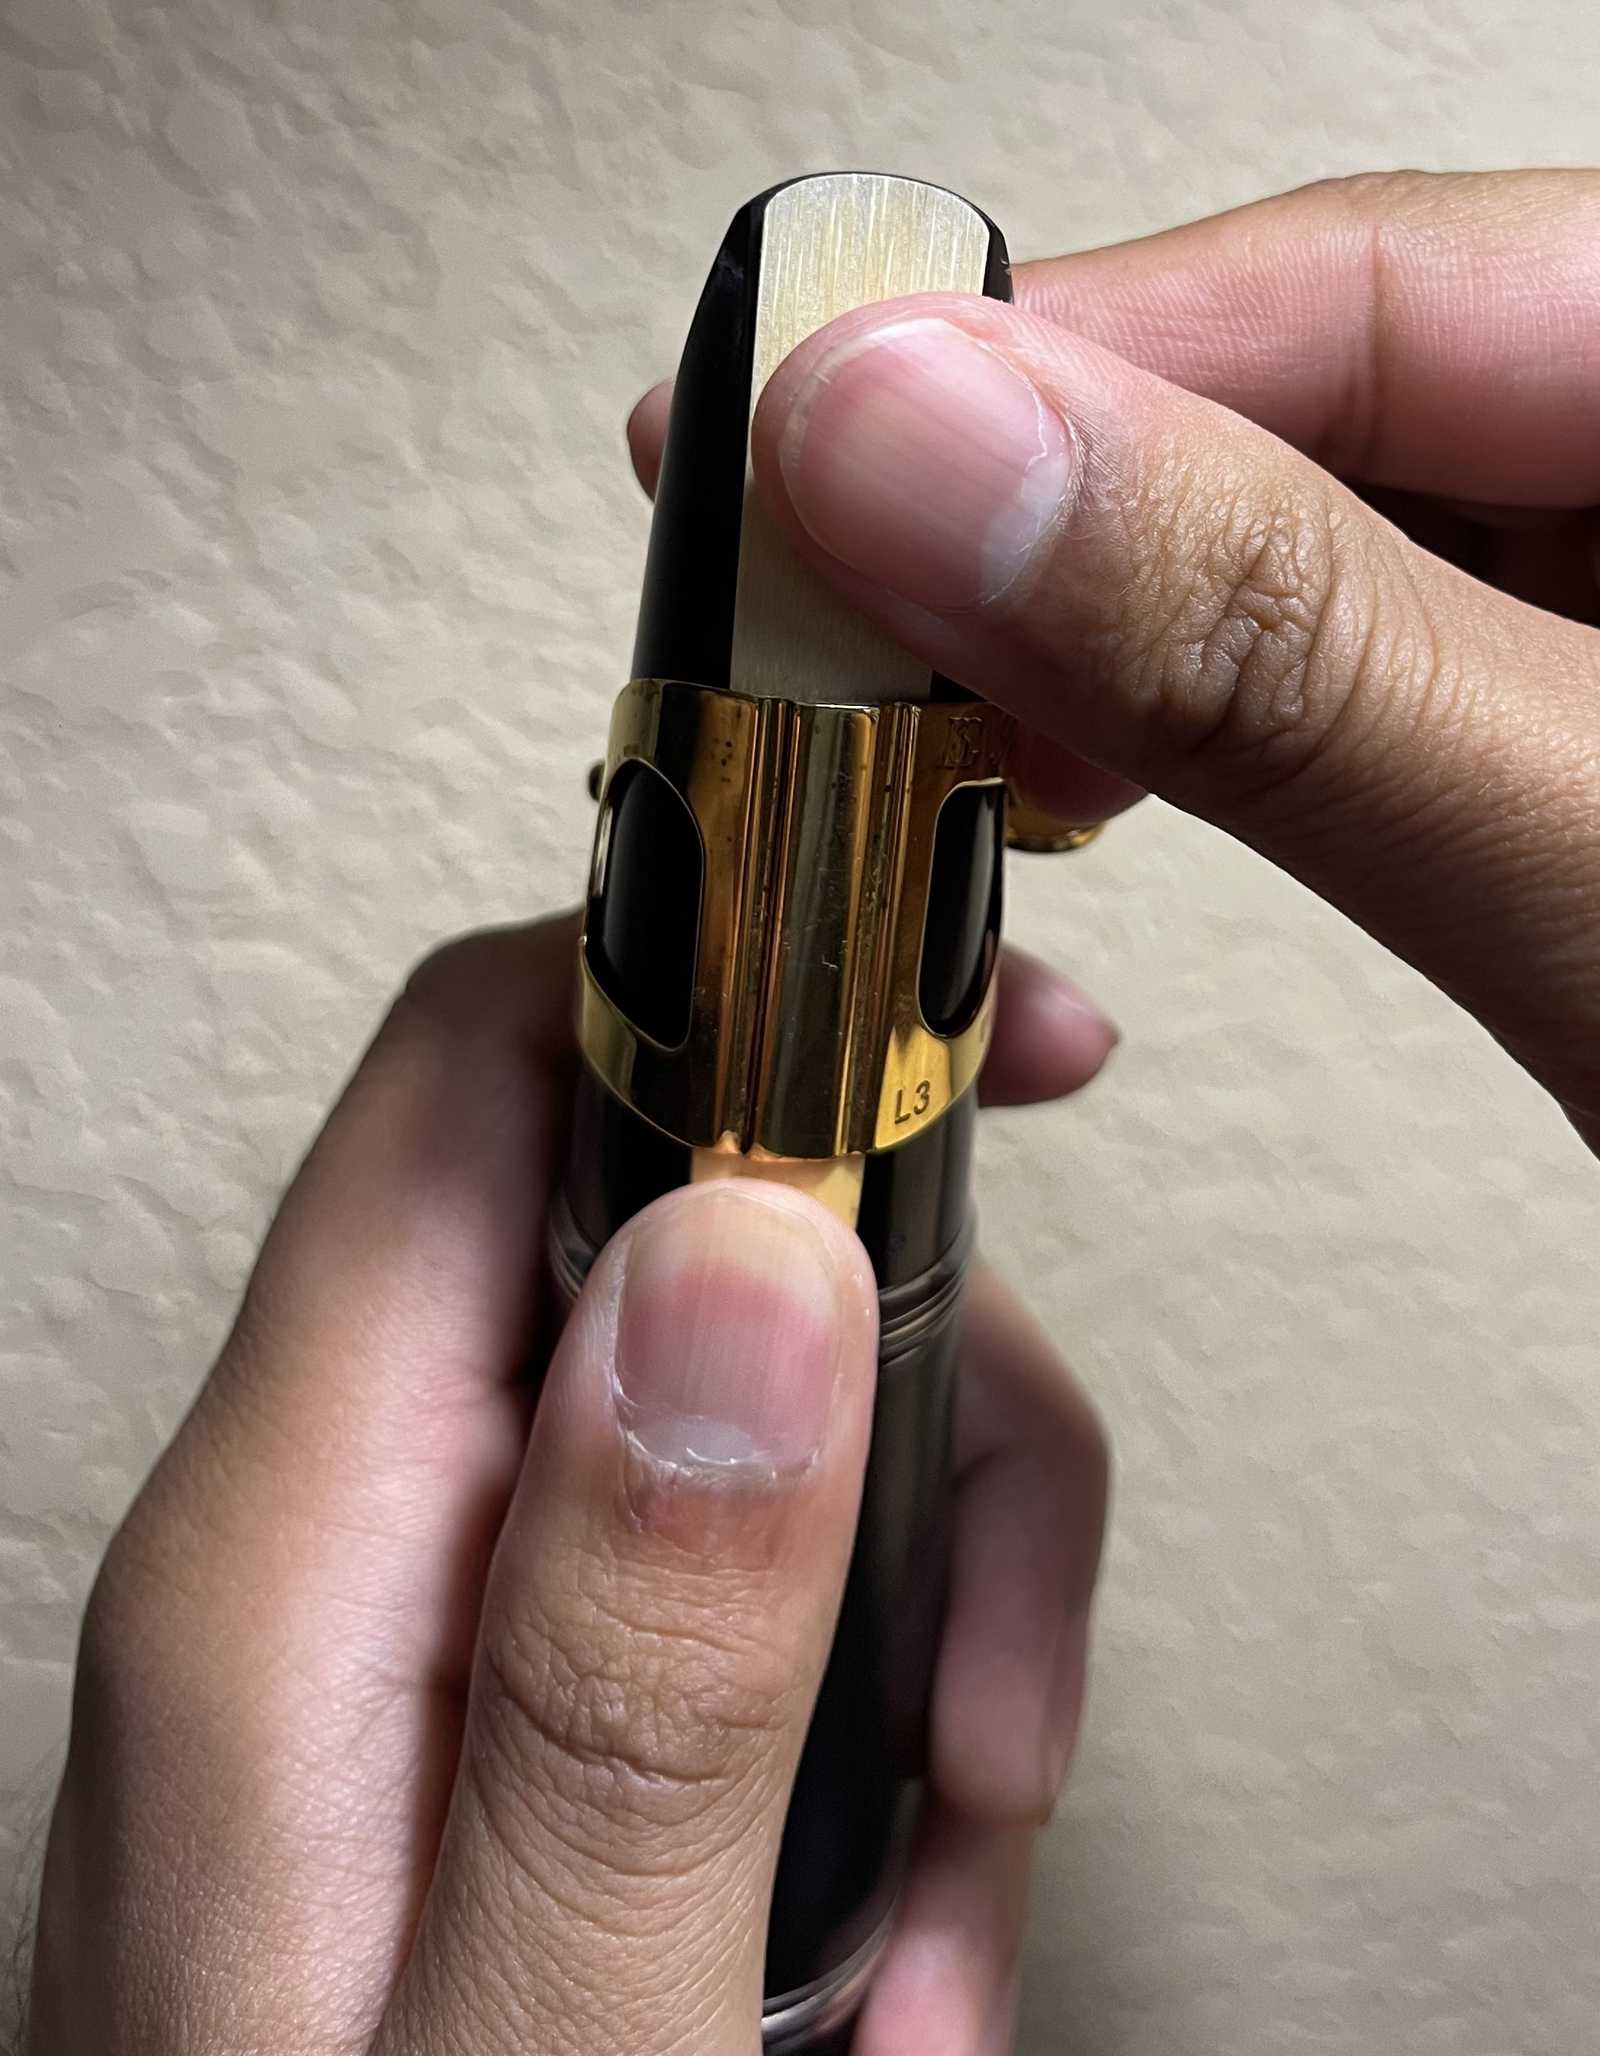
Make sure to line up the tip of the reed to the tip of the mouthpiece showing a hair length of black from the tip of the mouthpiece. Be careful not to damage, knick, or chip the tip and sides of the reed.
The reed should fit in between the side rails on the mouthpiece.
6. Tighten the ligature screws
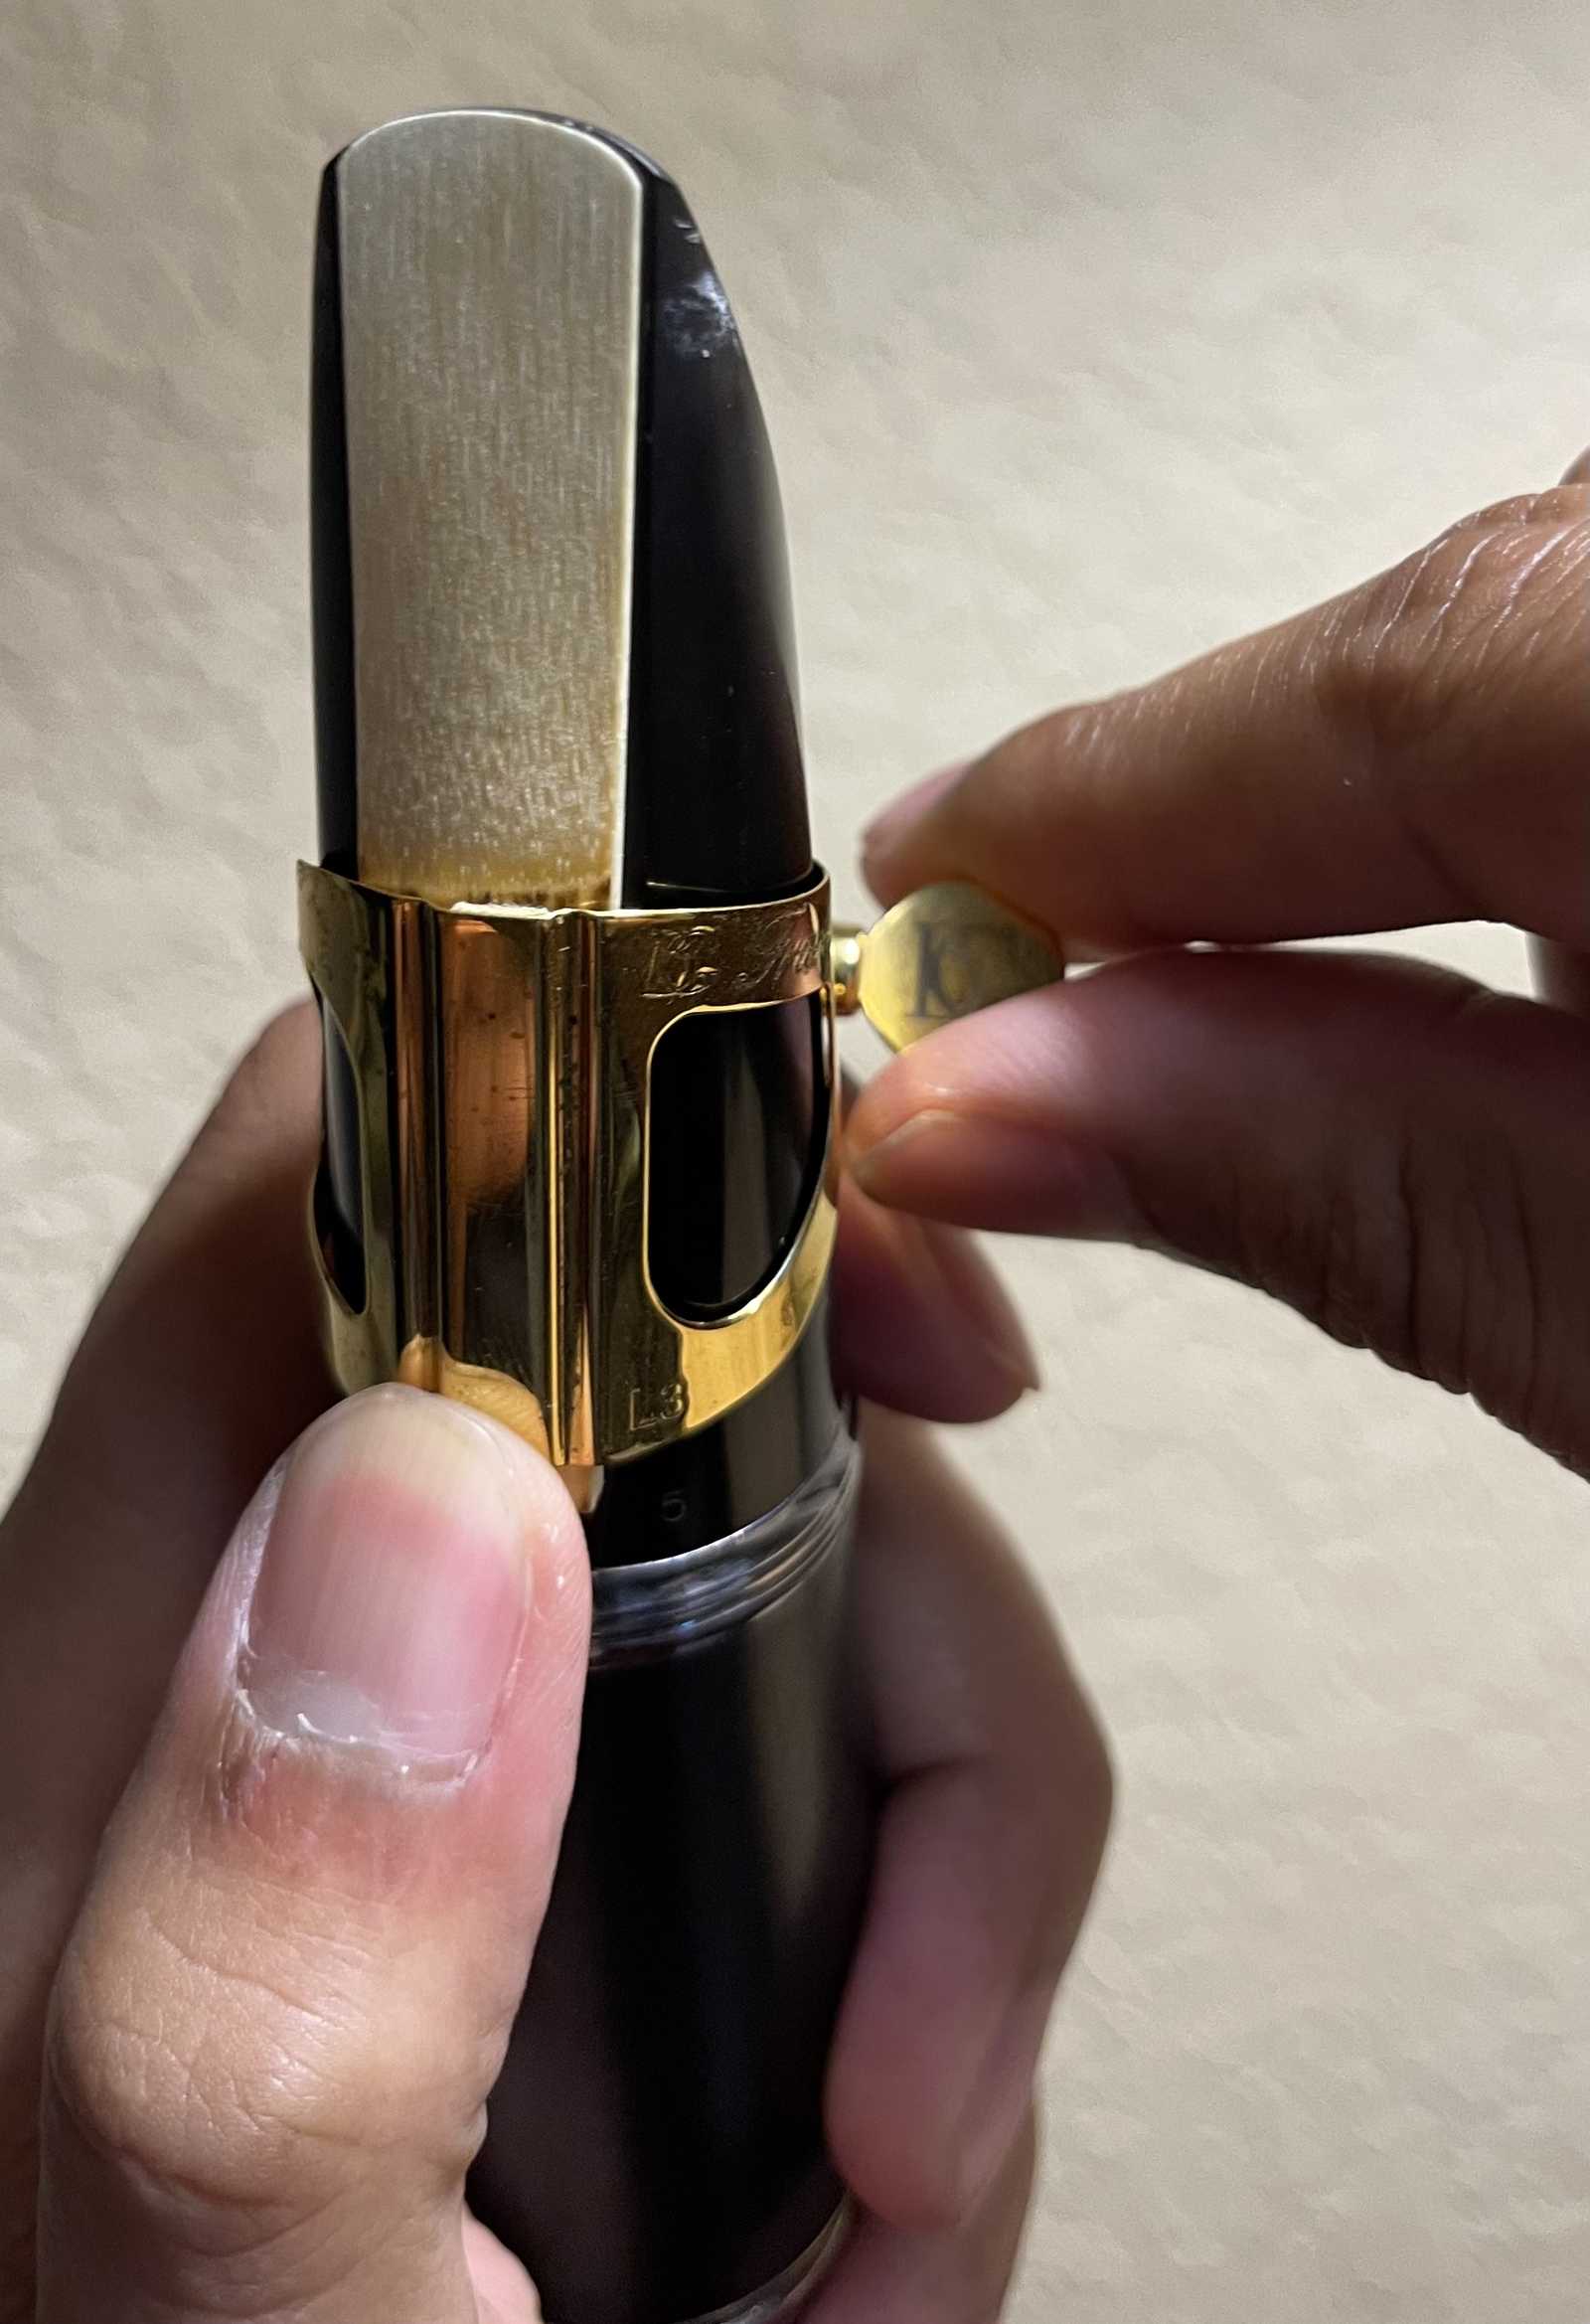
Once the reed is placed make sure the top of the ligature is aligned with the file mark on the reed. When you tighten the ligature you should feel the slightest resistance from the screw. Don't overtighten! You don't want to dent or crush the reed.
7. Take the clarinet mouthpiece apart

Once you're done practicing or performing, you should properly prepare your mouthpiece and reed for storage. Do this so that your mouthpiece stays clean and doesn't become filthy with bacteria, and so that your reeds last as long as possible.
When your reeds last longer, you don't have to purchase replacements as regularly, and you will sound your best!
8. Remove the reed from between the mouthpiece and ligature
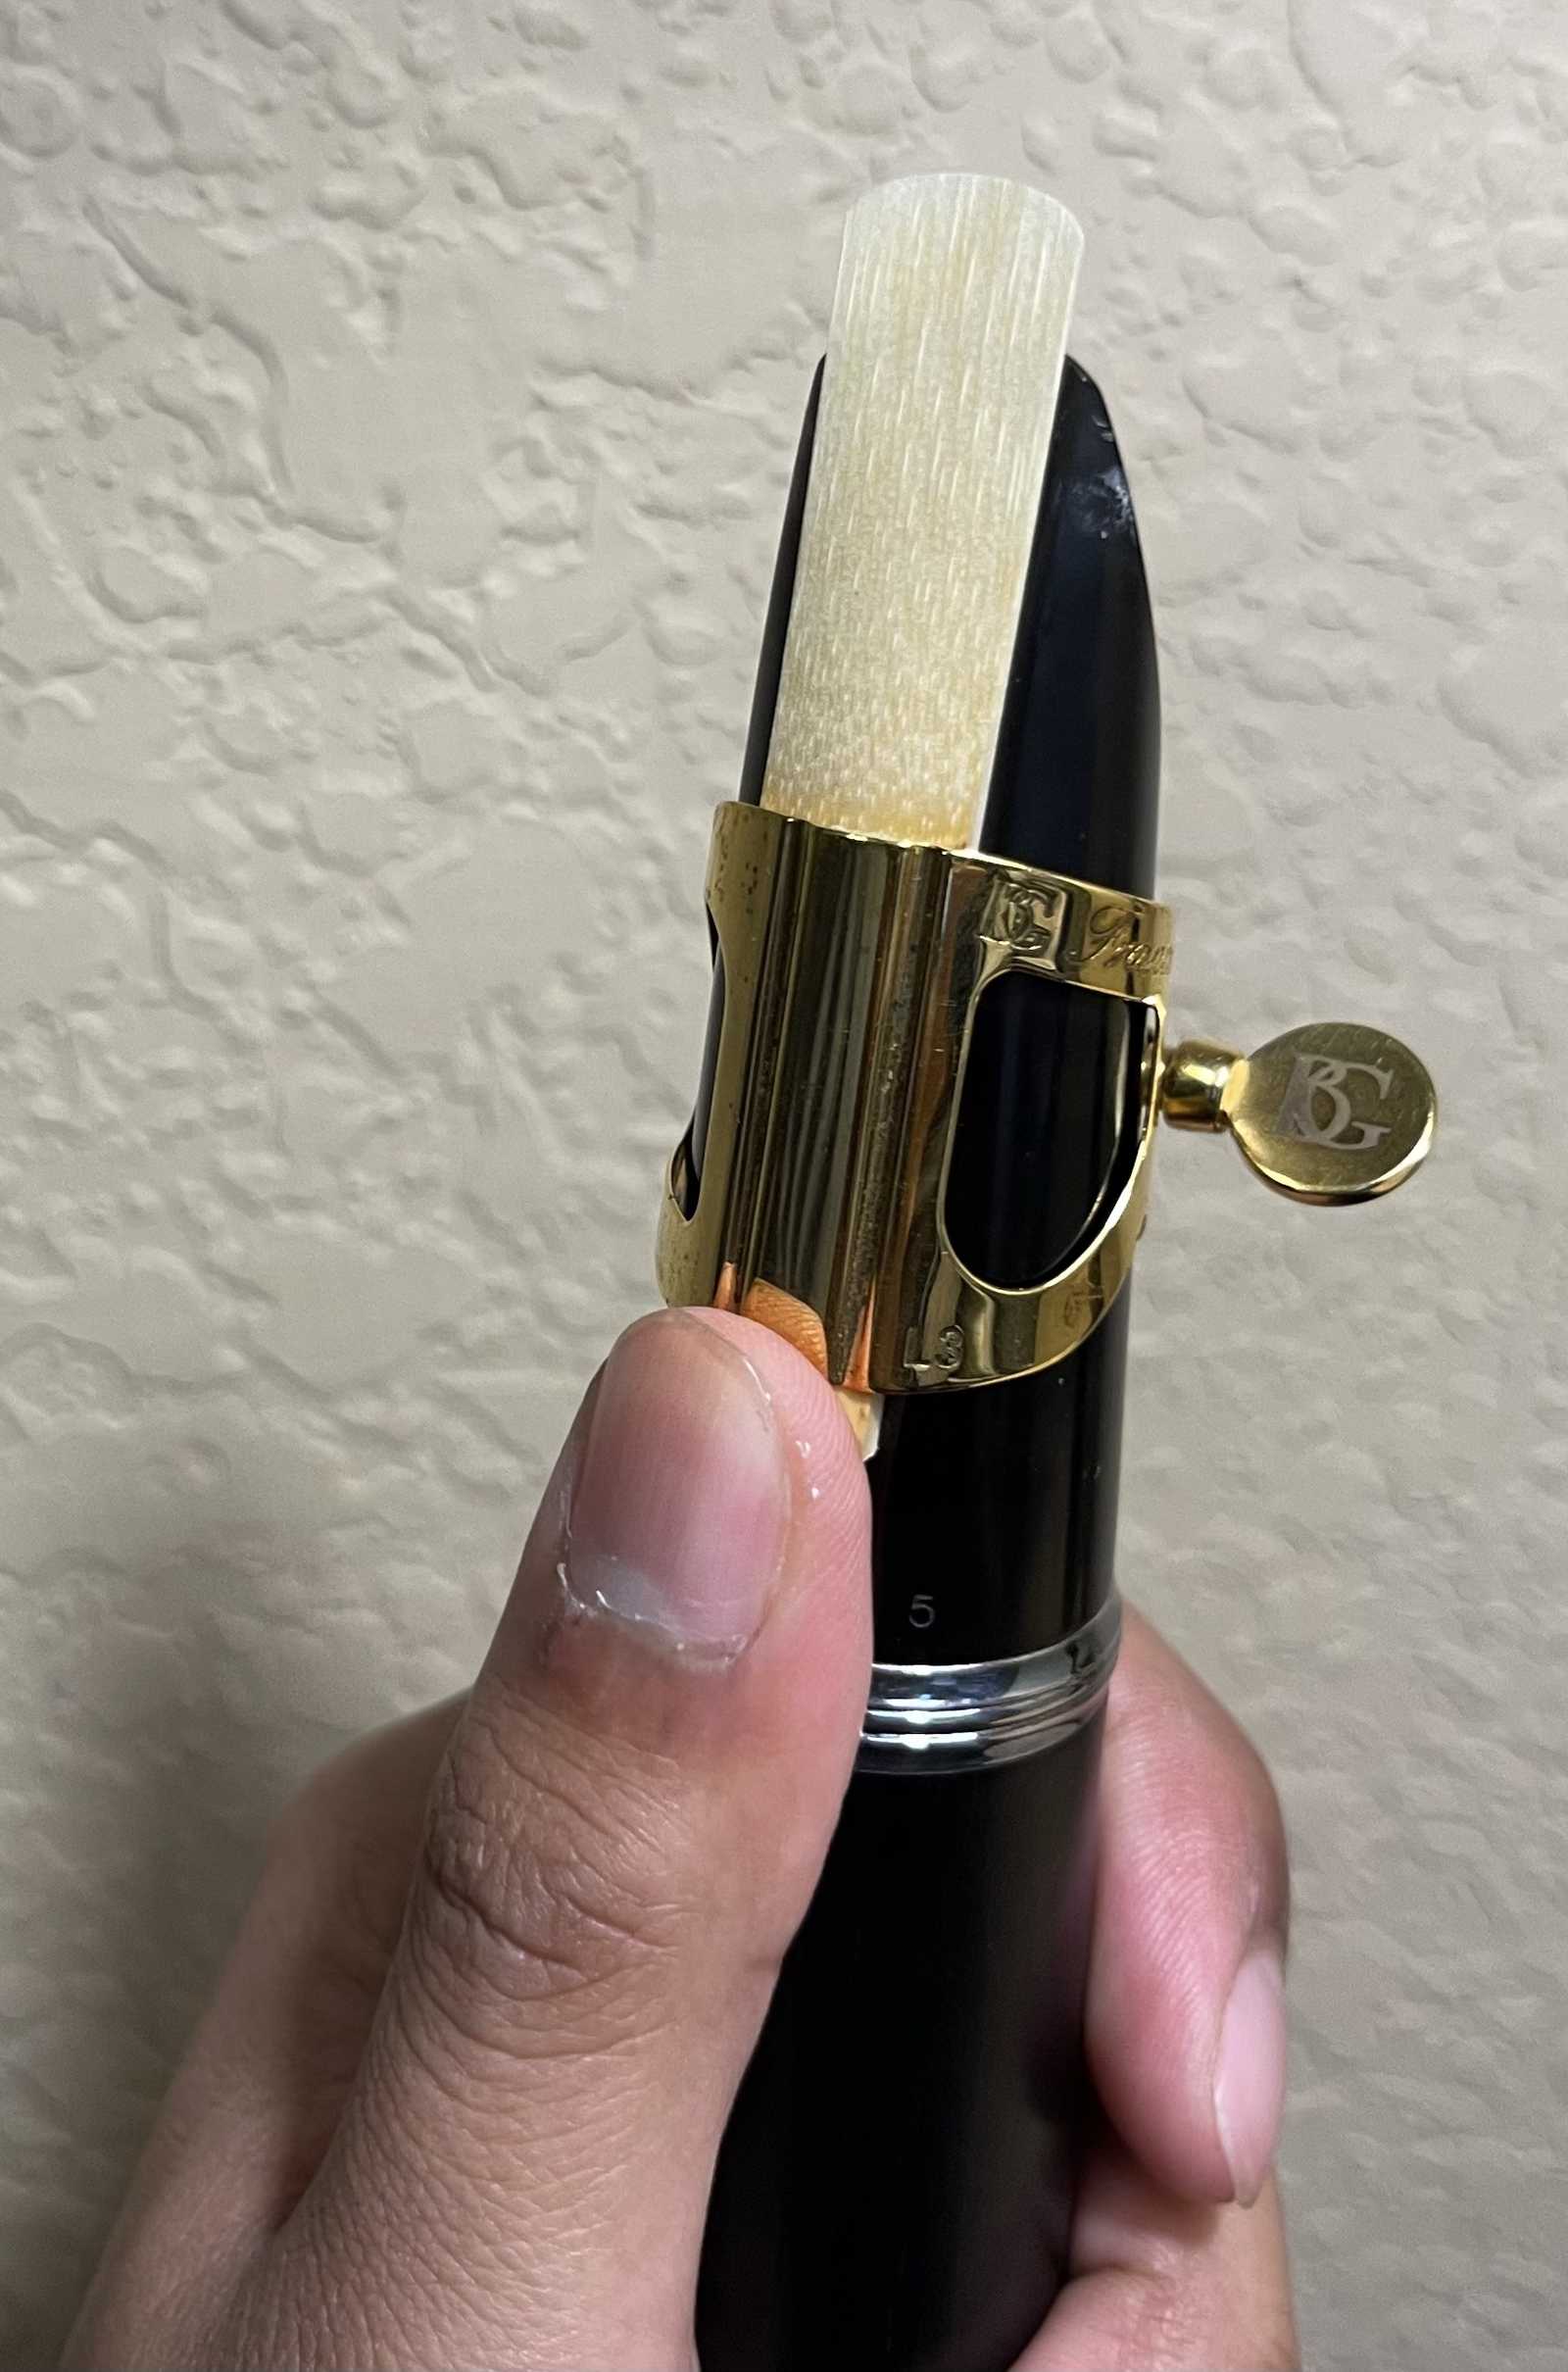
Unscrew your ligature just enough to push the reed up with ease, using your less dominant hand. Grab the reed at the file mark with your dominant hand and remove it from under the ligature.
9. Place the reed on the side to dry
Make sure the reed gets some time to dry before placing it back into the case to avoid bacterial growth.
10. Swab away all moisture
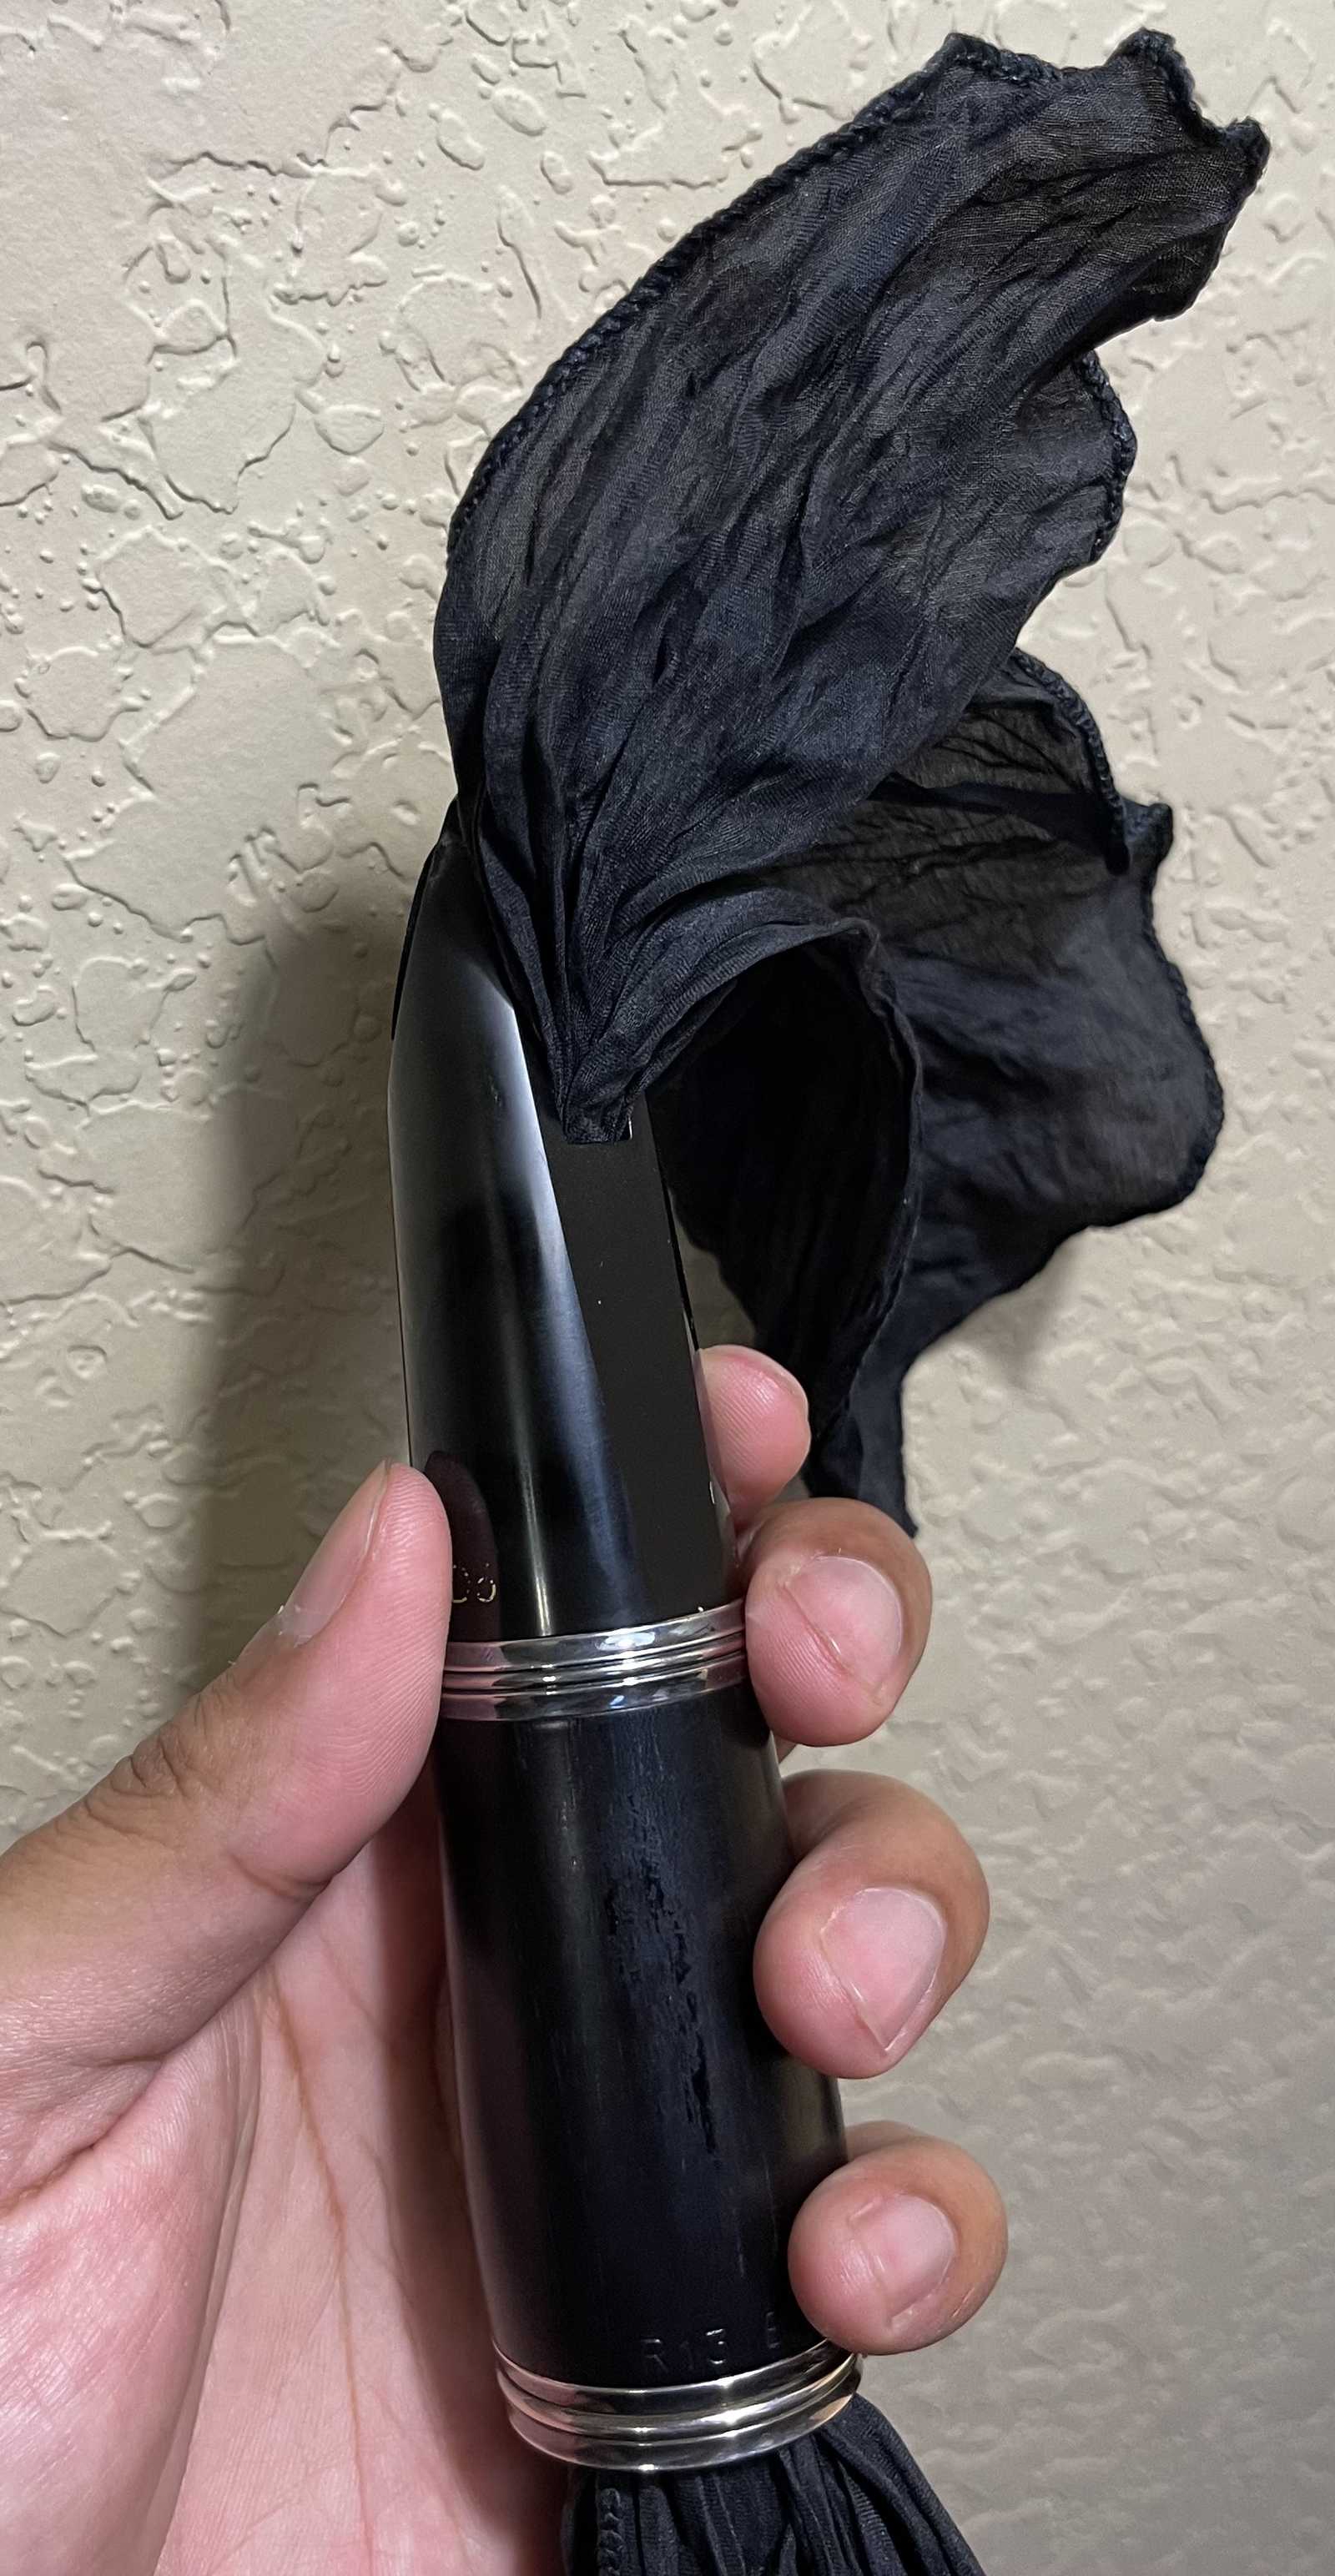
Take the ligature off before you do swab the mouthpiece.
Swab out your mouthpiece. Be careful when guiding the weighted string from the swab through the mouthpiece because this can cause some damage to the tone chamber or side rails which will affect your sound.
11. Loosely reattach ligature
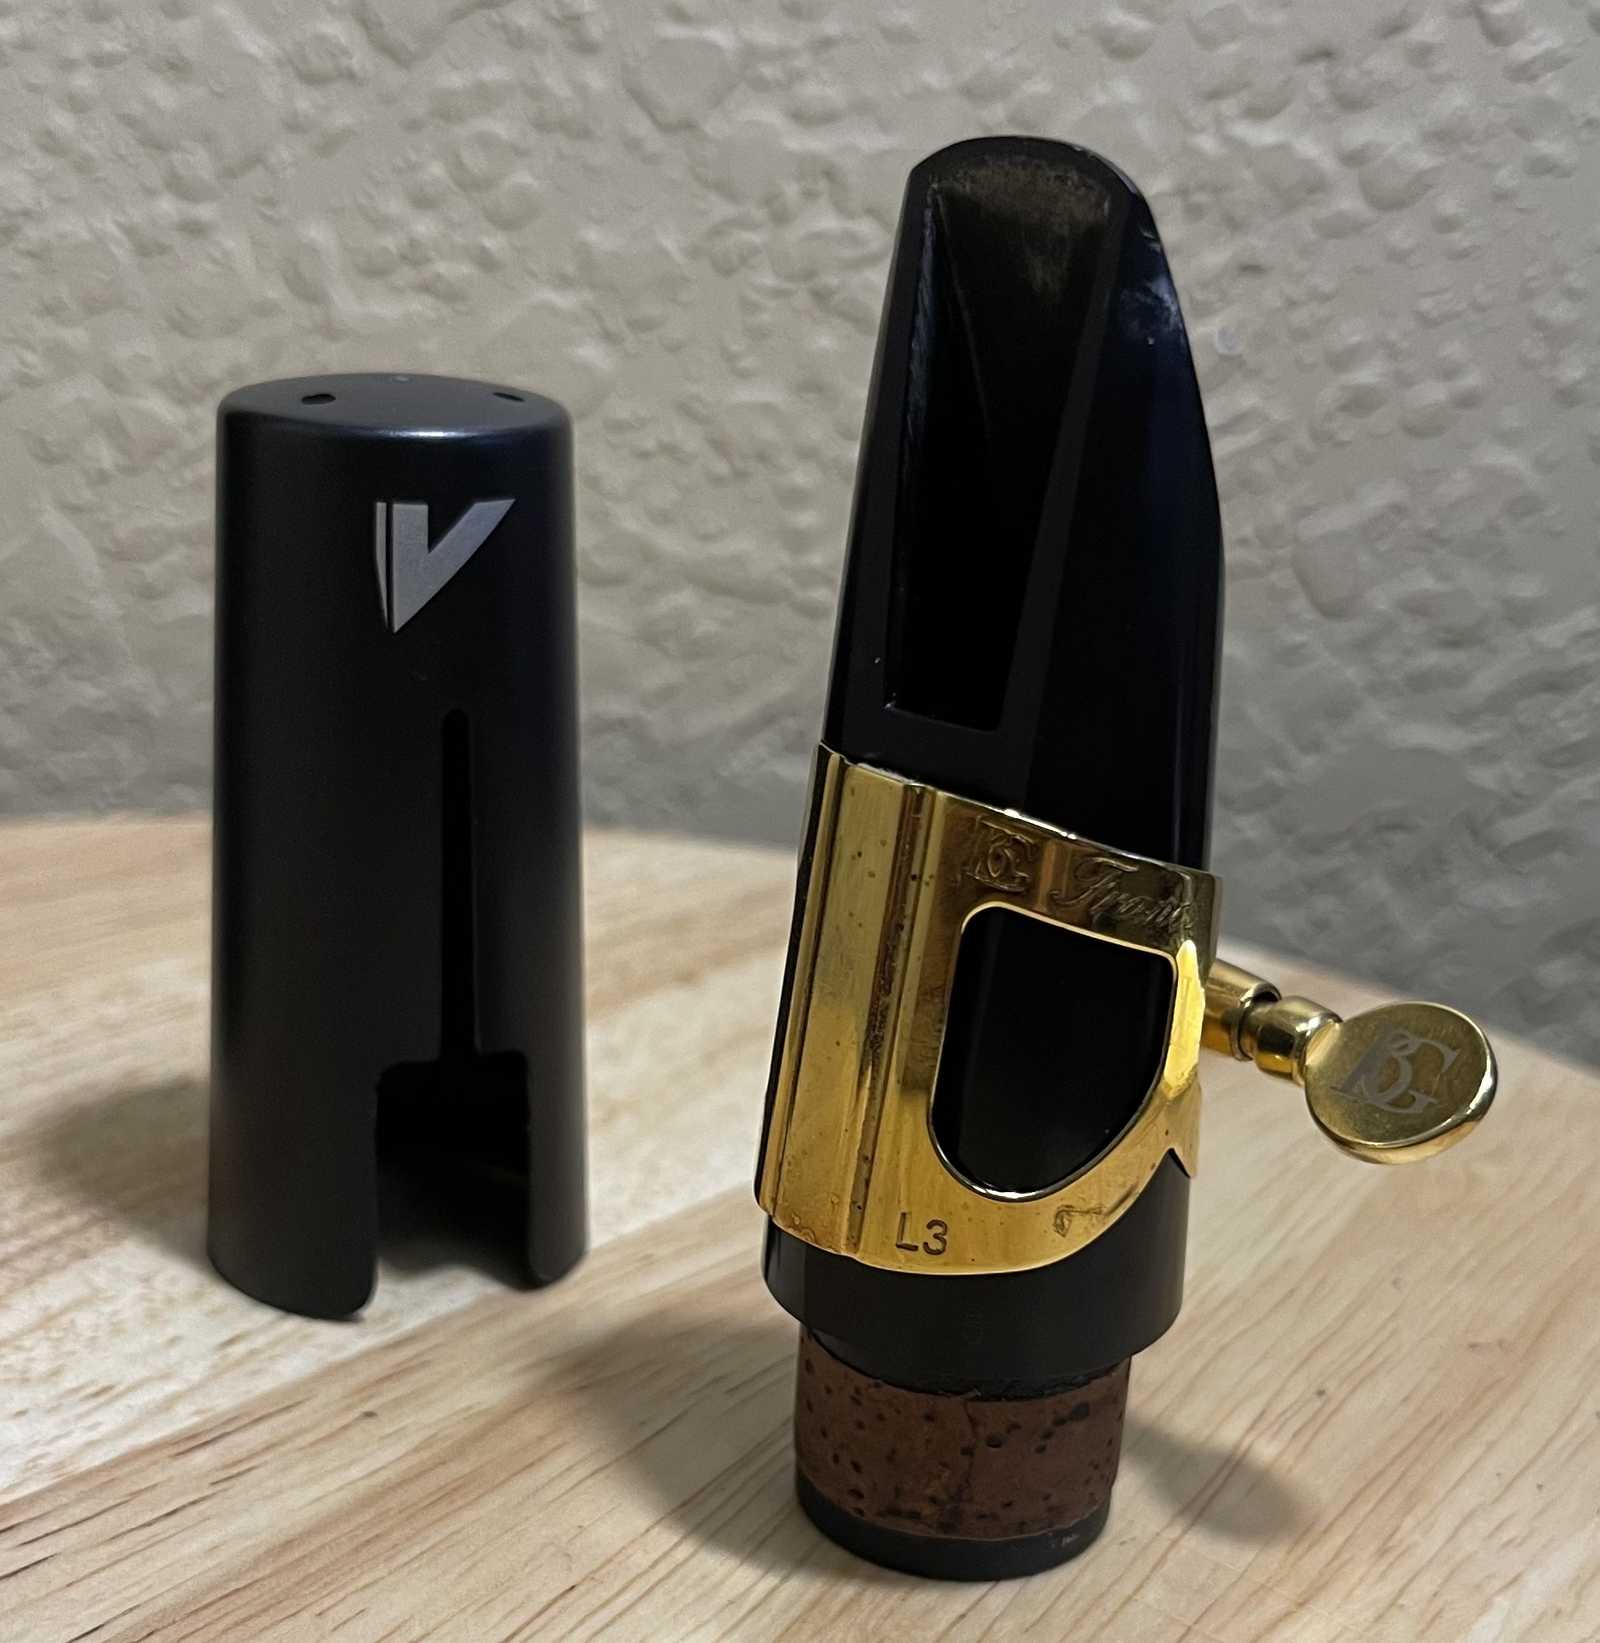
Keep the screw loose so it's ready for your next practice session!
12. Put the mouthpiece cap back on.
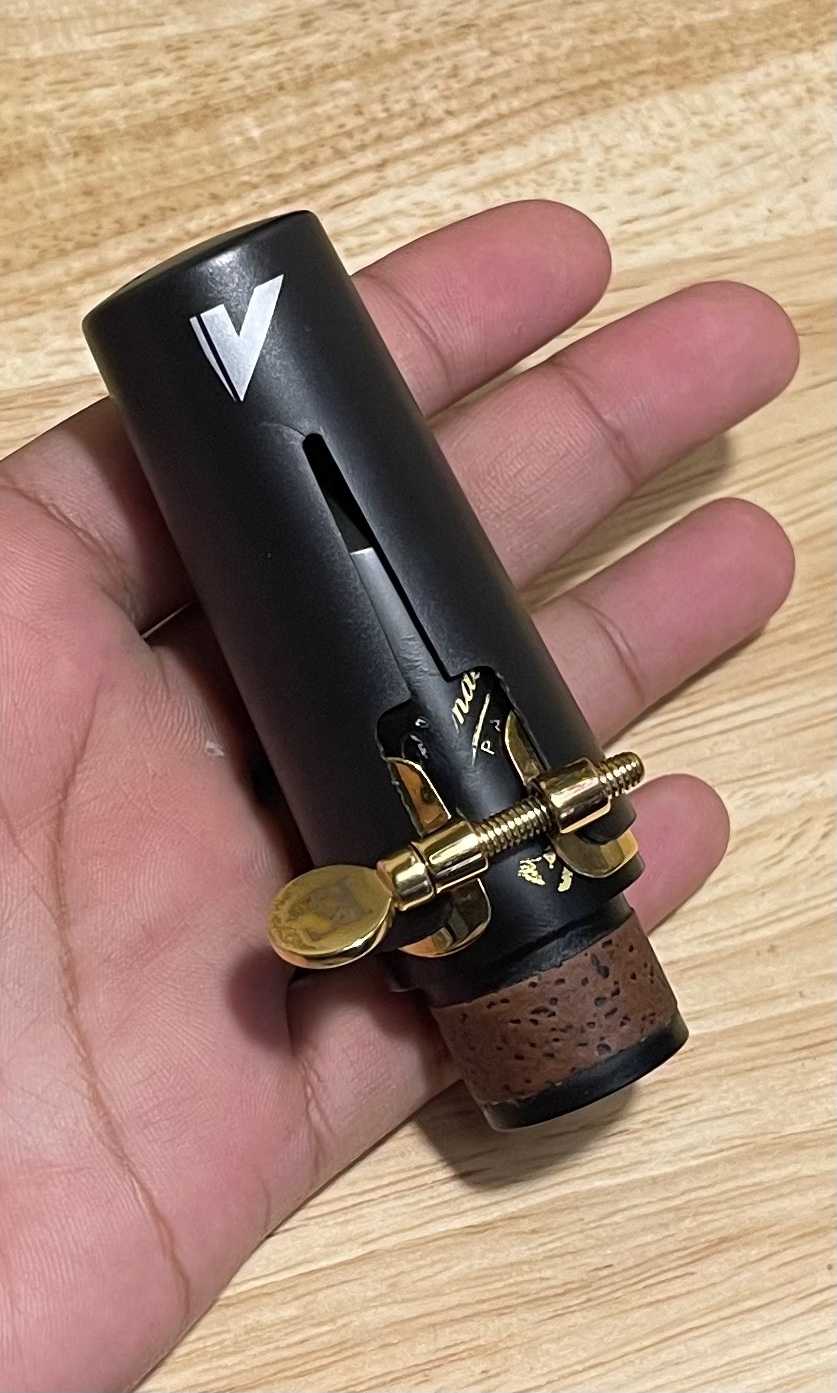
Make sure it fits snugly.
13. Put the reed back in the reed case.
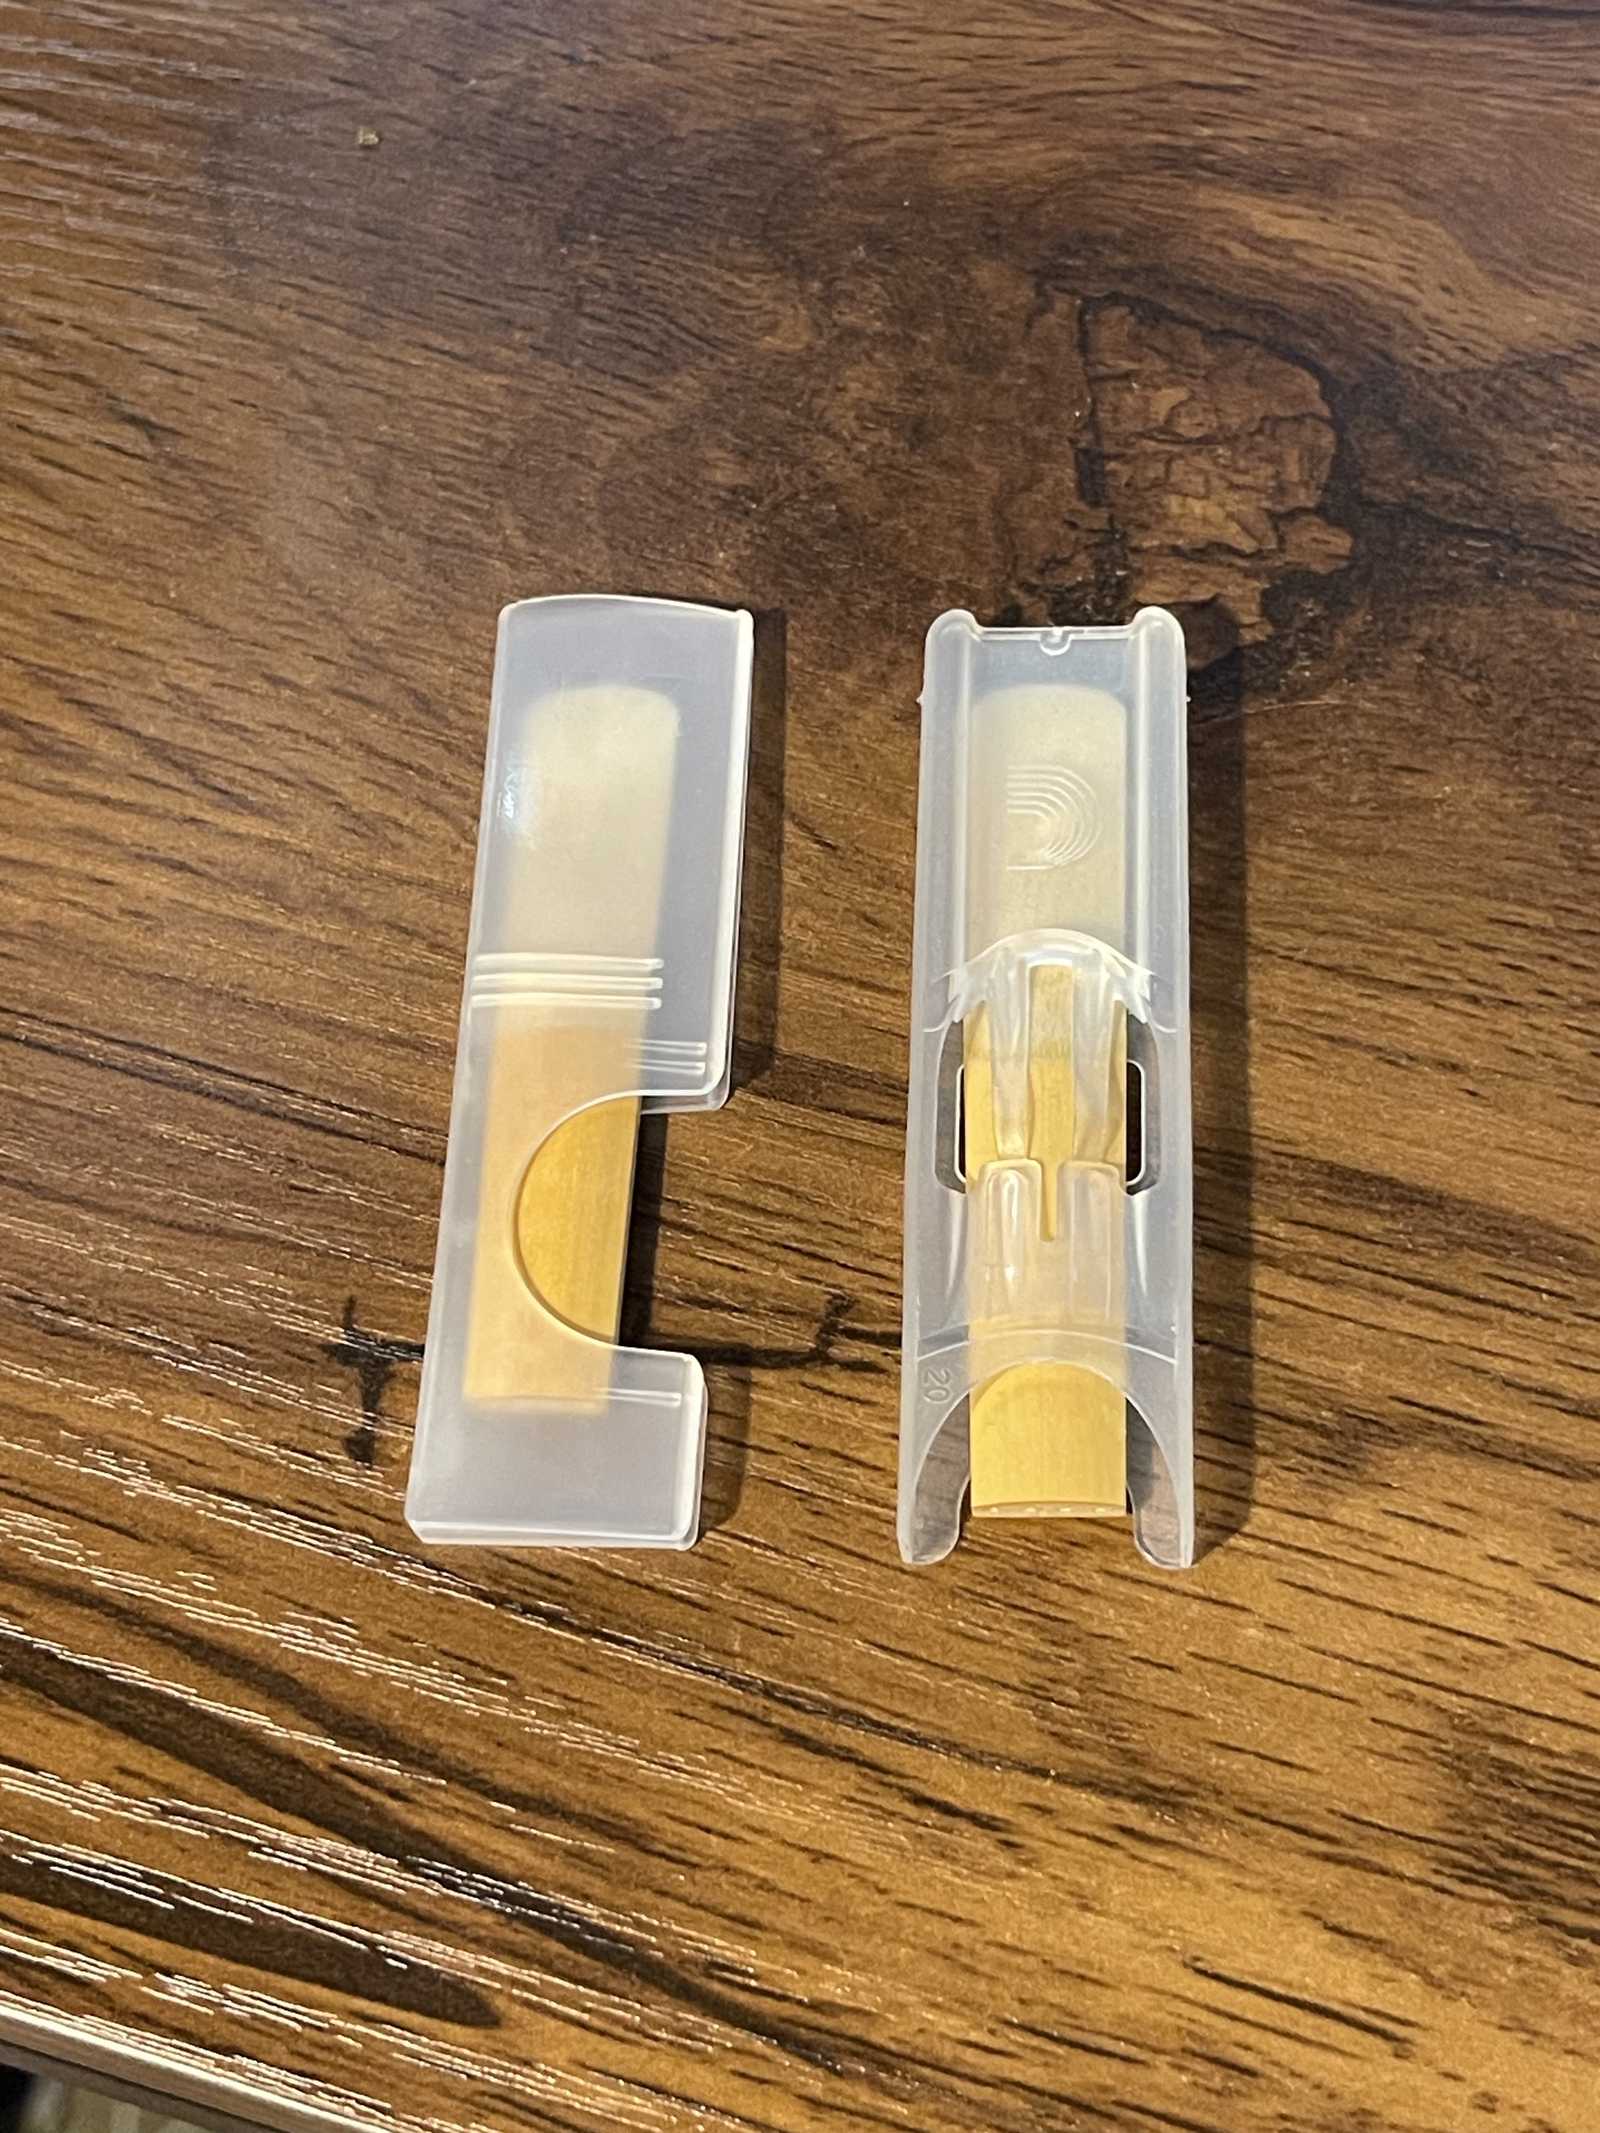
Make sure the reed has dried.
14. Put everything back in the case
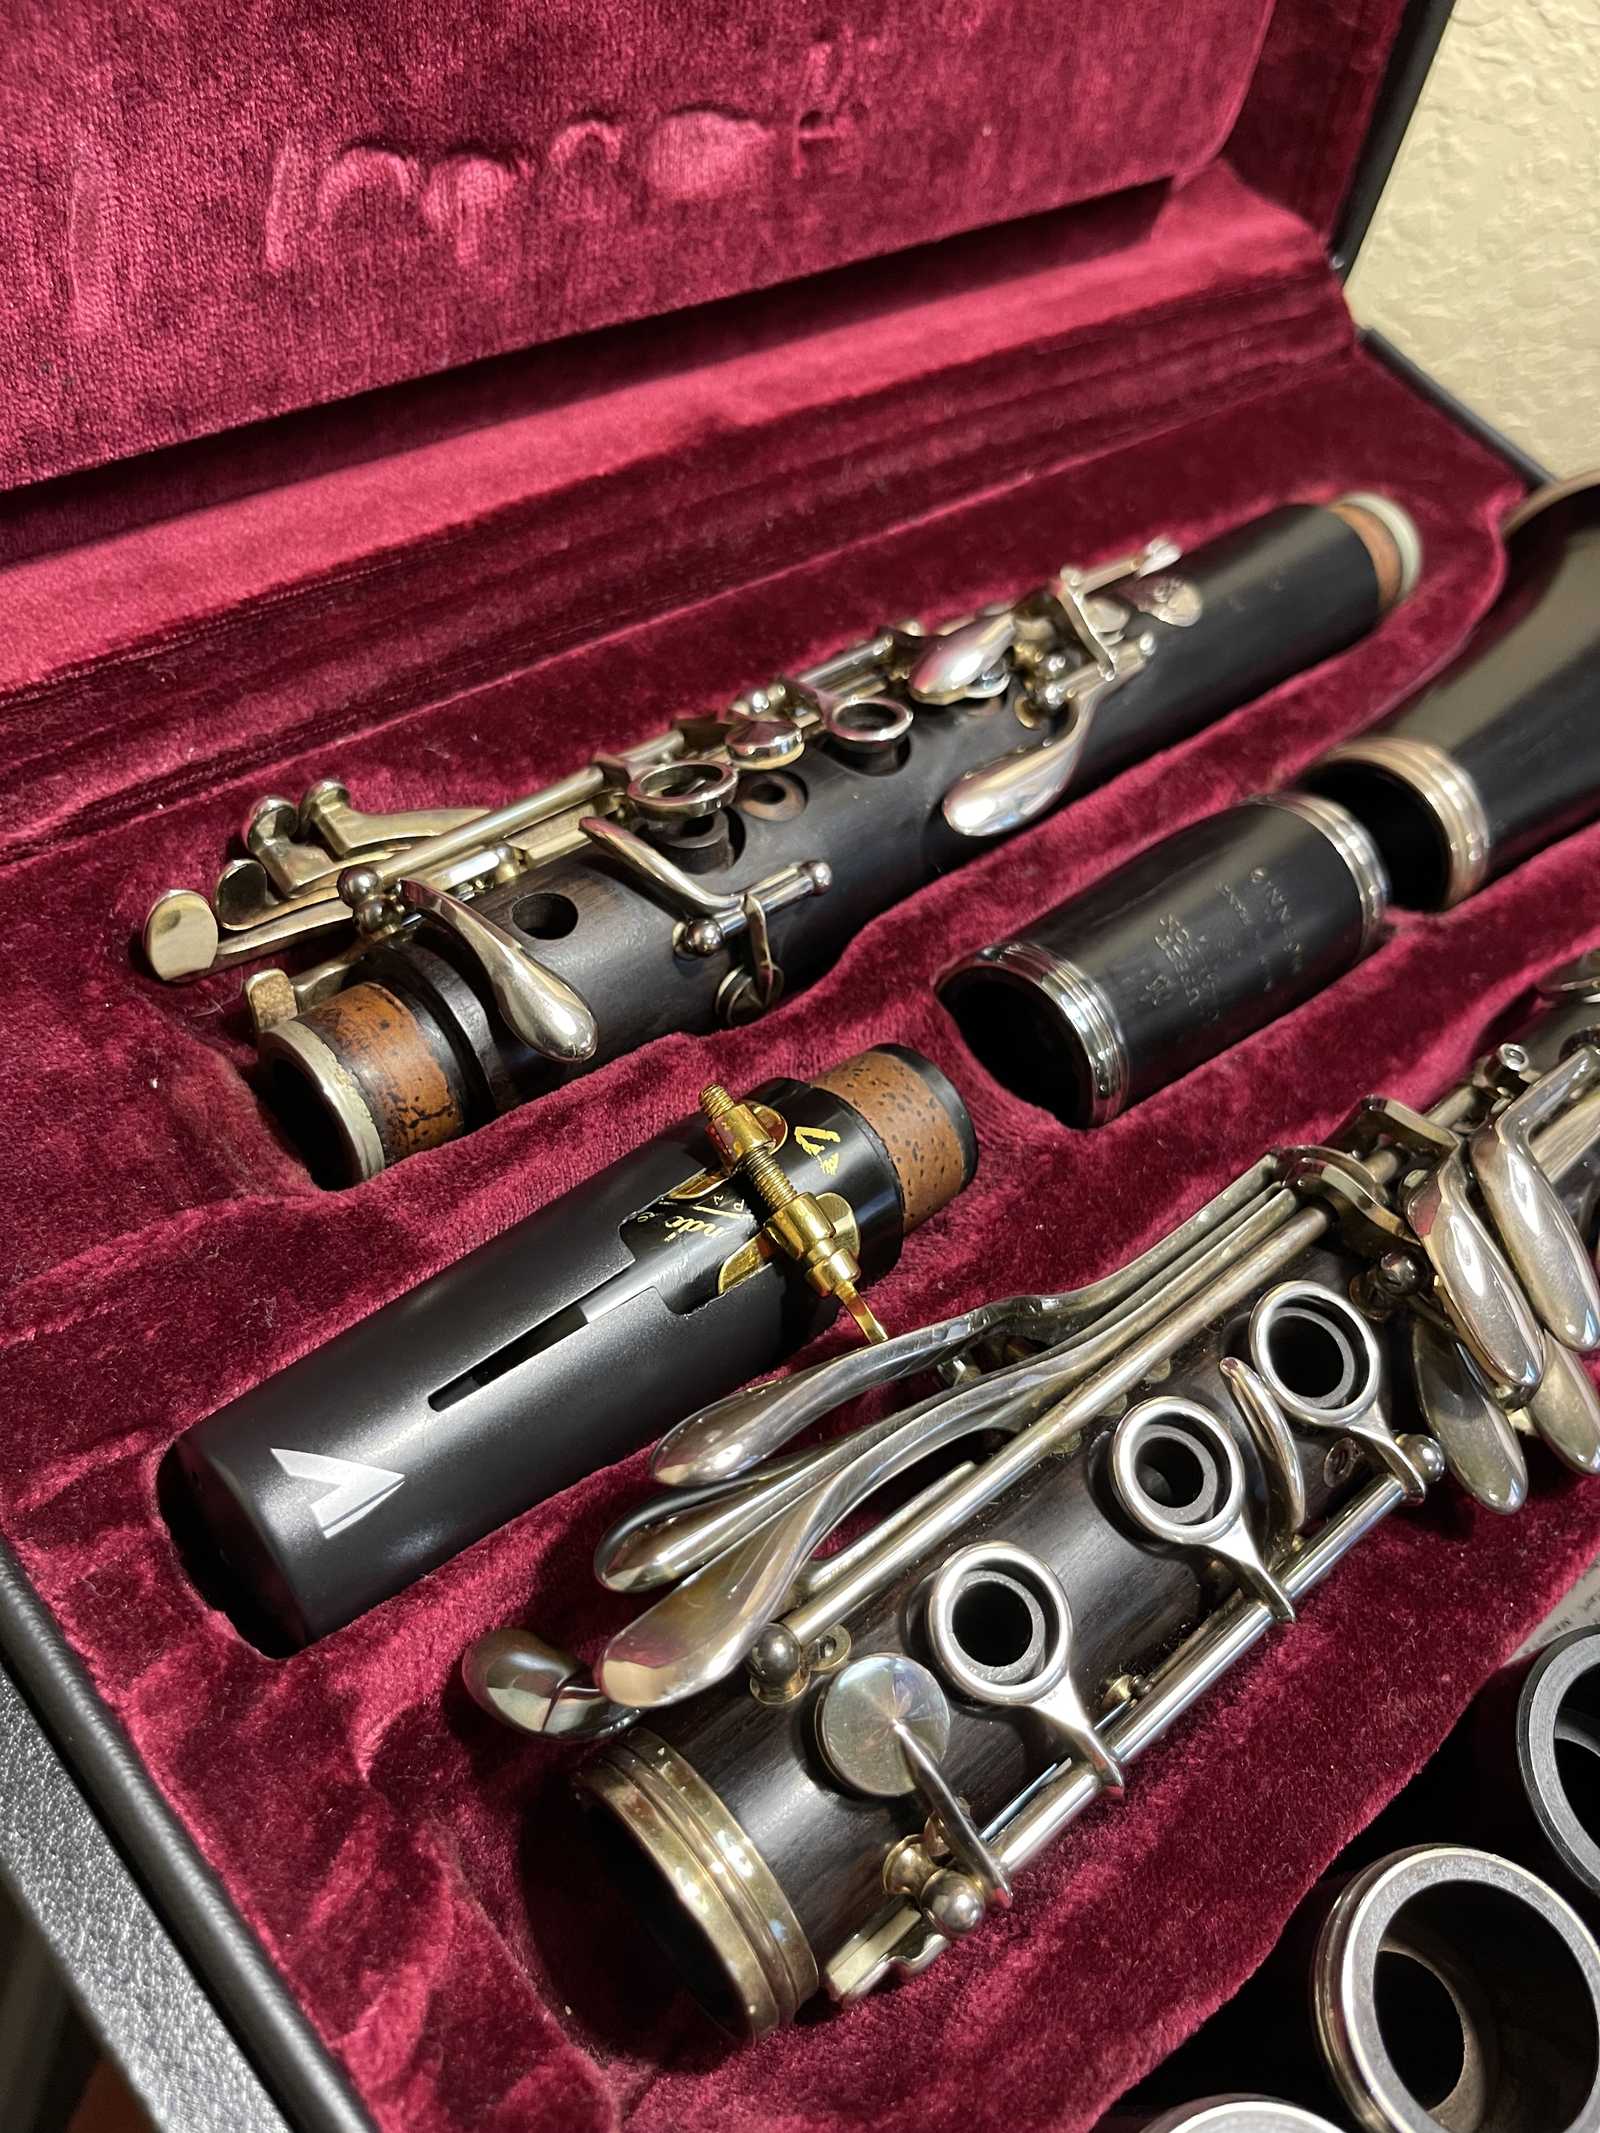
Always store the mouthpiece with the ligature and mouthpiece cap attached. This is the best way to protect both the mouthpiece and ligature from damage.
Now you've got the knowledge to care for the most important parts of your instrument! Congratulations. That's one less thing to worry about, and now you can focus on making music. Happy practicing!
Related


Daniel